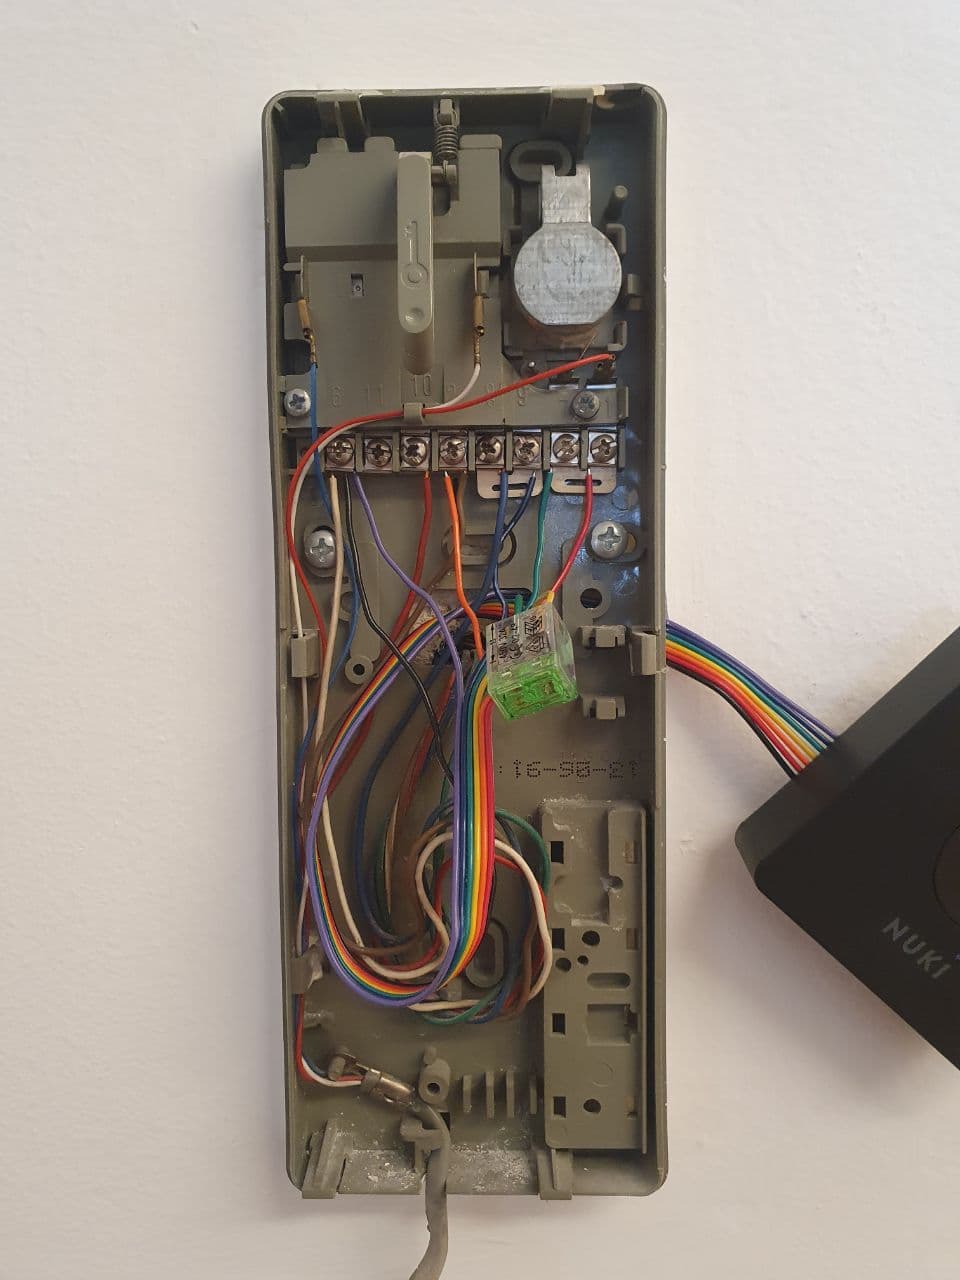
Yes, because of this I asked that, for if you need to know how to find them, that I give you the right steps for beginning, and to know where we start! So then let us find at first the 2 screws for opening on your intercom, where one of the two is the opening screw and the other the gnd screw, for finding them, please take a short isolated wire (about 10 cm) and take some isolation off from both ends, now hold one end of the wire on the first screw on the intercom where a wire (from out of the wall) is connected, and hold the other end to the next screw where a wire is connected, if the opening mechanism goes on from itself now, when connecting the two screws with the wire, then you have the right two, if not hold the wire on the next screw, and do this until you have the right two screws, where the opening mechanism goes on when you connect them with the wire, and notice the numbers of this two screws! Write here when done, and I give you the next steps!
Good morning !
You mean the first screw is # 1 ?
if so 1 and 8 gives me a slightly sound from the door down stairs.
And 7 and 8 rings the bell in the intercom.
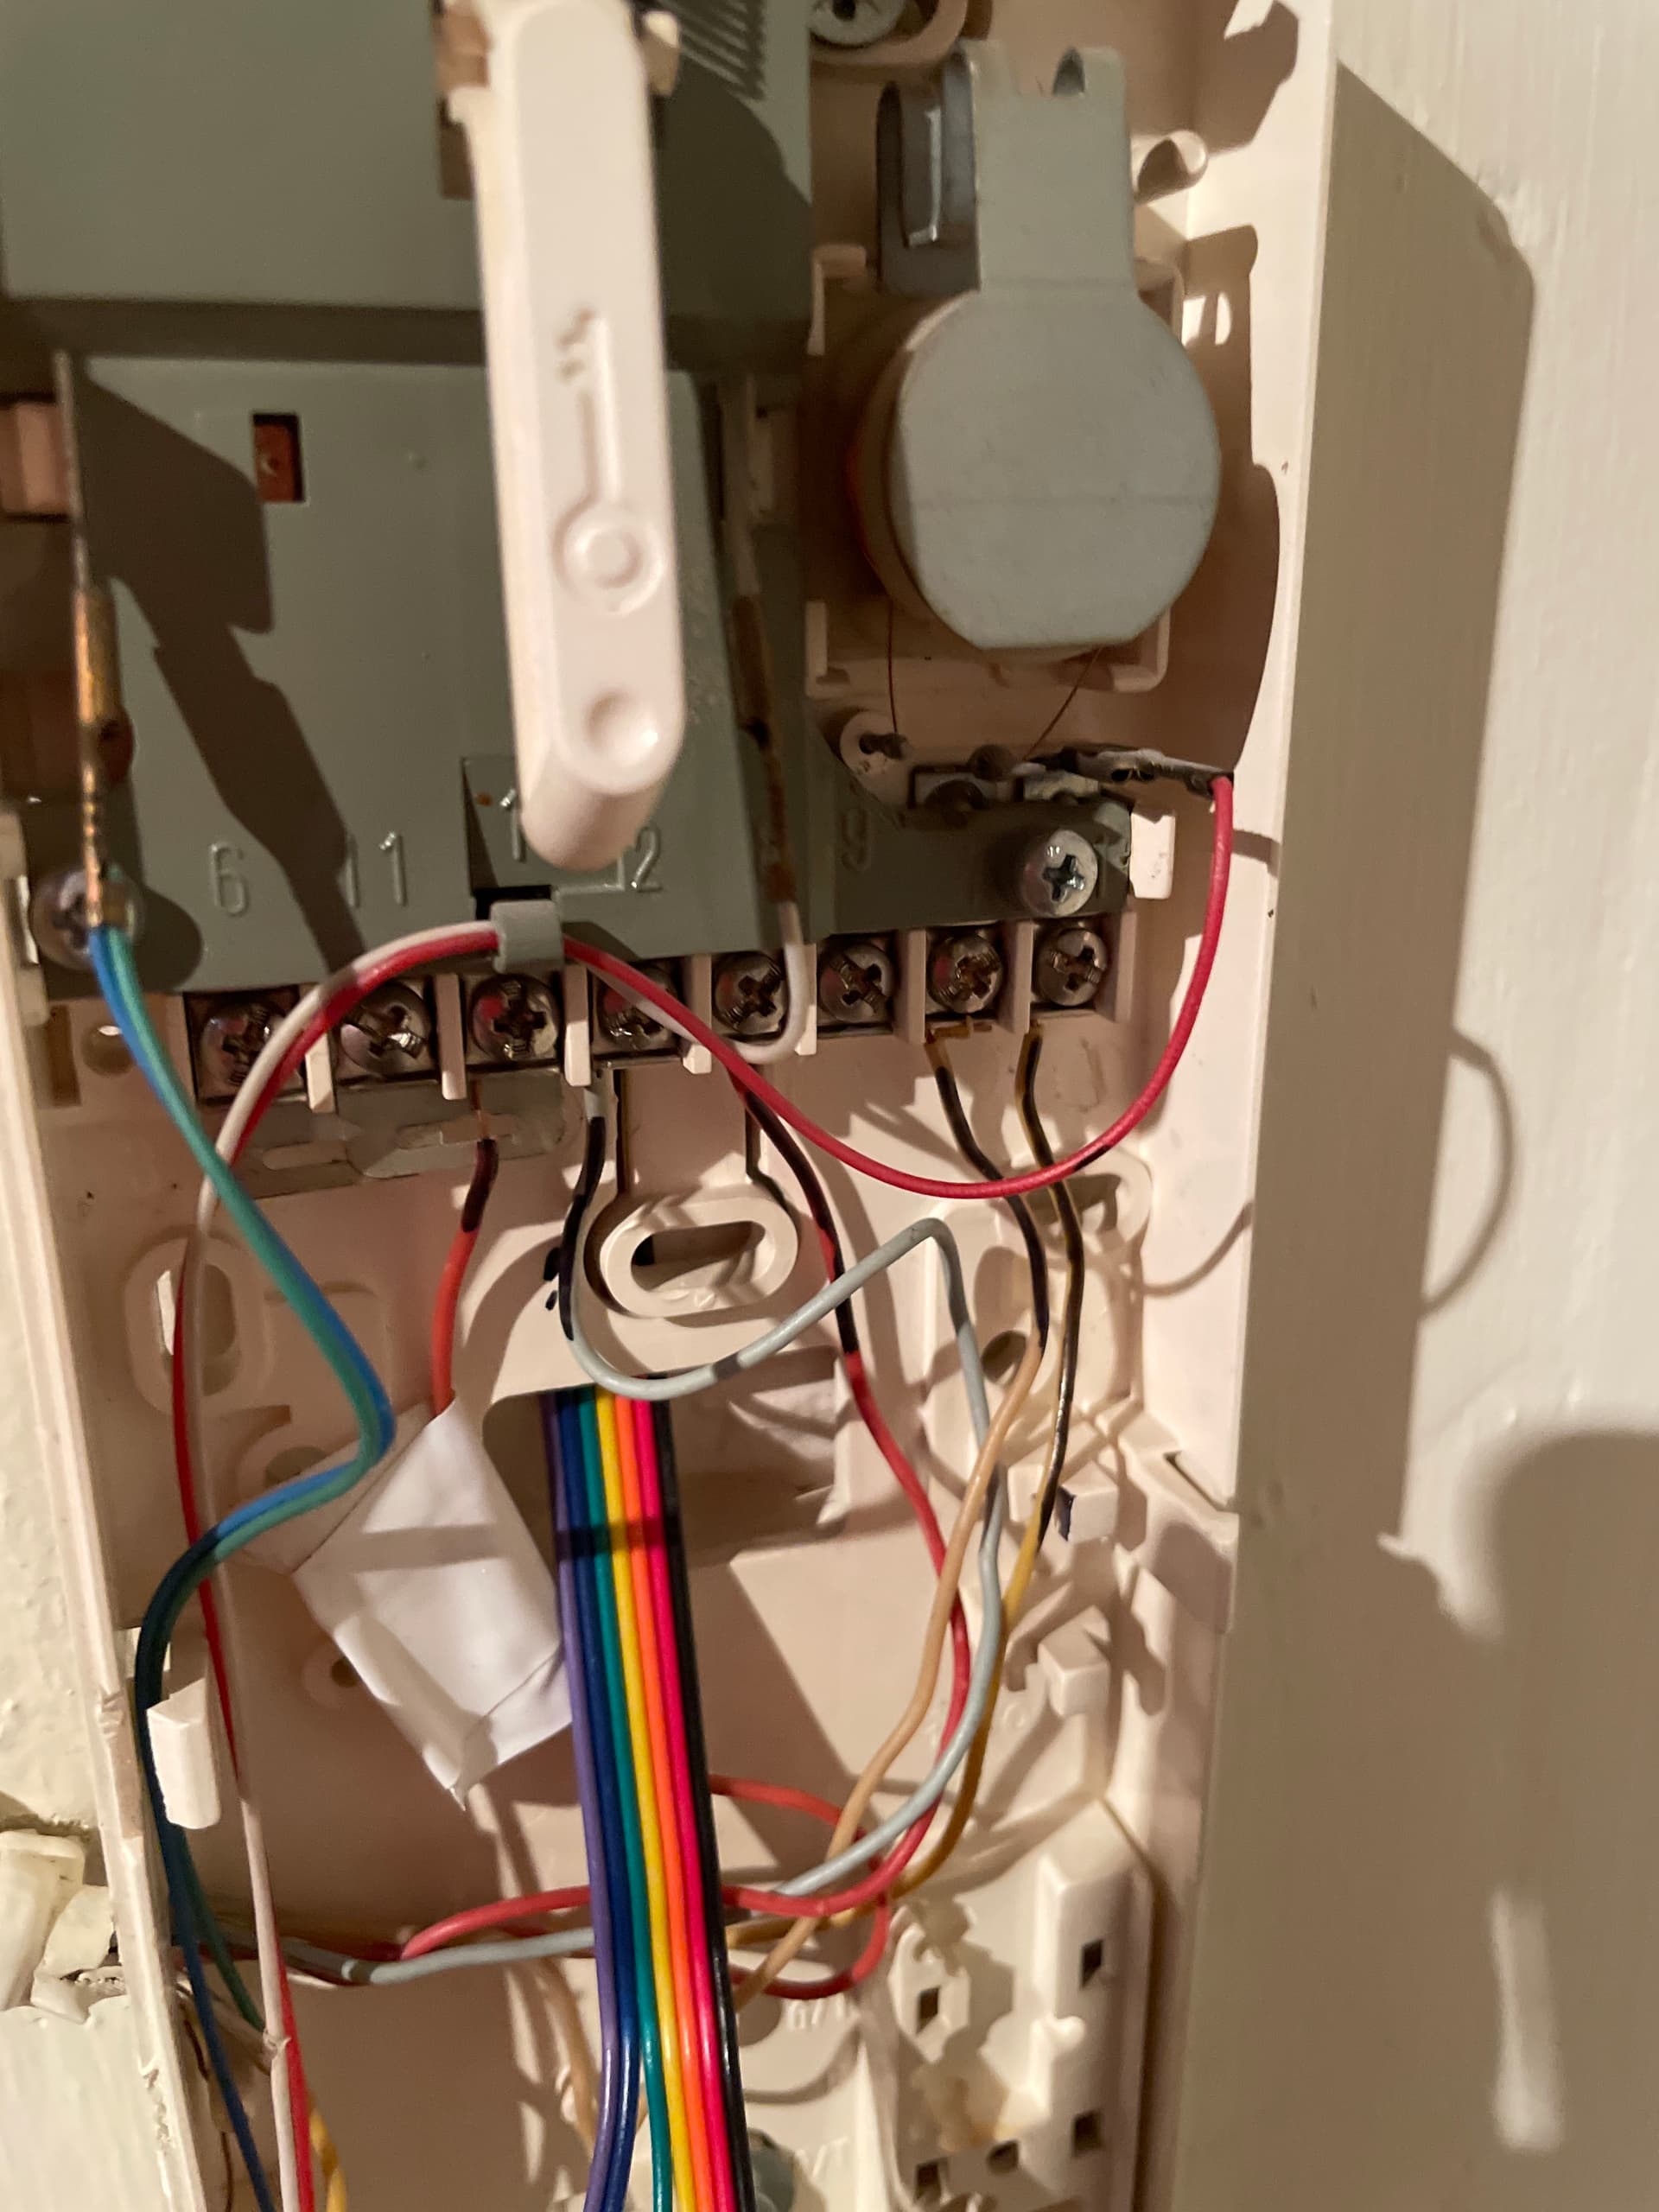
The first screw is just for beginning, what I see 1 is the first screw with a wire in it, so you hold the first end of the short wire on 1 and the second end to 12, 7, 8, and the last number I can’t read from the Foto, when nothing of them is right, you hold the first end on 12 and the second to 7, 8, and the last one what is not readable from the Foto, when not right, you hold the first end on 7 and the second end to 8 and not readable, when not right, then first end on 8 and the other to not readable, this are all possible configuration, test them through until you find the two opening screws!
Ok, now the bell wires! You wrote it’s 7&8, so please take out at first 7 and ring and look if ring is disabled for downstairs and upstairs or just for one of it, then put 7 back and do the same with 8, and look if downstairs and upstairs bell have one common wire, or if it is splitted in two wires. Get back here when done.
Ok. Then we begin the wiring, take the opener wires, take the purple wire and screw it on 11 together with the wire what is already there, now screw the blue wire to 8 together with the wire what is already there, then take the 2-port nuki clamp (what comes with the nuki opener), put the yellow opener wire in one port and put the wire from 7 in the other port, now take the green opener wire and screw it on 7 of the intercom, wiring finish (the remaining opener wires are not needed for analogue systems, so let them free)! Now plug the opener wires in the opener, and look very carefully that it sits straight and tight in the port of the opener, because just a slight but crooked, and you mostly get errors! Now reset the opener to factory settings, and make a fresh setup with generic analogue! Let me know, the outcome!