+1
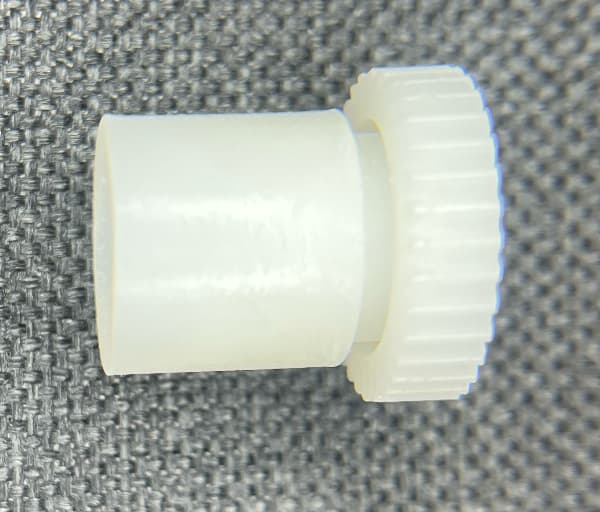
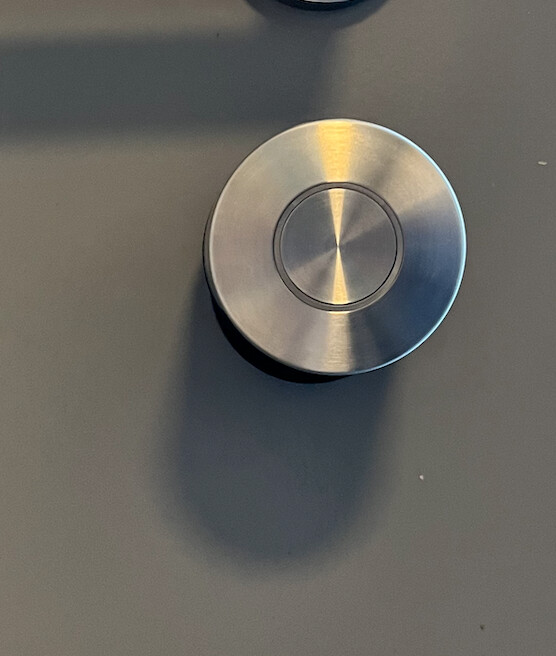
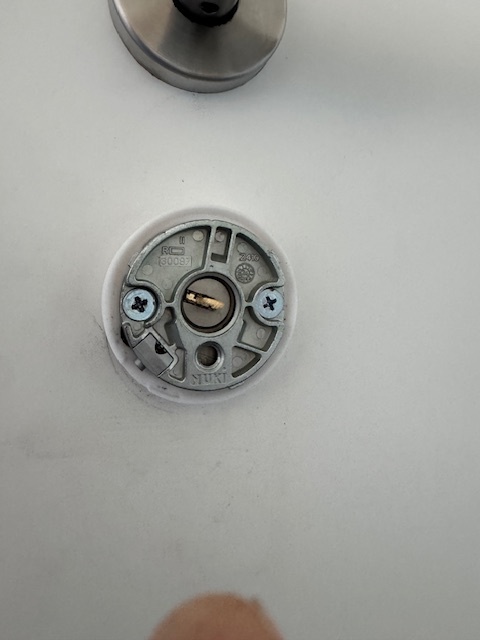
I have just received the first version of my 3D printed Keso Adapter. The gear works perfectly ![]()
The base plate is not yet ready, so I cannot permanently mount it.
For the final version I will reduce the height of the adapter from currently 17mm to 10mm.
It should be easy to adapt the OpenSCAD file for other cylinders.
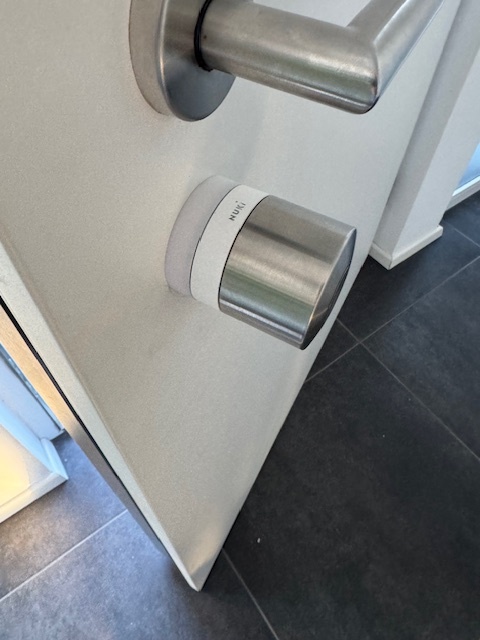
I have completed my prototype and it works great.
For the final version I have to adjust the height of the base plate (already done and ordered).
If you like to do the same you need to measure how much your cylinder stands out of your door and update this setting in the openscad file. I’ve ordered the base plate with JLC Black Resin and the gear with LEDO 6060 Resin
No tape requiered, everything can be mounted with screws.
My cylinder was optimized for the Nuki 4 and is a little bit long due this this. Maybe I will shorten it by 10mm, so that the base plate can be smaller (needs to be as high as the cylinder stands out of the door).
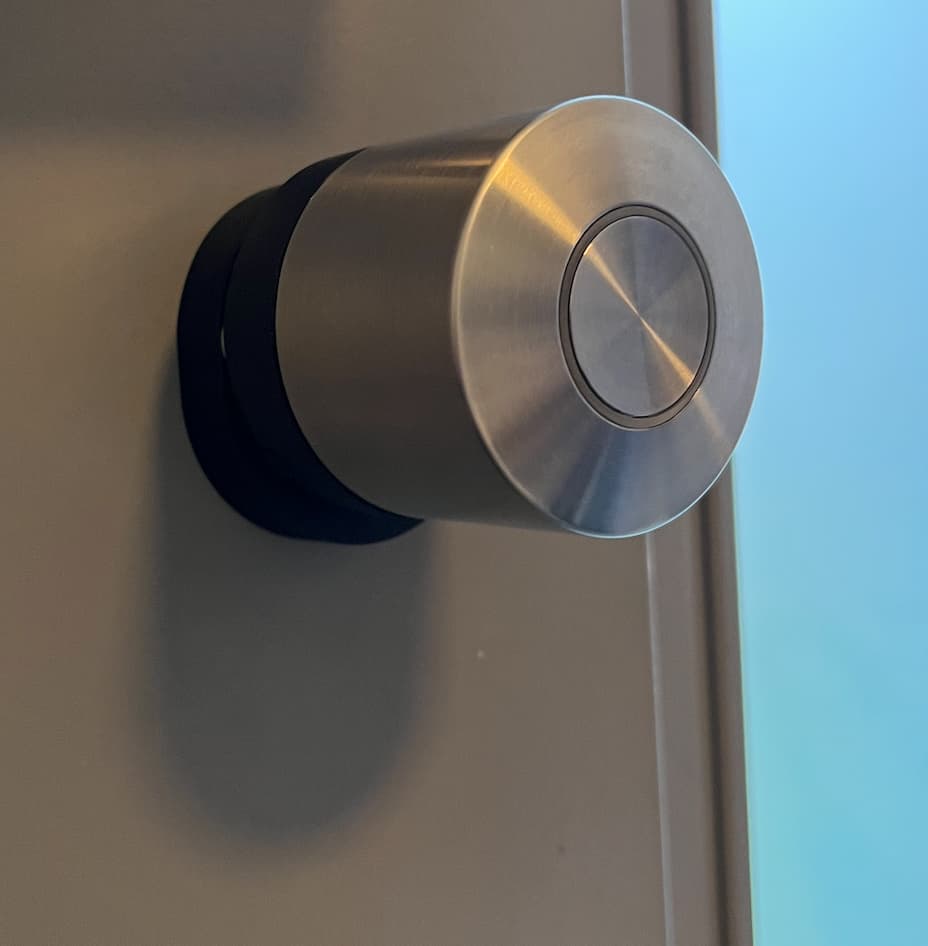
This is how it looks:
3 Likes
If you watch the following video she is clearly mentioning that they are working on a retrofit version.

2 Likes
Count me in! Tedee also has the “Go” and the “Pro”. The “Go” is a bit larger and works with any cylinder. The “Pro” is a tick smaller but as with the Nuki Ultra, requires changing the cylinder.
@Philipp what Material ist the gear and the base plate brinted with? And is a filament or resign printer used?
1 Like
This is no secret. But with everything in tech & smarthome: You never know when it’s coming, if it is indeed coming at all and what downsides that model will have. One would assume none, because Nuki is getting feedback, but looking at the mounting-plate debate in another thread you can tell how well that influences Nuki product development…
1 Like
Because not all people are living in a house owned by themselves. There might be regulations that do not allow you to change the cylinder, on the other hand a house has more than one door that goes with locks that are keyed alike (cellar, washing room, garden doors, you name it).
You may be happy and fine with exchanging the cylinder, I bought a cylinder with emergency functionality that fits to my house’s key system because the old one did not have that. Having to exchange that once again would be a waste of money.
So, as always, beauty is in the eye of the beholder, at least for me this prevents me from buying an Ultra.
1 Like
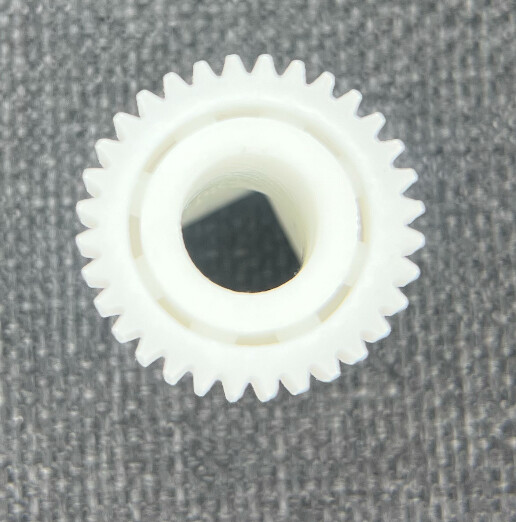
@Kaimundo, it is printed with resin. I do not have my own printer, so I chose to have it printed by JLCPCB.
For the base plate, I used “JLC Black Resin” because it is truly a deep black. For the gear, I used “LEDO 6060 Resin.” In the meantime, I have increased the number of spokes on the gear because they broke after a week of heavy use in insane mode. I designed the spokes to break before the Nuki lock as a protective measure, and I think it may take a few iterations to determine the ideal thickness. I also ordered an SLS print of the gear for testing, though it might not have sufficient precision—let’s see.
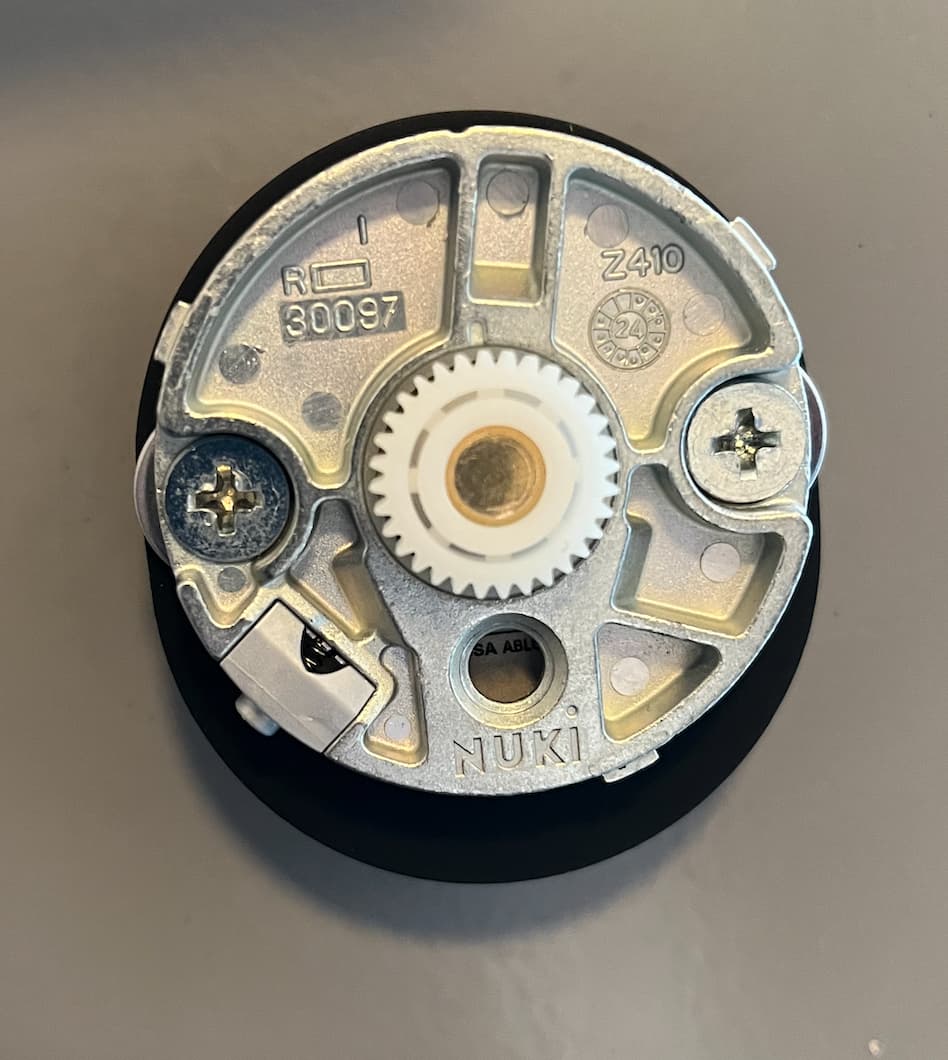
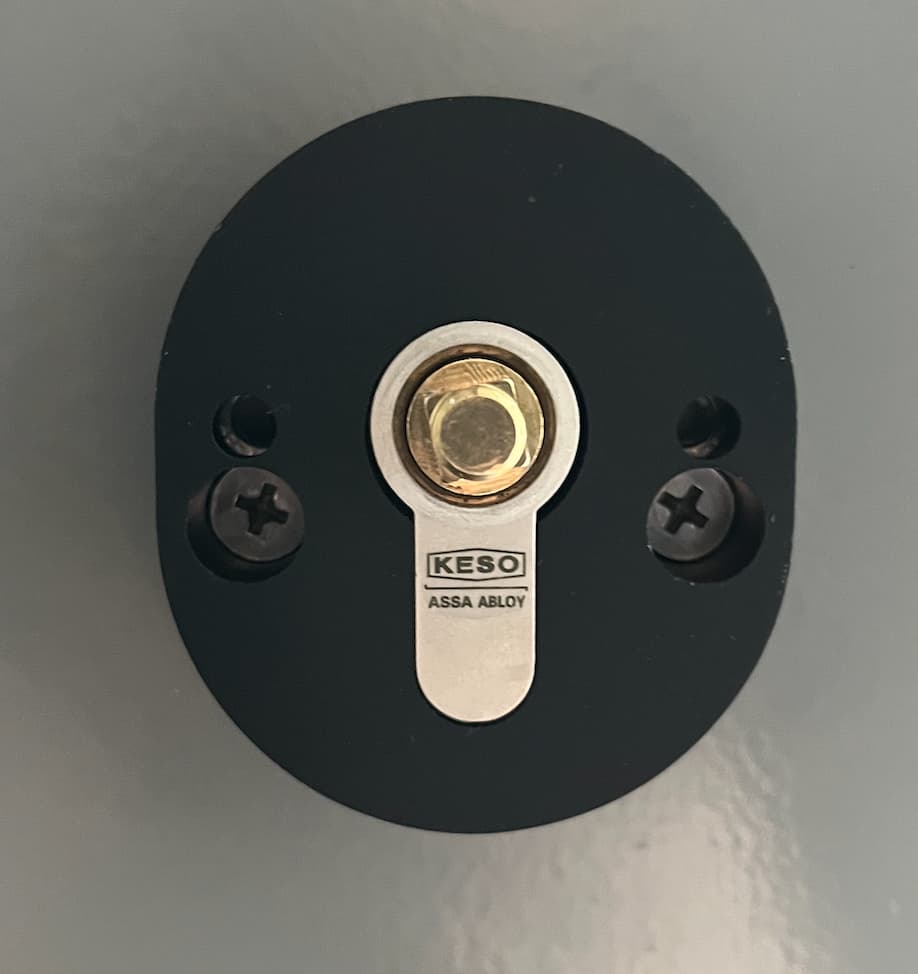
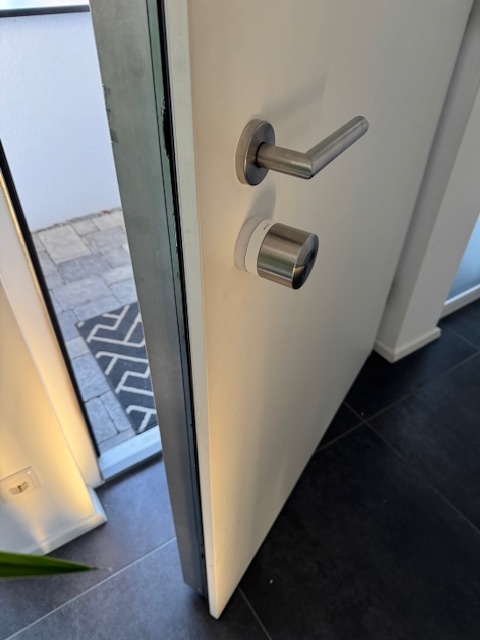
Today I received the final version of my base plate. You can find instructions in the Git repository on how to adjust it for other cylinder sizes. It only requires changing one value in the OpenSCAD file. I also believe it’s relatively easy to adapt this for other gears. I kept in mind that other users might want to adapt it, for example, for an Abus cylinder. You simply need to subtract the shape of the knob rectangle.
Images of the final base plate:


2 Likes
I really like ur work. Would like to adjust that for my abus cylinder, which i used with nuki nob and a nuki 3 until the ultra arrived. Unfortunatily i Dont know How to adjust ur Design for my abus nob. Second Problem is the quality and duration of the gear. I use the ultra only in insane Mode. Time is money ![]() but i am afraid the gear will break every week.
but i am afraid the gear will break every week.
I suggest you adapt ur mounting plate for assymetrical use that it fits the radius of the ultra lock. I remixed the Design of alexey to fit it assymetrical for me rosette. Only problem is i have to use the universal cylinder ![]() .
.
@Kaimundo I will keep using it only in insane mode as well. I have the problem that it will not unlatch otherwise (independent of the cylinder). I suggest waiting for my tests with larger spokes and different material (nylon instead of resin) to see if this resolves the problem. I intentionally chose the design with the spokes so that the gear should break in case of something unexpected. It would be no problem to design it in a way that it never breaks, but I don’t like the risk of harming the Nuki. I already ordered a new Version and it is already produced. But the shipment always takes around two weeks.
For the Abus knob, can you provide the dimensions of the holder to see if it will fit? You can share them here or post everything in a GitHub issue. I will check if making an Abus version is as easy as I expect.
Did you try to put some PS22 to lubricate your lock? It worked really well for me for a lot of doors that needed more force to open/close.
For the gear I would recommend Nylon SLS for higher strength.
@Panda thanks for the advice, I will test to oil the lock mechanism. A variant with Nylon SLS is on the way to me I will keep you updated on the print quality.
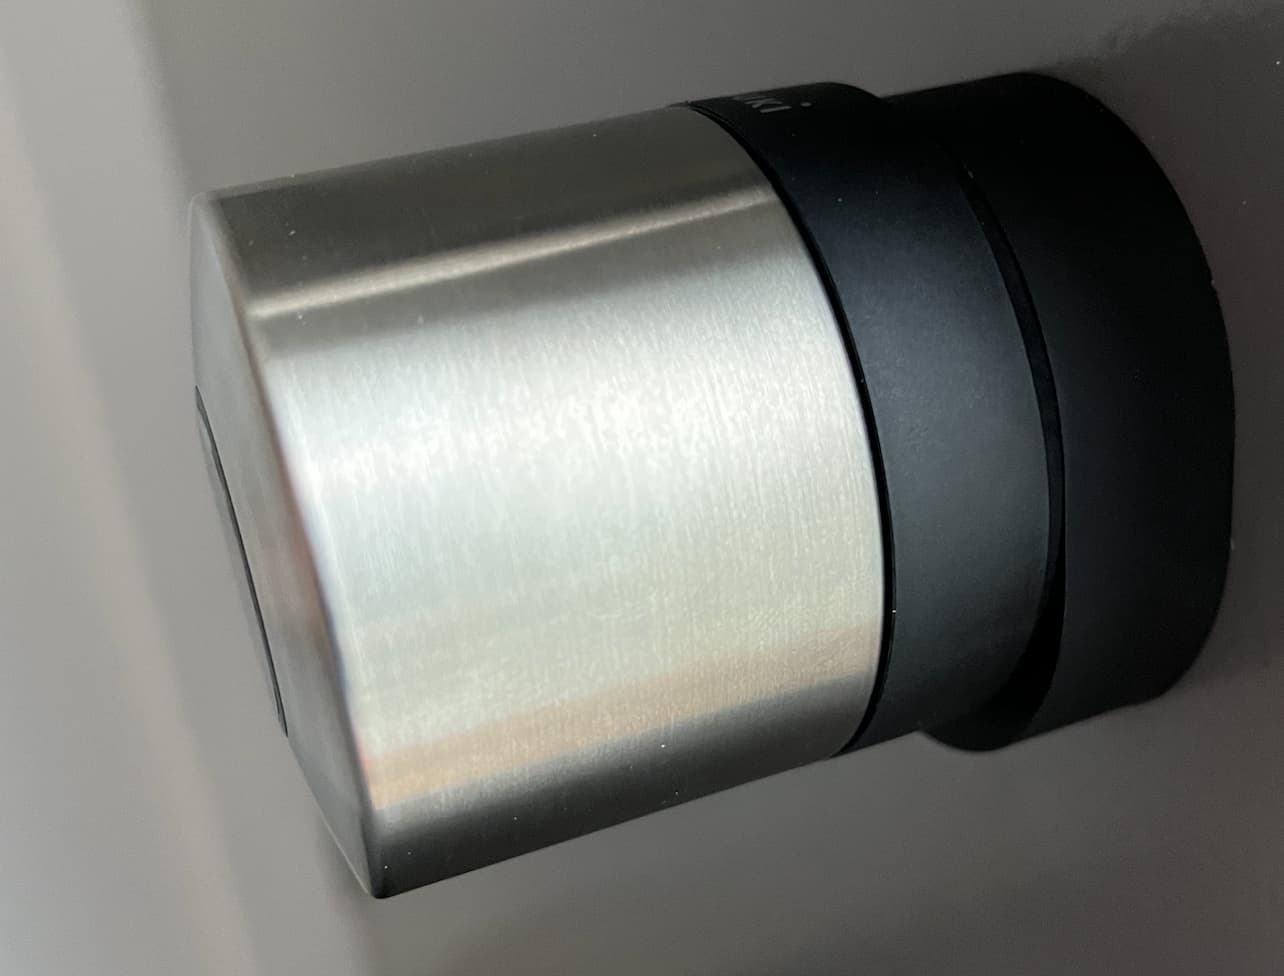
@Kaimundo I added another design variant so that it covers only the shape of the Nuki Ultra
This can be enabled by setting nukiSize=true;
it looks like this:

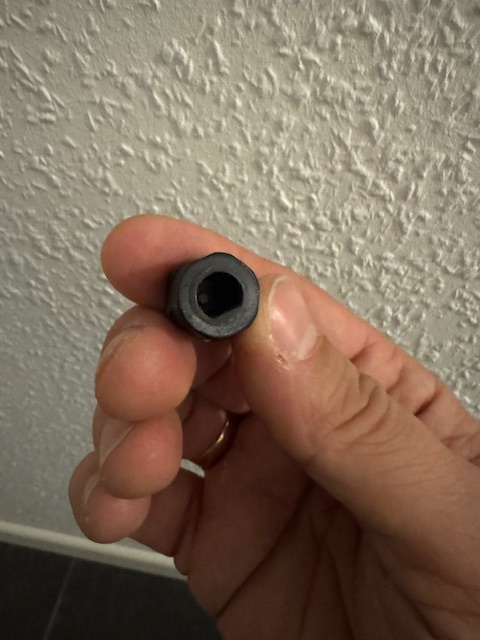
I got a nuki nob for my Old Nuki 3.0 for an Abus Lock with nob. I Attached a picture of the Nob an i attached the measures of the shape of that Nob link. The nob itself looks 13 mm out of the cylinder. Can you work with that?
1 Like
@PhilippA i want to print ur Nuki True adapter, but i dont know anything about that scad thing. Can i download somewhere the STL directly ?
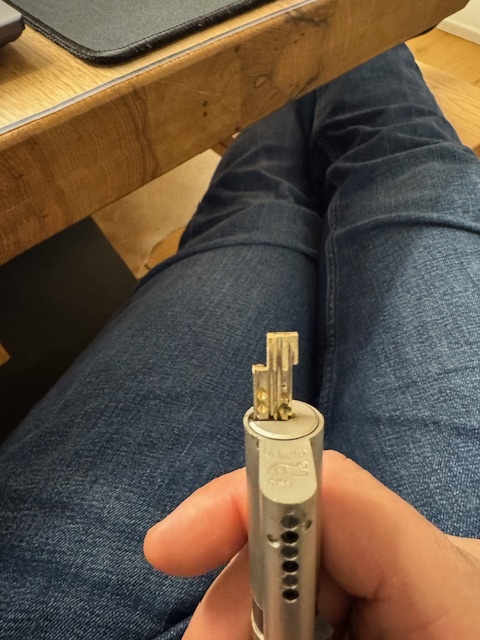
EDIT: I finally got it how to do that with openscad. Made some tutorials, its basically really easy to adapt the parameters if you know how to do. Ur Baseplate is printing right now. Decided to Cut one of my keys in shape to avoid printing the gear for the abus nob. I had anothe cylinder with keys still here. Printing it right now in PLA + to give it a test mount tomorrow. Unfortunately my Nuki Ultra died today so i have to wait until Support gets me help or i get an exchange of the Lock. It suddenly doesnt respond and the LED isnt blinking anymore. Its just dead …

2 Likes
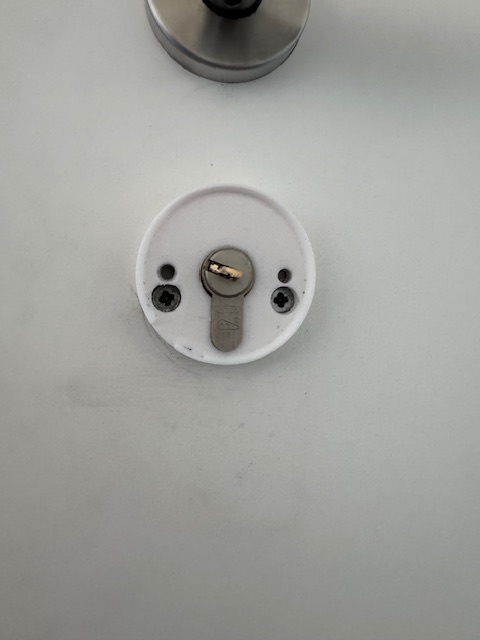
So its done finally. The baseplae print of @PhilippA is easy to print. Used PLA+ with PETG as support dividing layer. The Screw nut is very tight to get in. Had to press it in with the srew and the space between the Srew holding the rosette and the srew nut holding the nuki baseplate ist very tight. You have to be careful that he nut will not press in the srewcanal of the long srew holding the rosette. But with a litte bit of patience it worked fine. Big thanx to Philipp for the design. Here are the latest pictures. Unfortunatelly i cant test the nuki now because it died yesterday. But manually it works fine…
2 Likes
Hi @Kaimundo thanks for the update and for giving the small adapter ![]() and the feedback.
and the feedback.
I still have to wait around two weeks to get my updated version ![]()
I decided to do this in OpenSCAD as it is pretty easy to adapt for e.g. the height. In parts.scad there is the setting for the screw nut cutout. The tolerance is set to Mtolerance = 0.1; which is indeed very tight. I did it that way as I don’t like them falling out during mounting. But I should change this to .2.
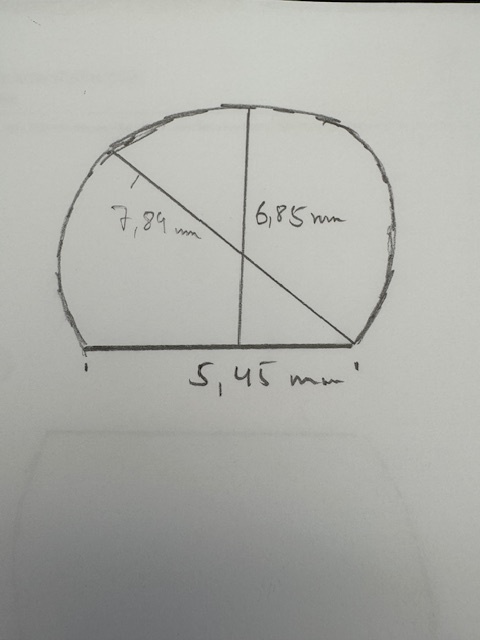
Can you tell me the diameter of the Abus Knob? So when you imagine it would be only a cylinder without the flat side. What would be the diameter? Is this 7.89? Or something else?
1 Like
@Kaimundo I’ve added an adapter for Abus:
GitHub - philipparndt/nuki-ultra-adapter assuming the diameter is 7.89.
Maybe you can do a draft print and check if it matches.
1 Like
So i just printed it to test it, but it wont slide on the nob. Its to narrow. I measured the diameter again and it says 7,92 mm. The Nuki adapter has a litte bite of play on the nob and slides easy on the nob.

1 Like
Hi @Kaimundo thanks for doing a test print. Is it only to narrow by a small amount? Can you tell if it is the cylinder or if the flat side should be moved? Both can be set here: