Hi Guys,
I got my Nuki Working with the BFT 210 system. I couldnt get into the BUS system like you before but i managed to hardware hack the existing touch panel “quite easliy” big thanks to all of the information provided before it wouldnt been possible without that information.
How i got it working:
Ring:
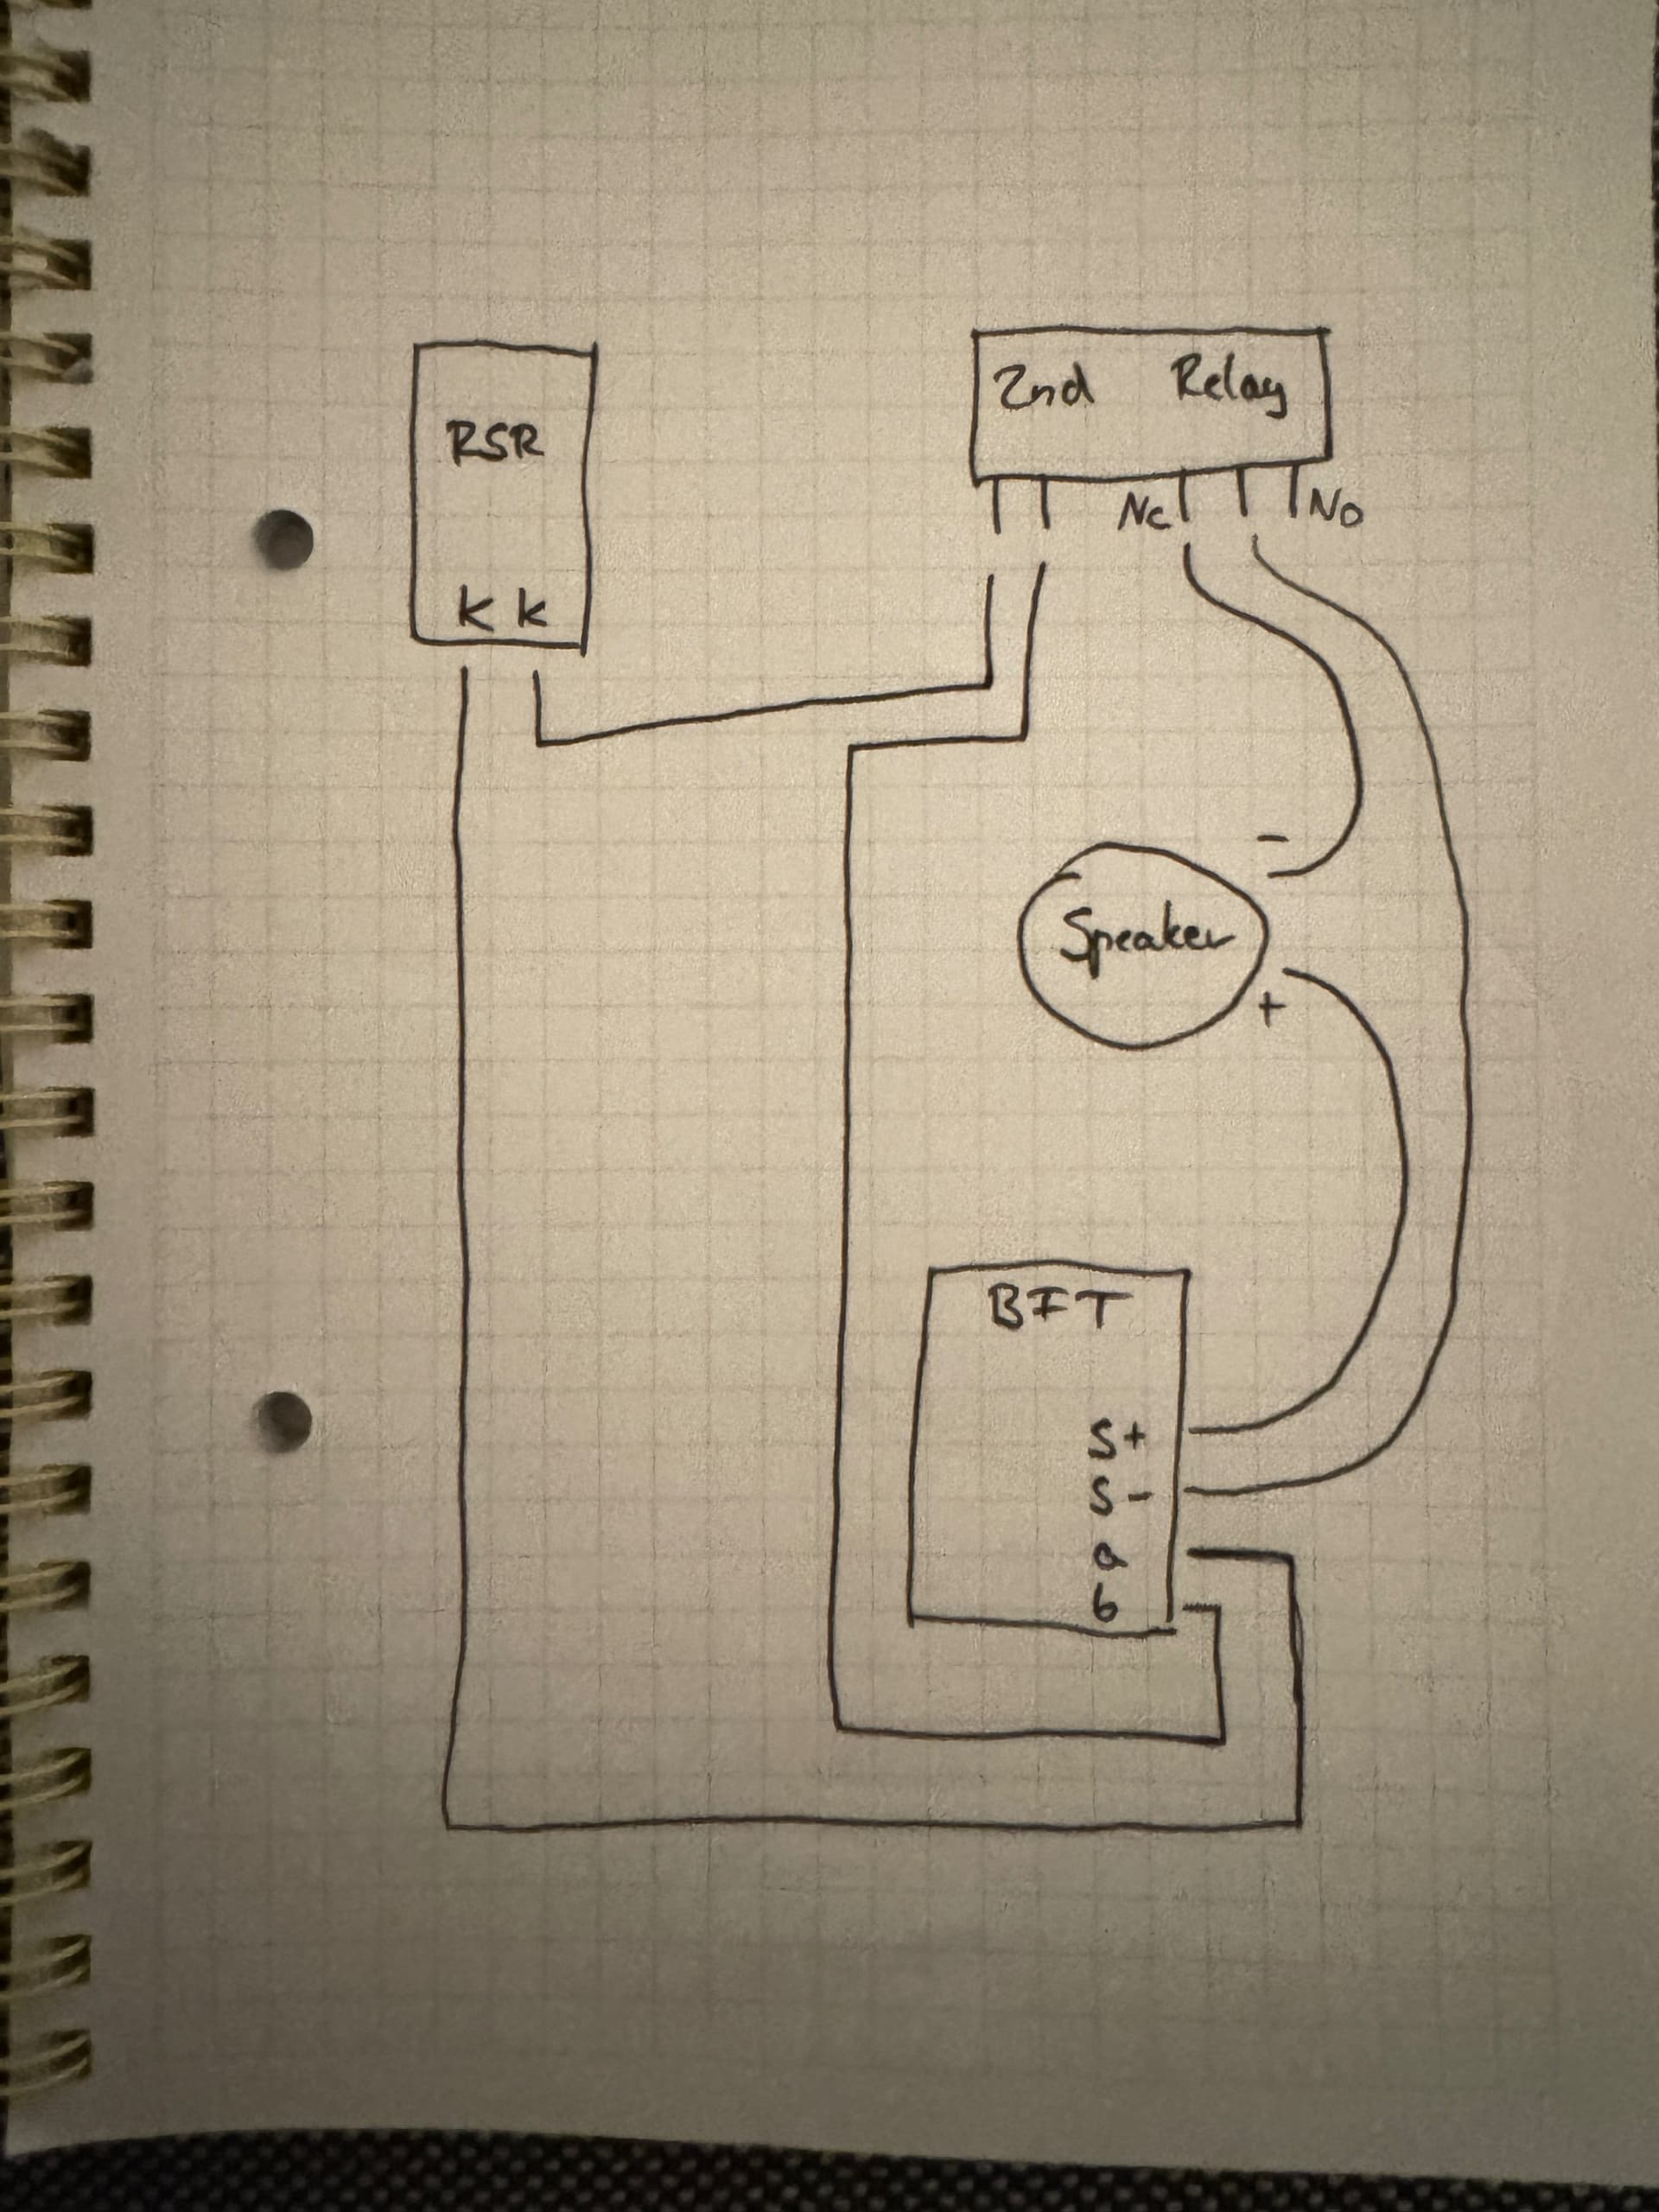
Thats super simple, you just install the RSR 210 and Get the BUS+ signal to one of the K terminals and your yellow Ring wire to the other one to and easy peasy you get a ring signal.
Open the door:
Here it got tricky, so the touch sensitive plate and the button of the BHT differ how they are working. the other hacks just add a the nuki contact and bridge the button with the NUKI itself. thats not possible with the BFT210 because of the SSD relai working function, you always would get creeping capacity within the system therefore you need a real physical disconection of the Button. The button works more or less like so. A capacitor charges the plate and your physical touch decharges it, that drop is then reconized by the system as “touch”
The Hack:
first struggle i had to find a connection point of the Corresponding touch plate. after i found that i needed a point to ground it too so same same as the BHT but differnt as before because as i explained above the nuki on connection on these buttons wouldnt work because they would “short it” so you need to install an additional relai in that connection and thats triggered with the nuki to discharge the capacitor against ground.

Hardware:
What you need for that is the RSR210 to get a ring signal out of the Bell itself
A Relai to trigger and decharge the Button (therefore i made some hardware to make it easier by miself)

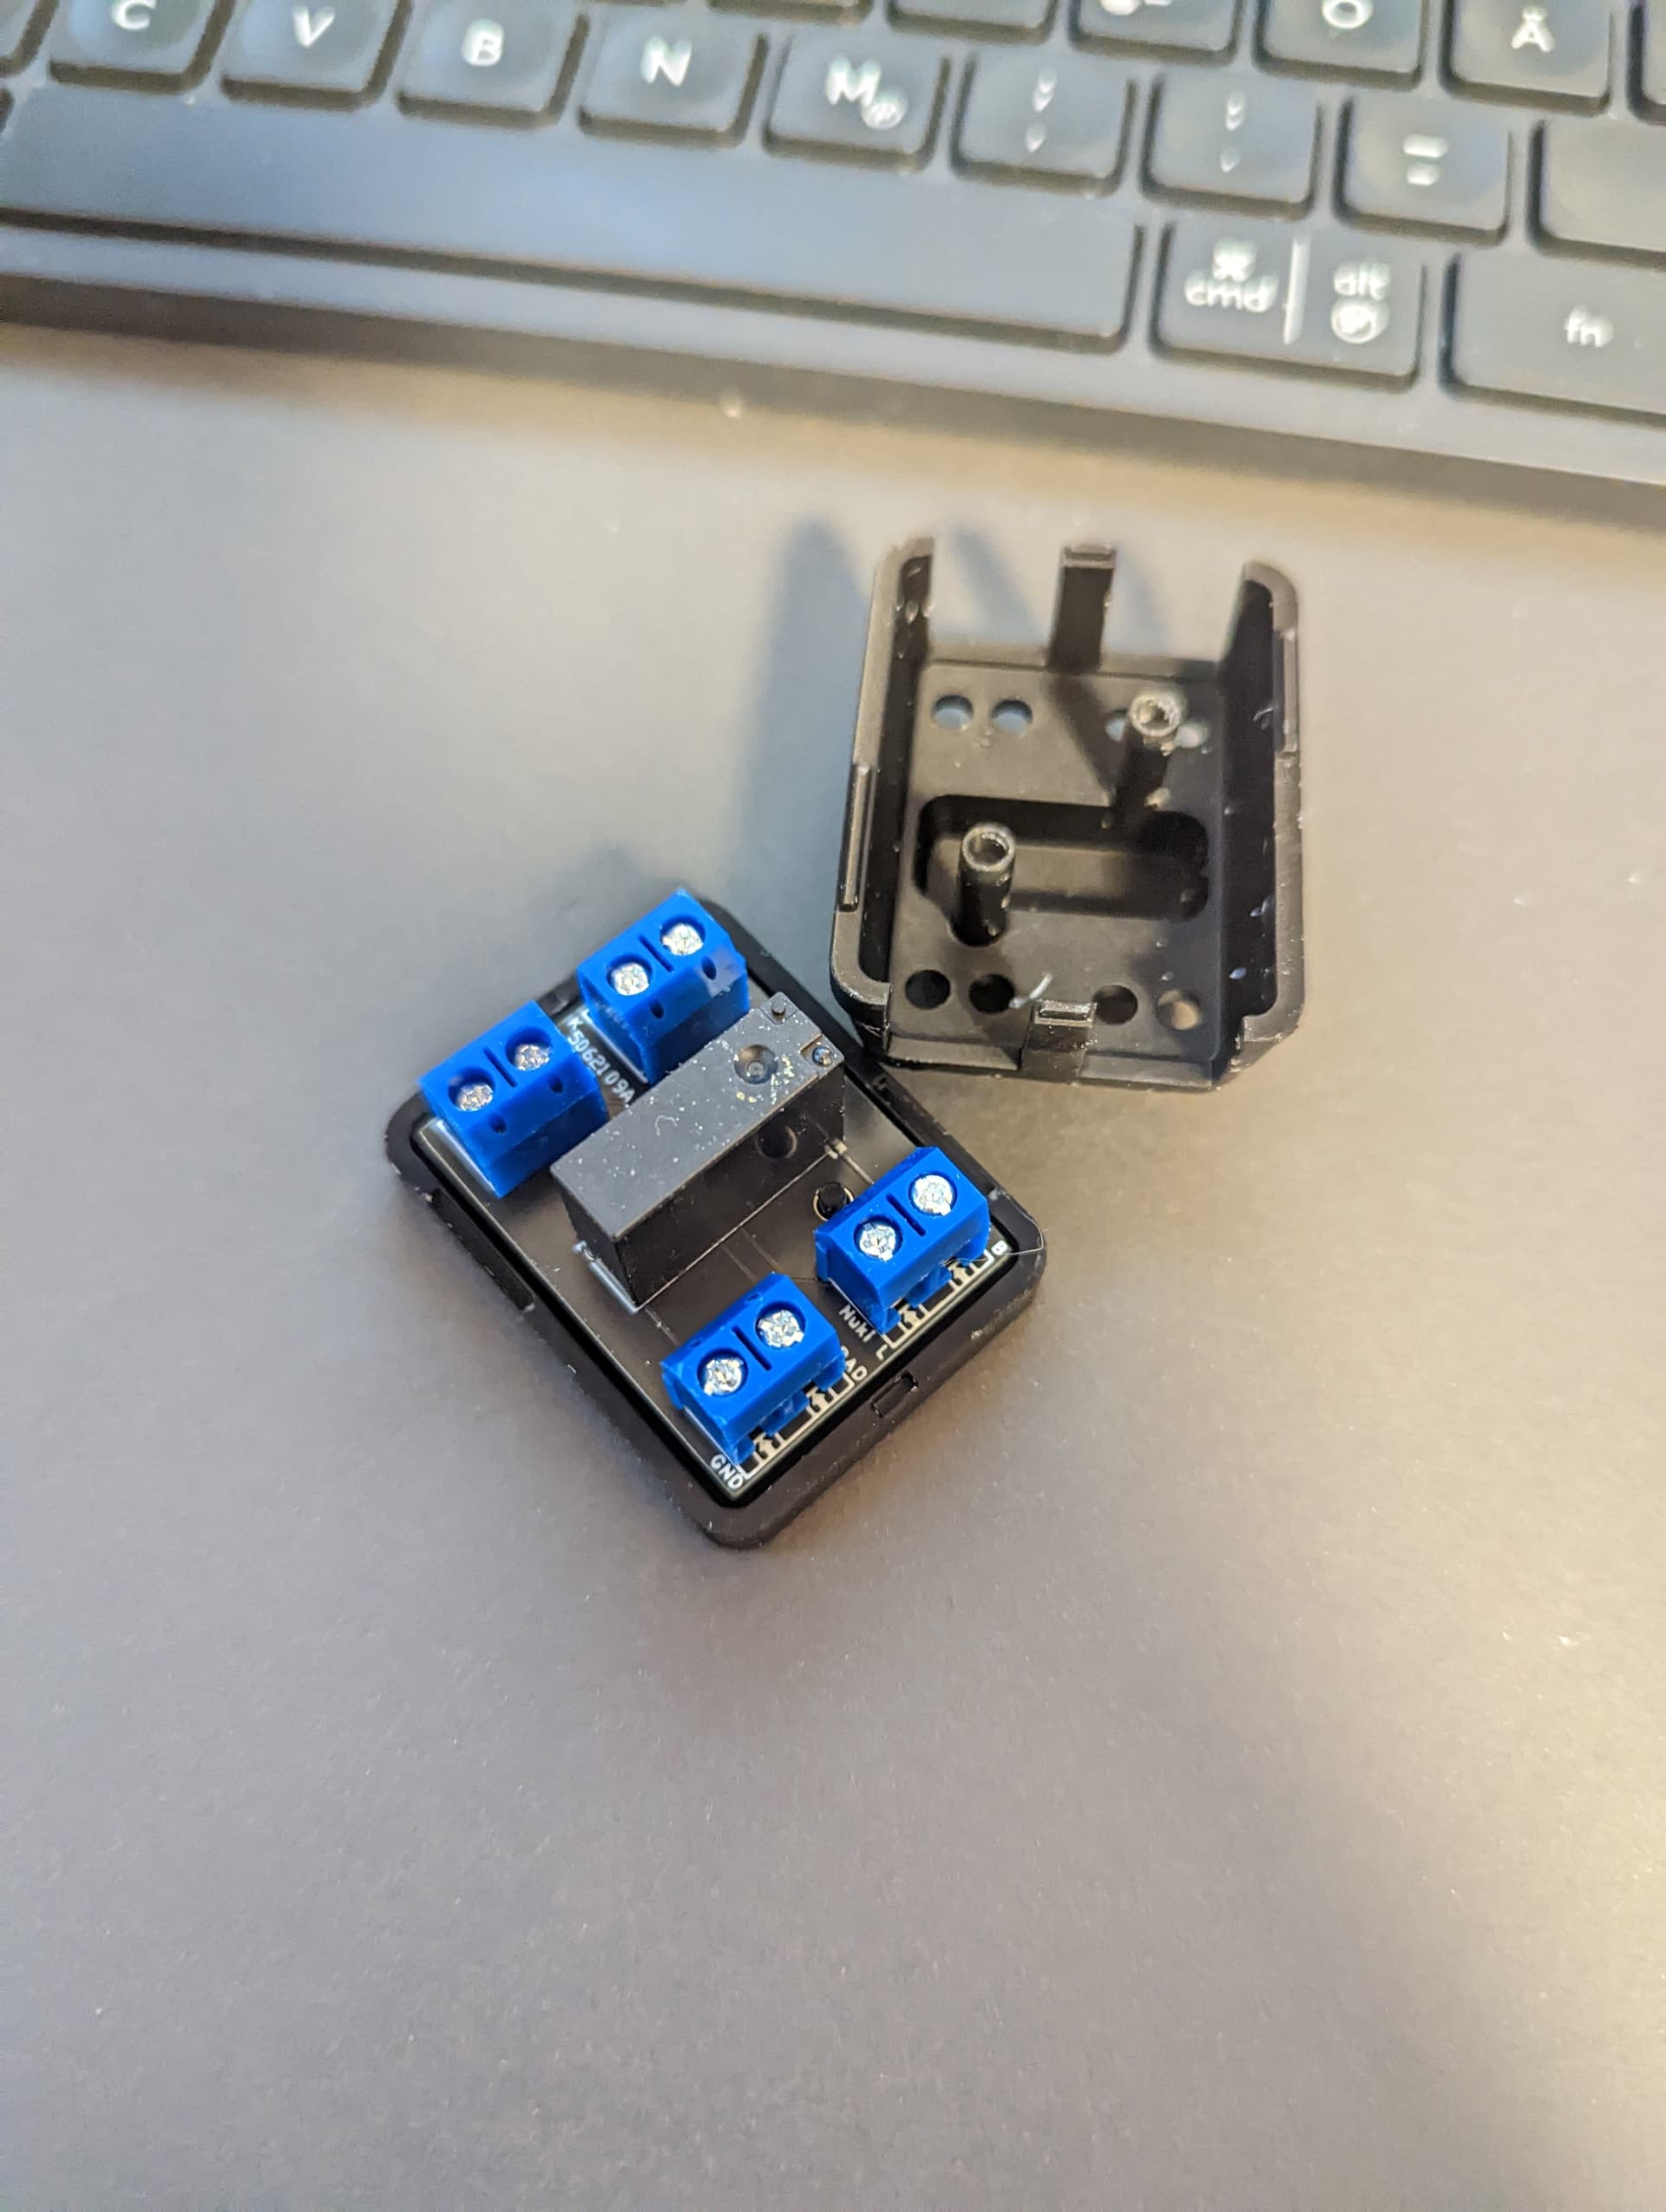
I have some in spare and would love to sell these because in the process of making it happend i bought a used Elcom from ebay to thinker around and dont f*ck up my unit.Just hit me up with a PM if you want one of the Relai pcb´s. Of course you are free to do it with own hardware.
HOW TO:
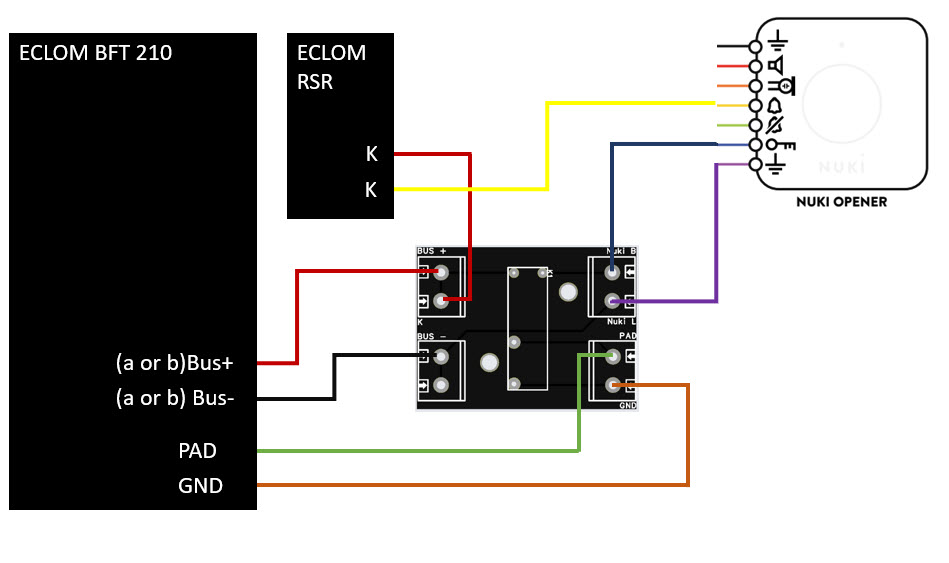
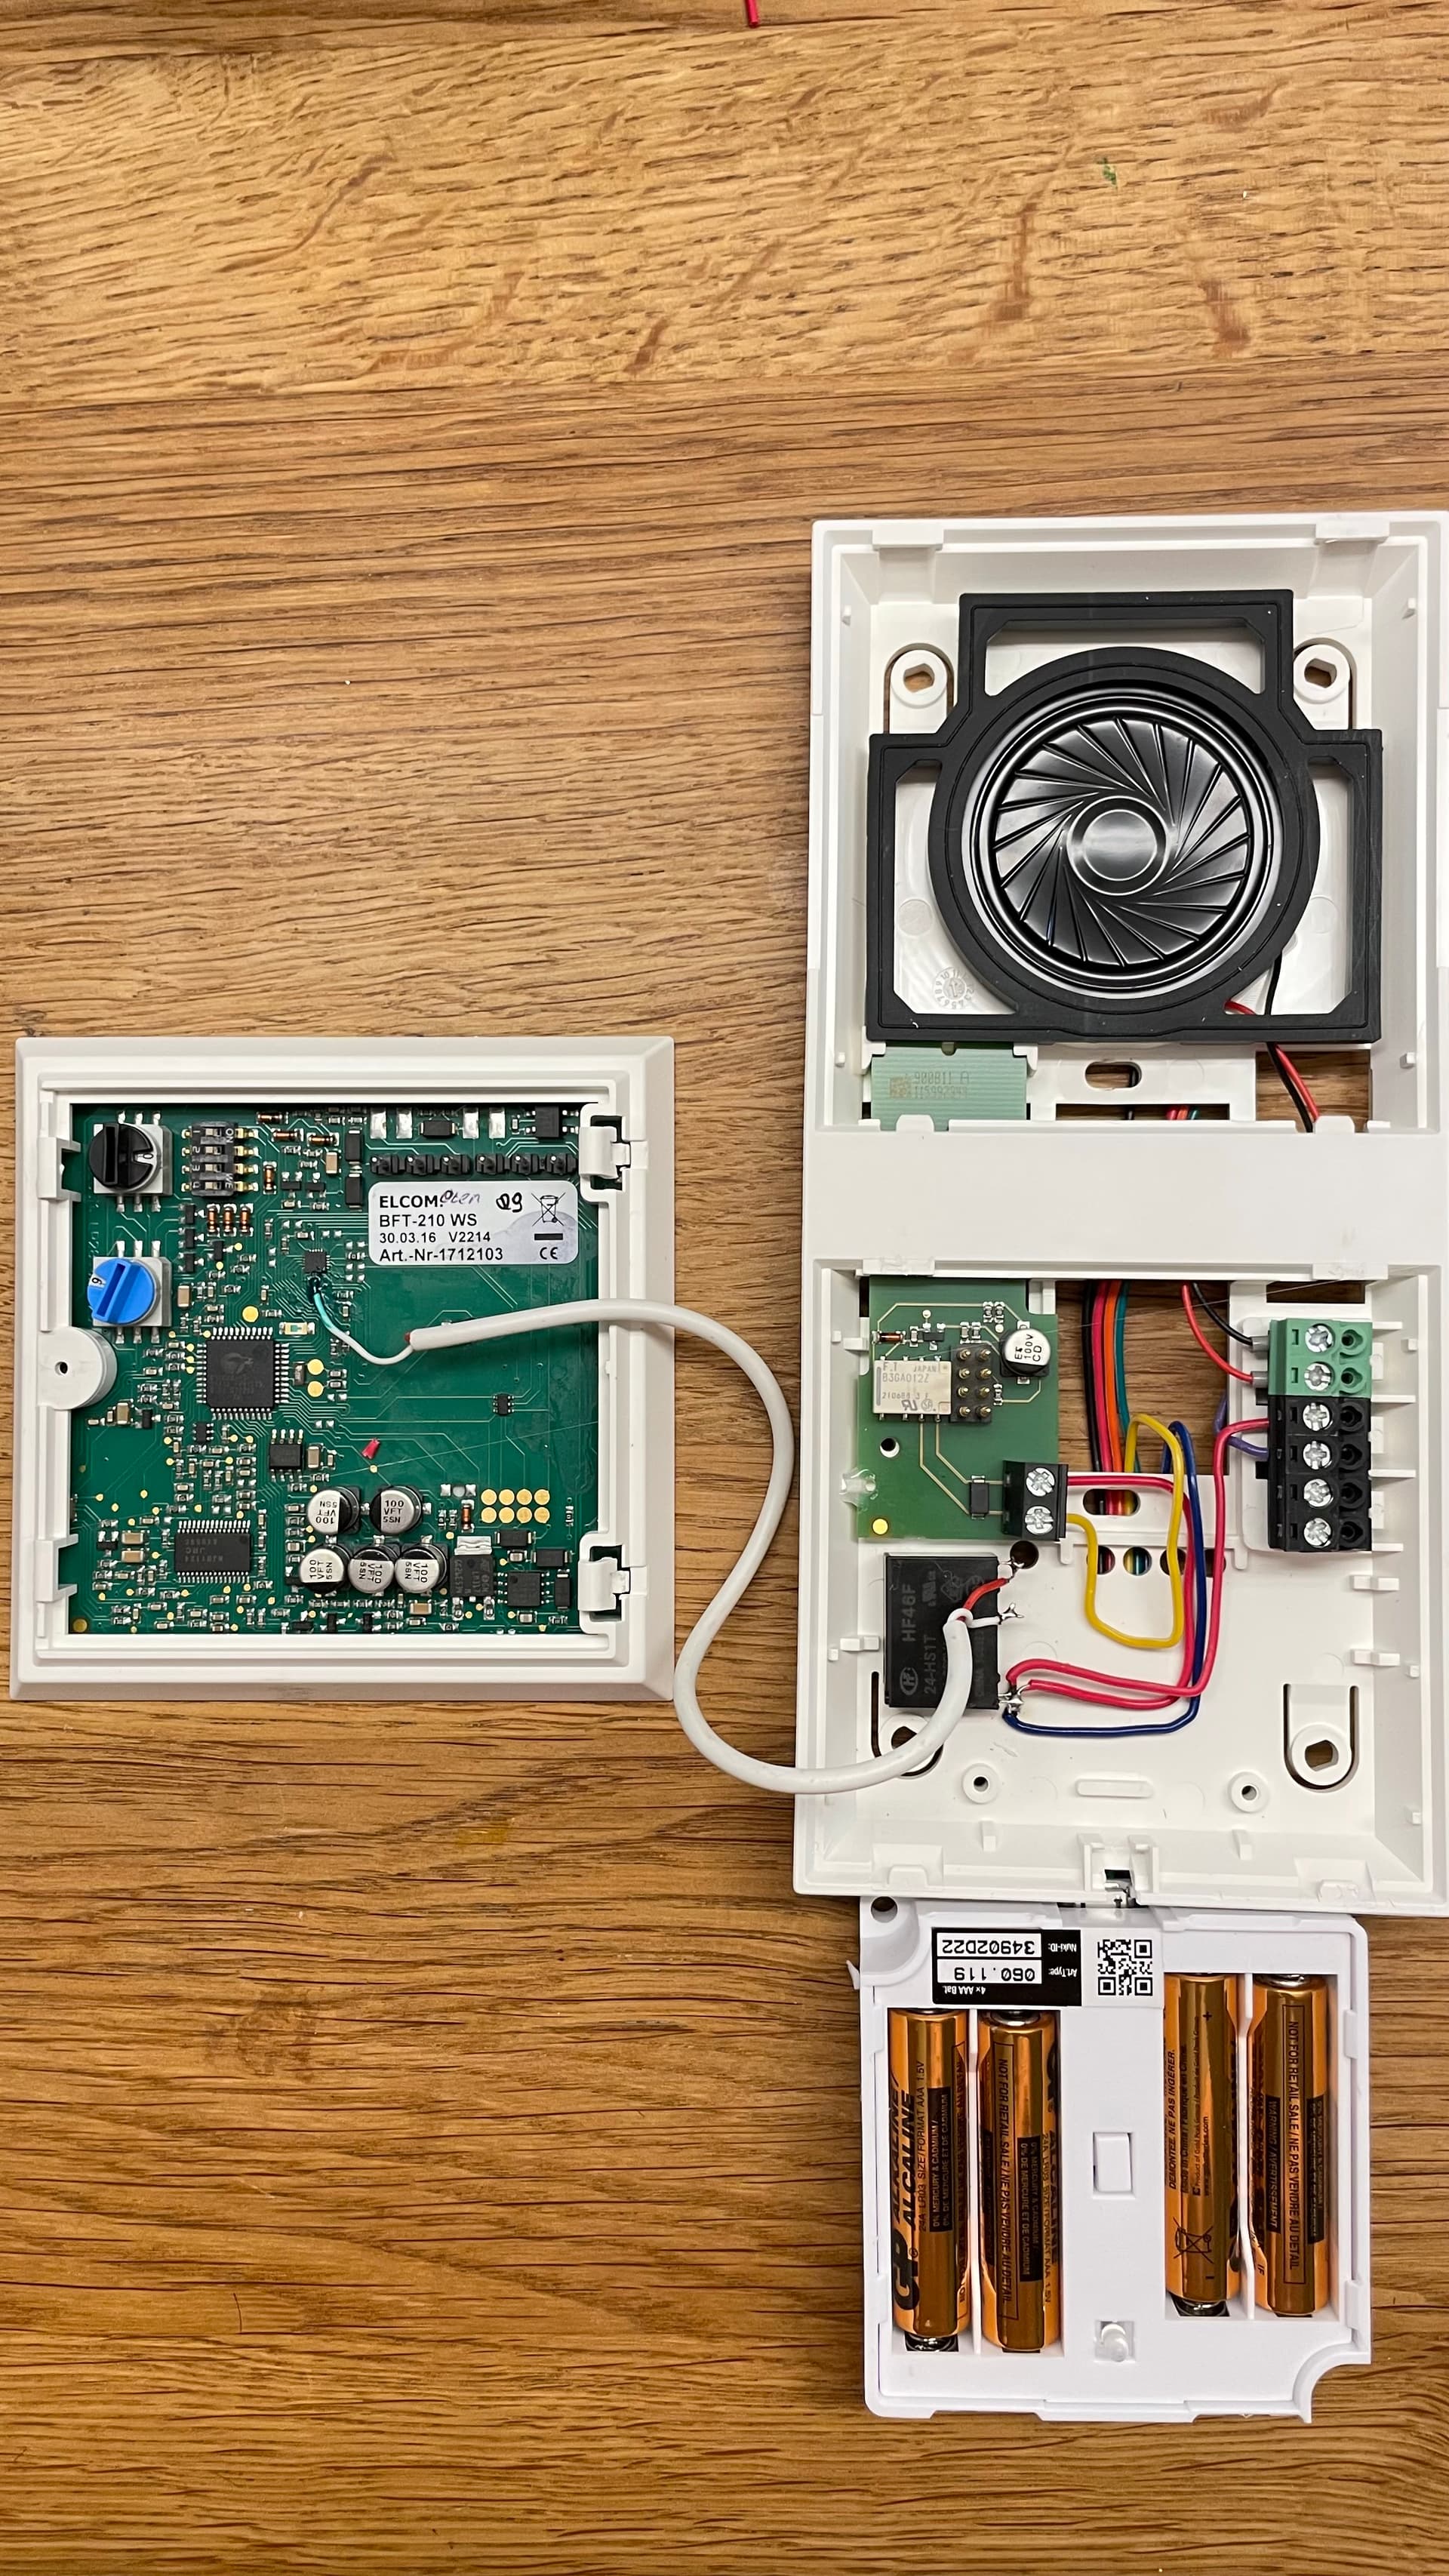
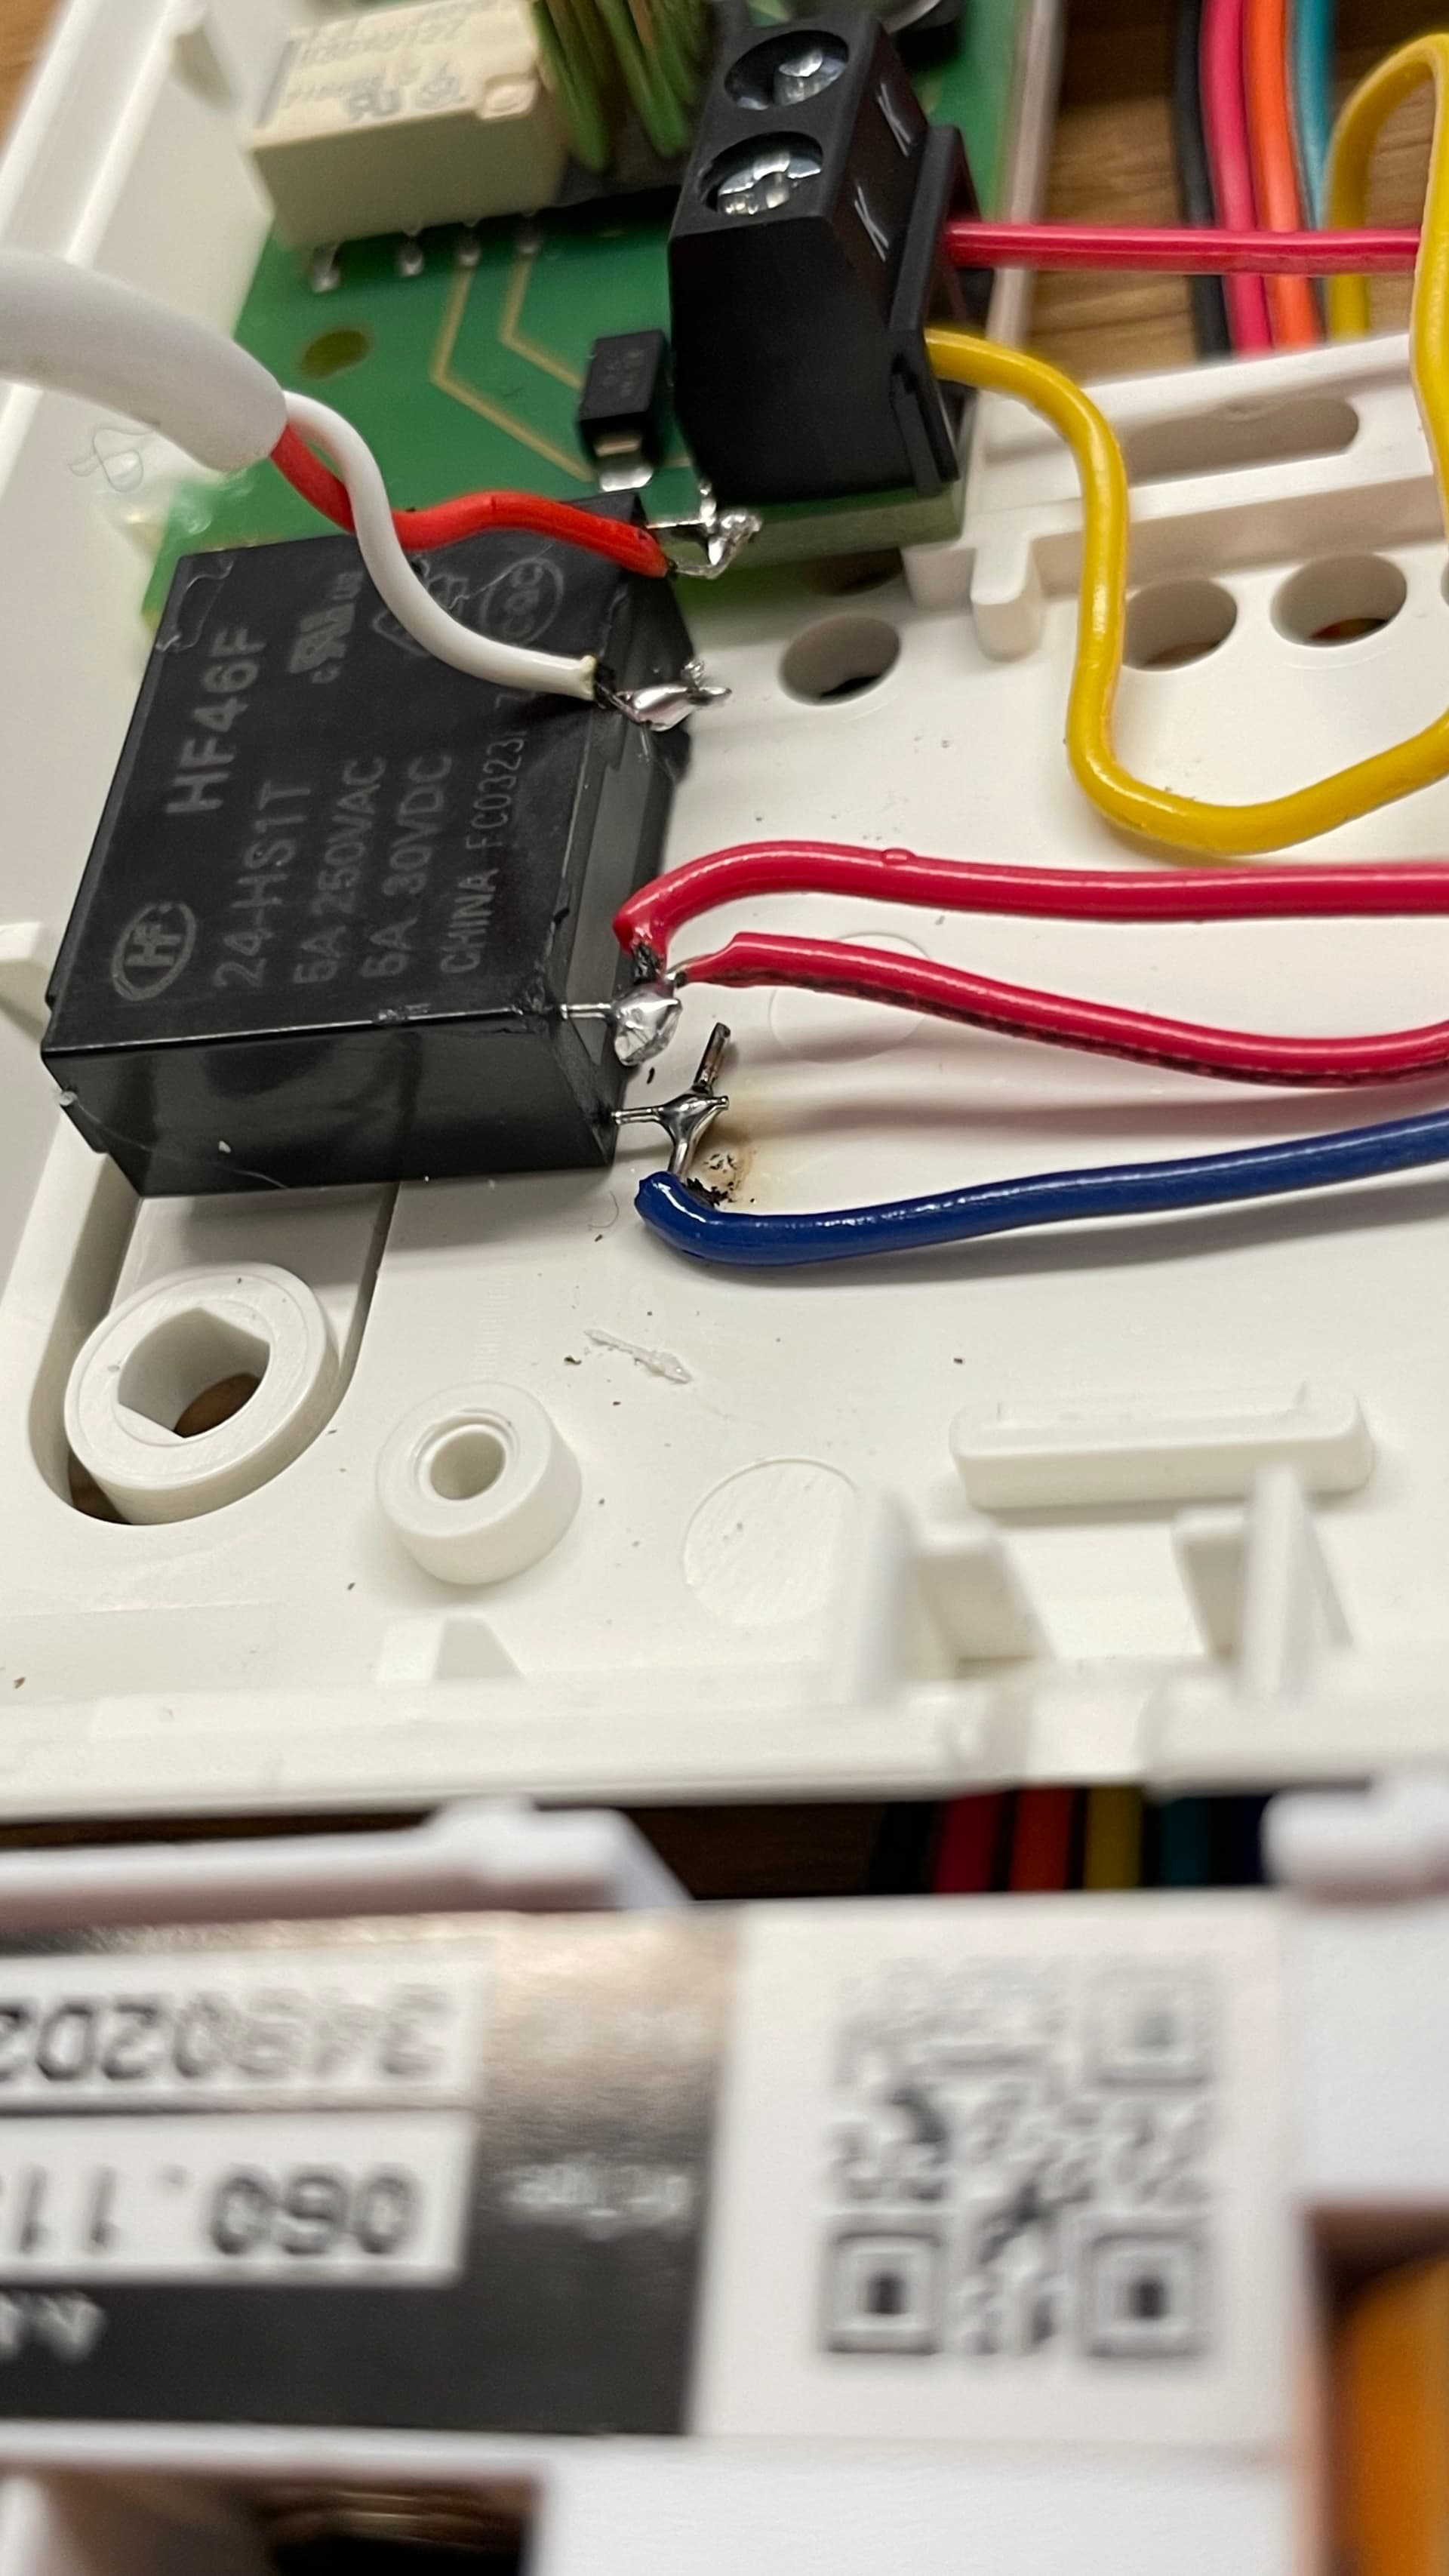
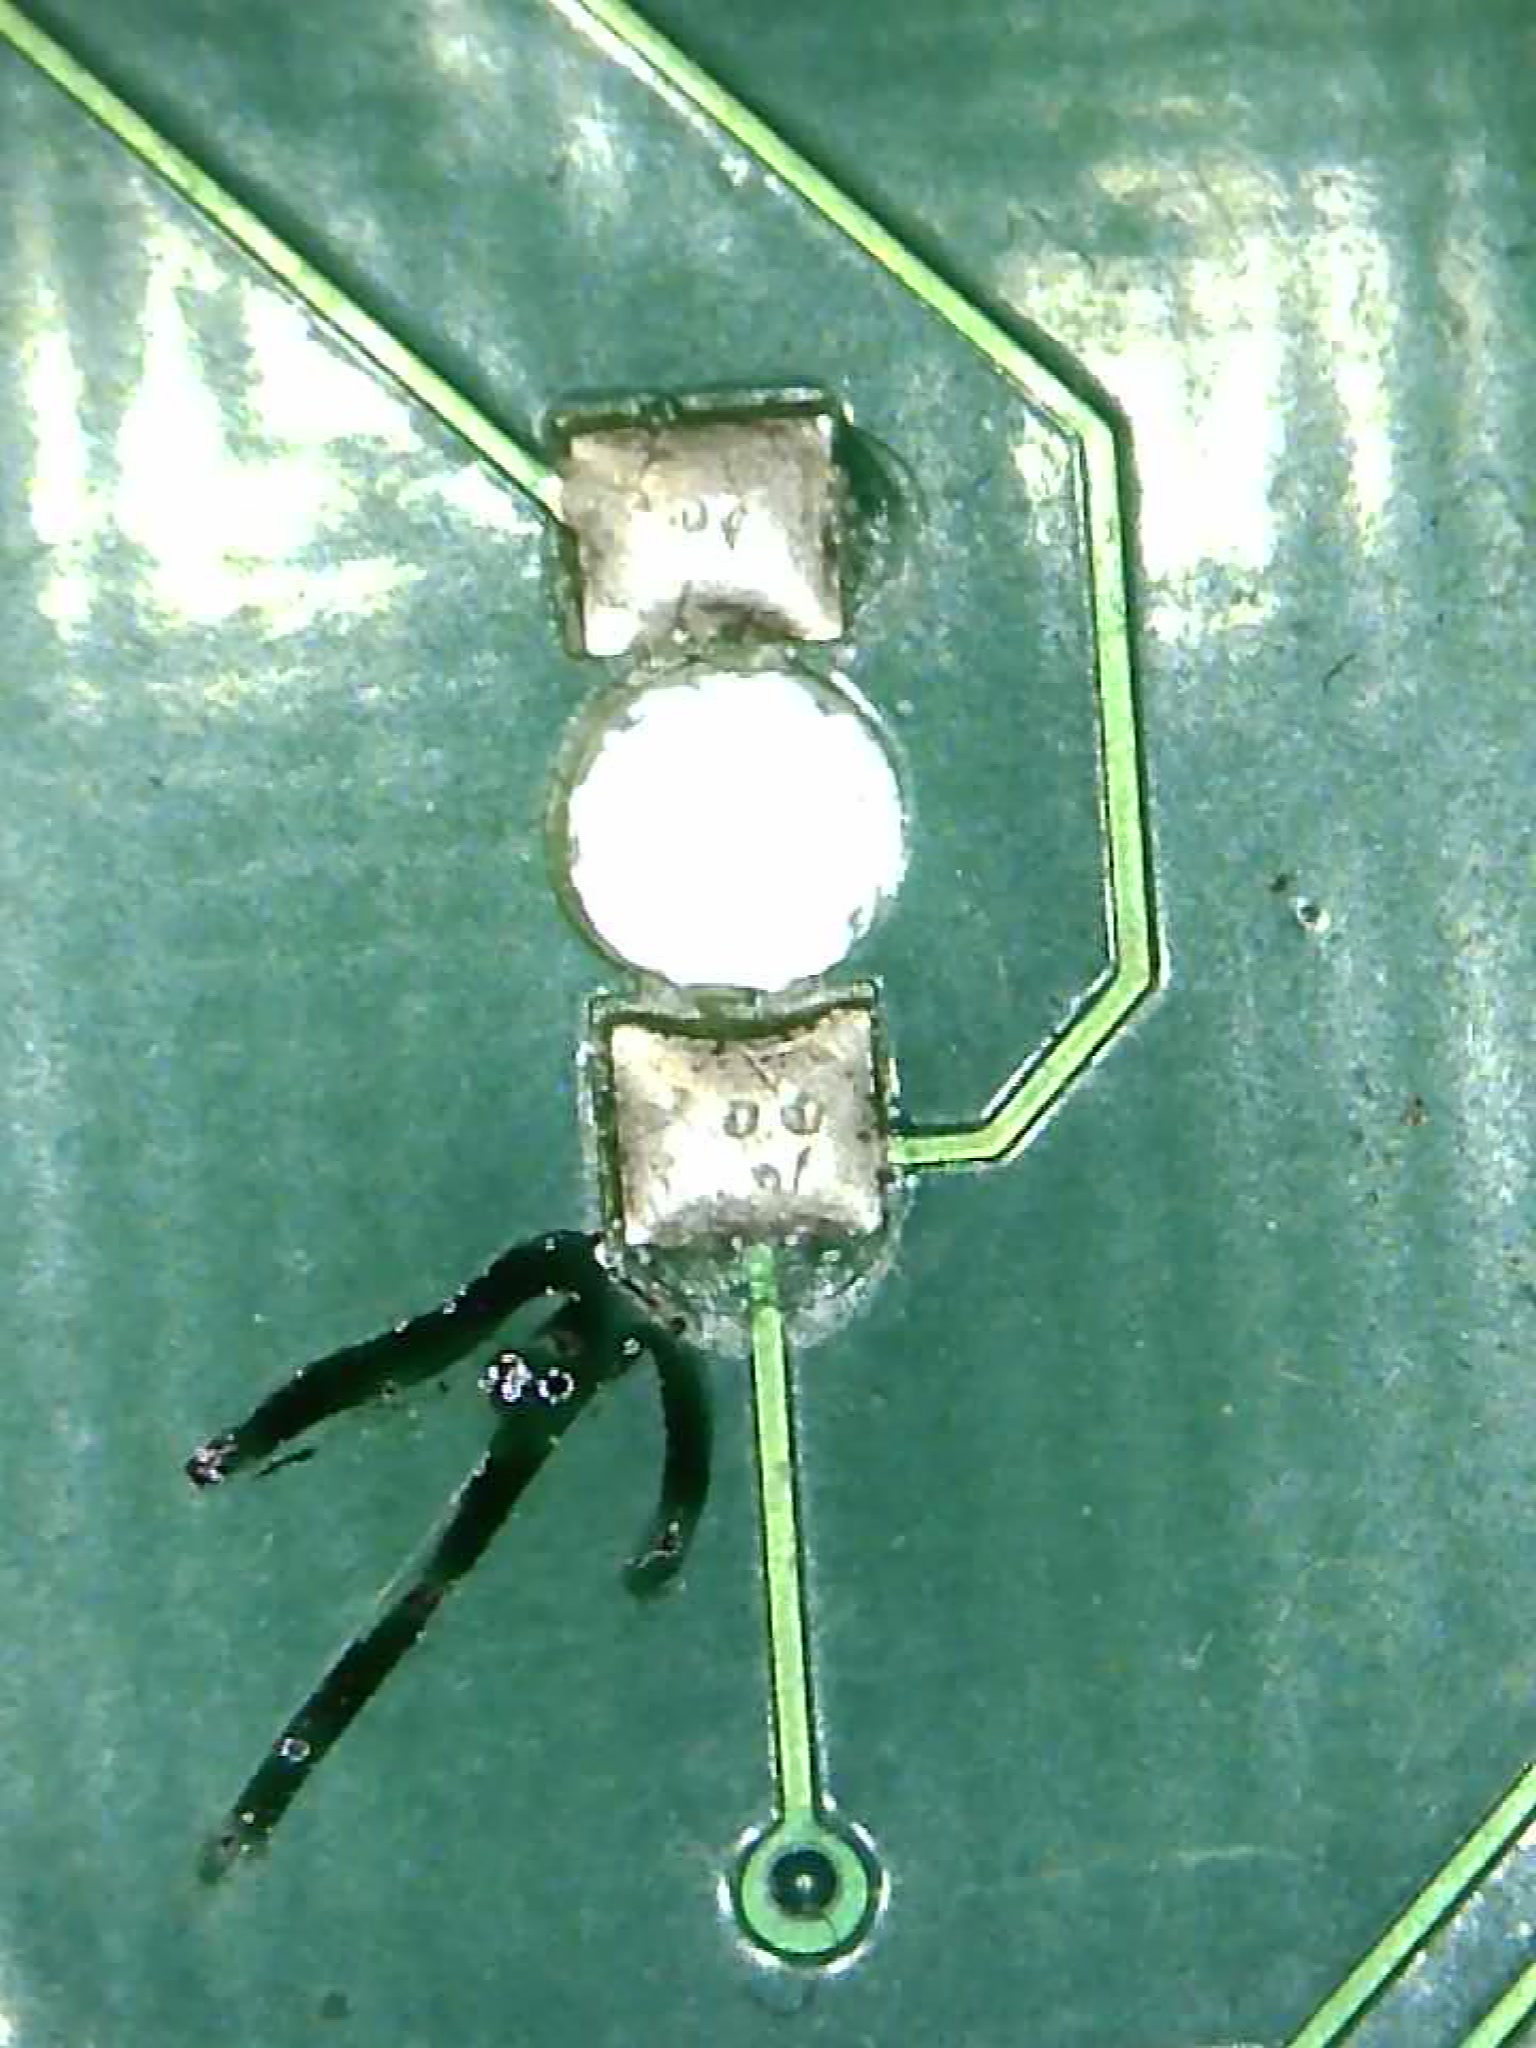
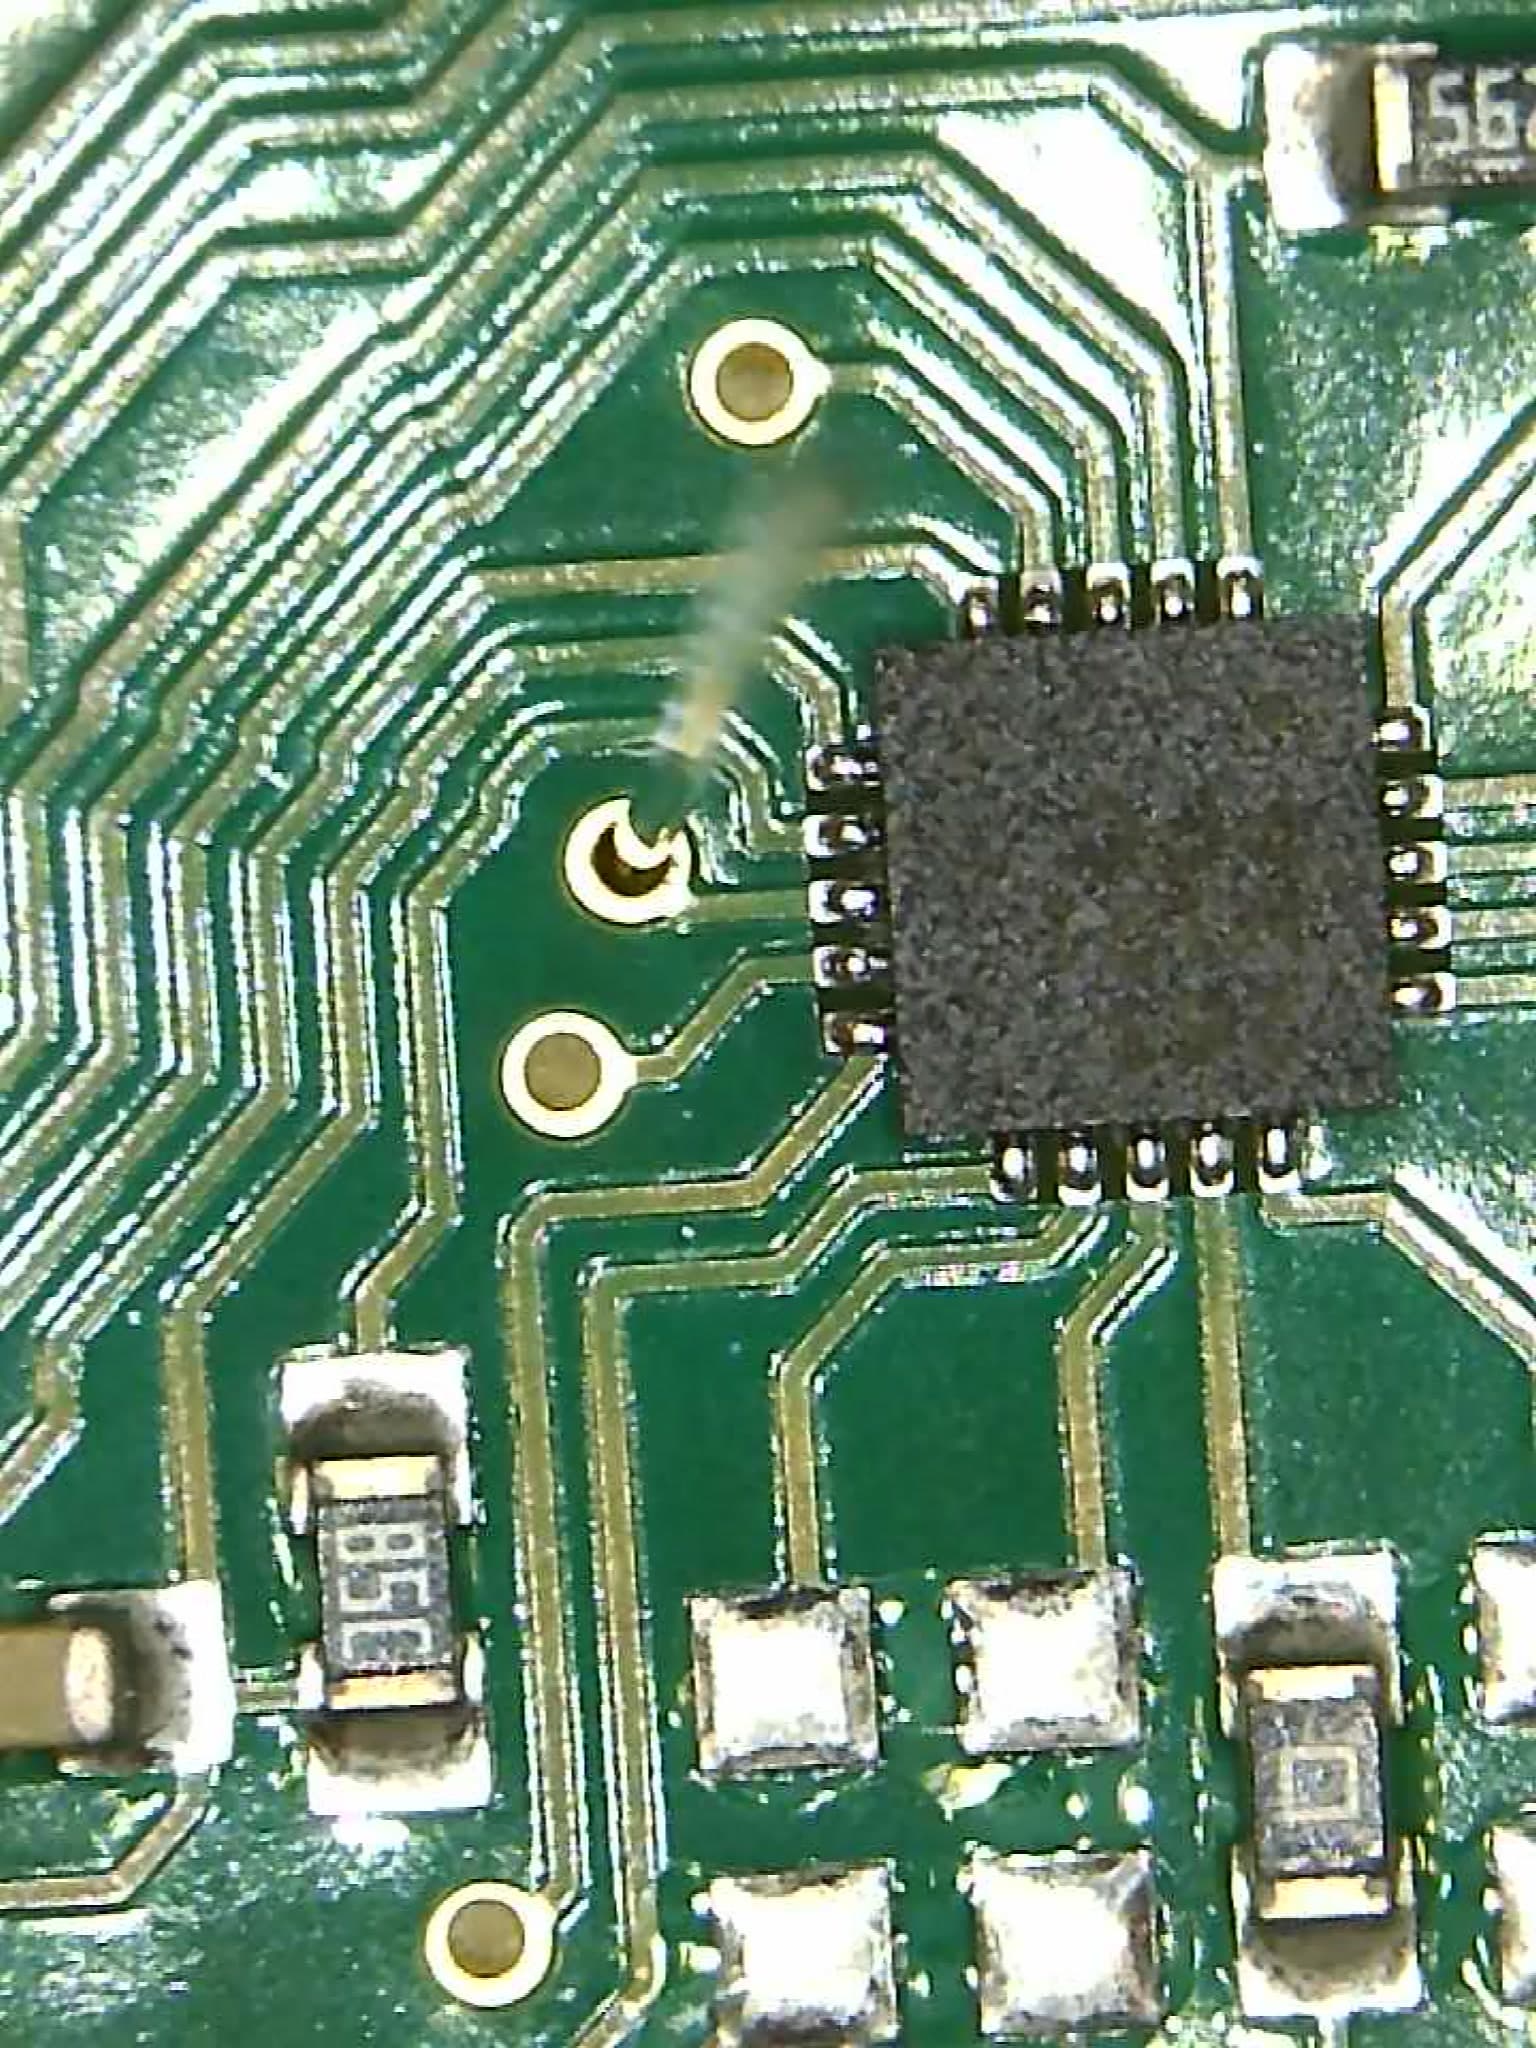
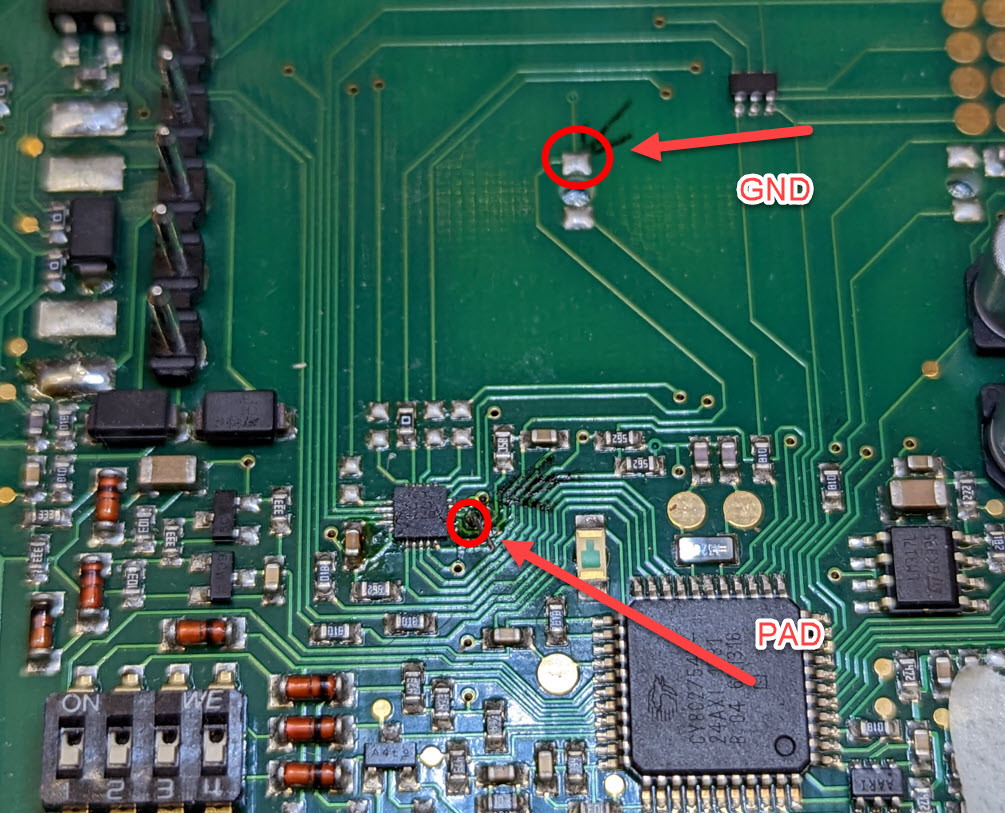
You need to solder two wires as shown in the pics
- One to ground
- One to the Pad
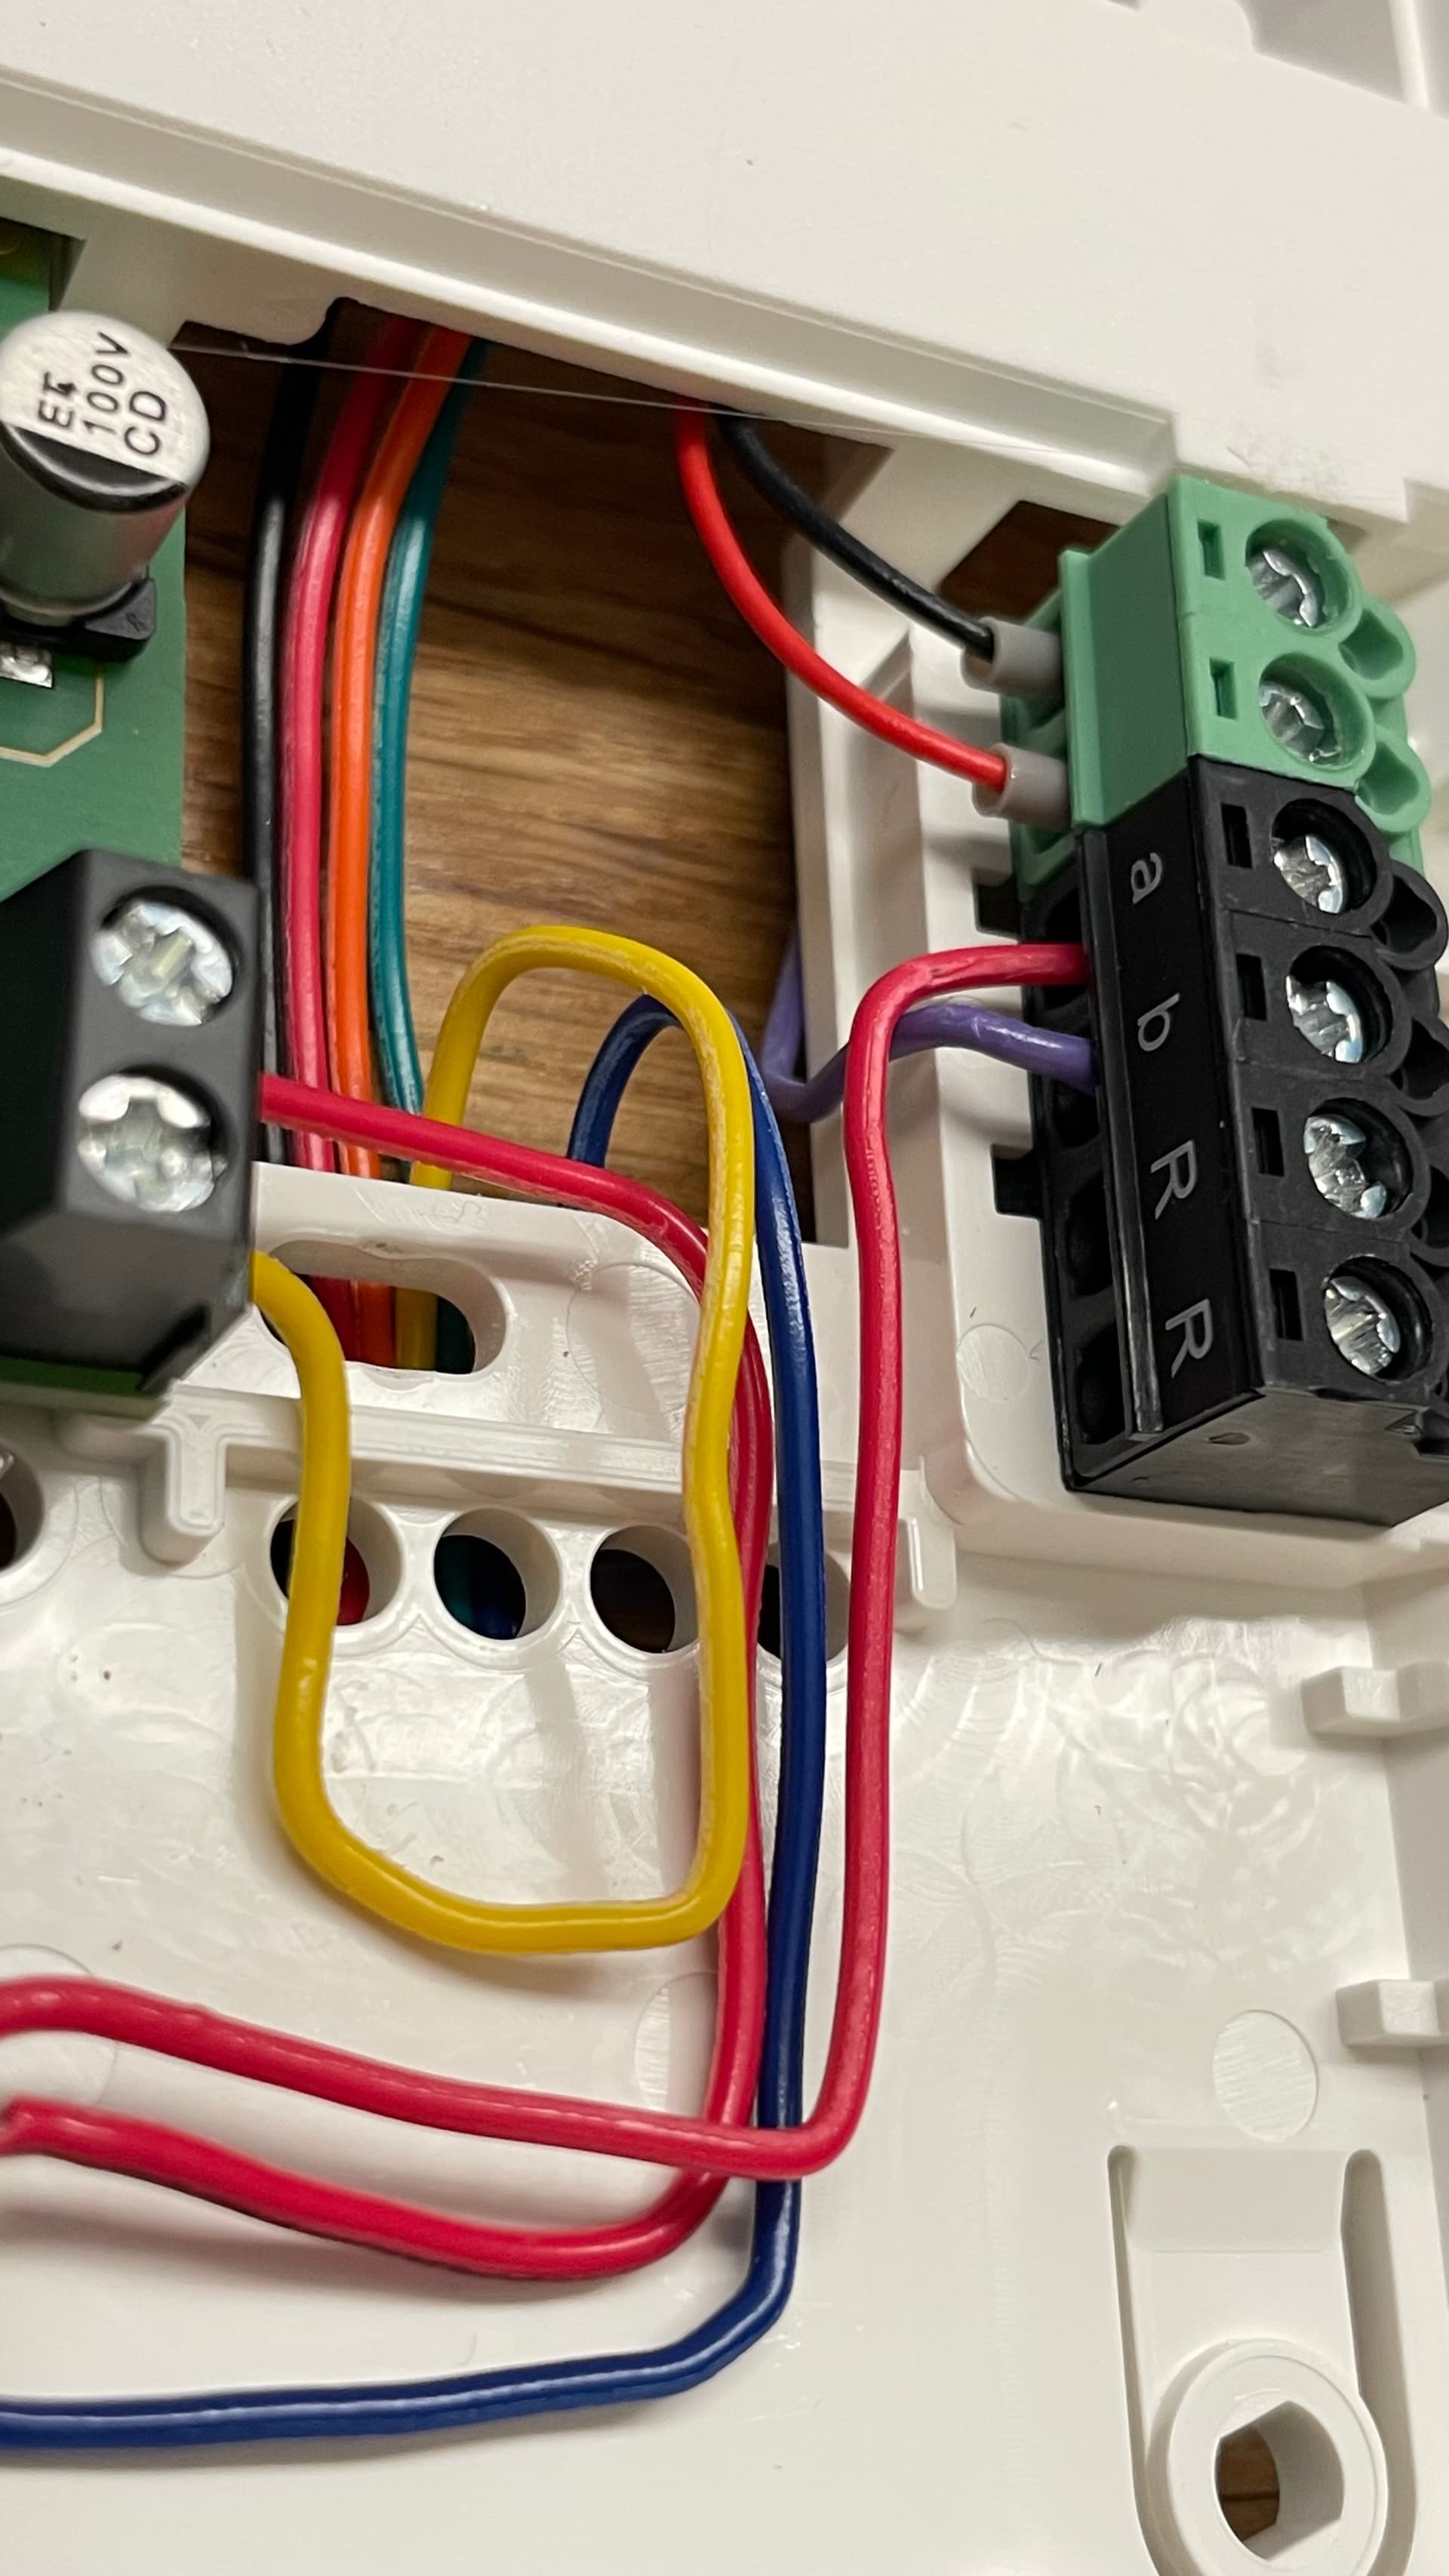
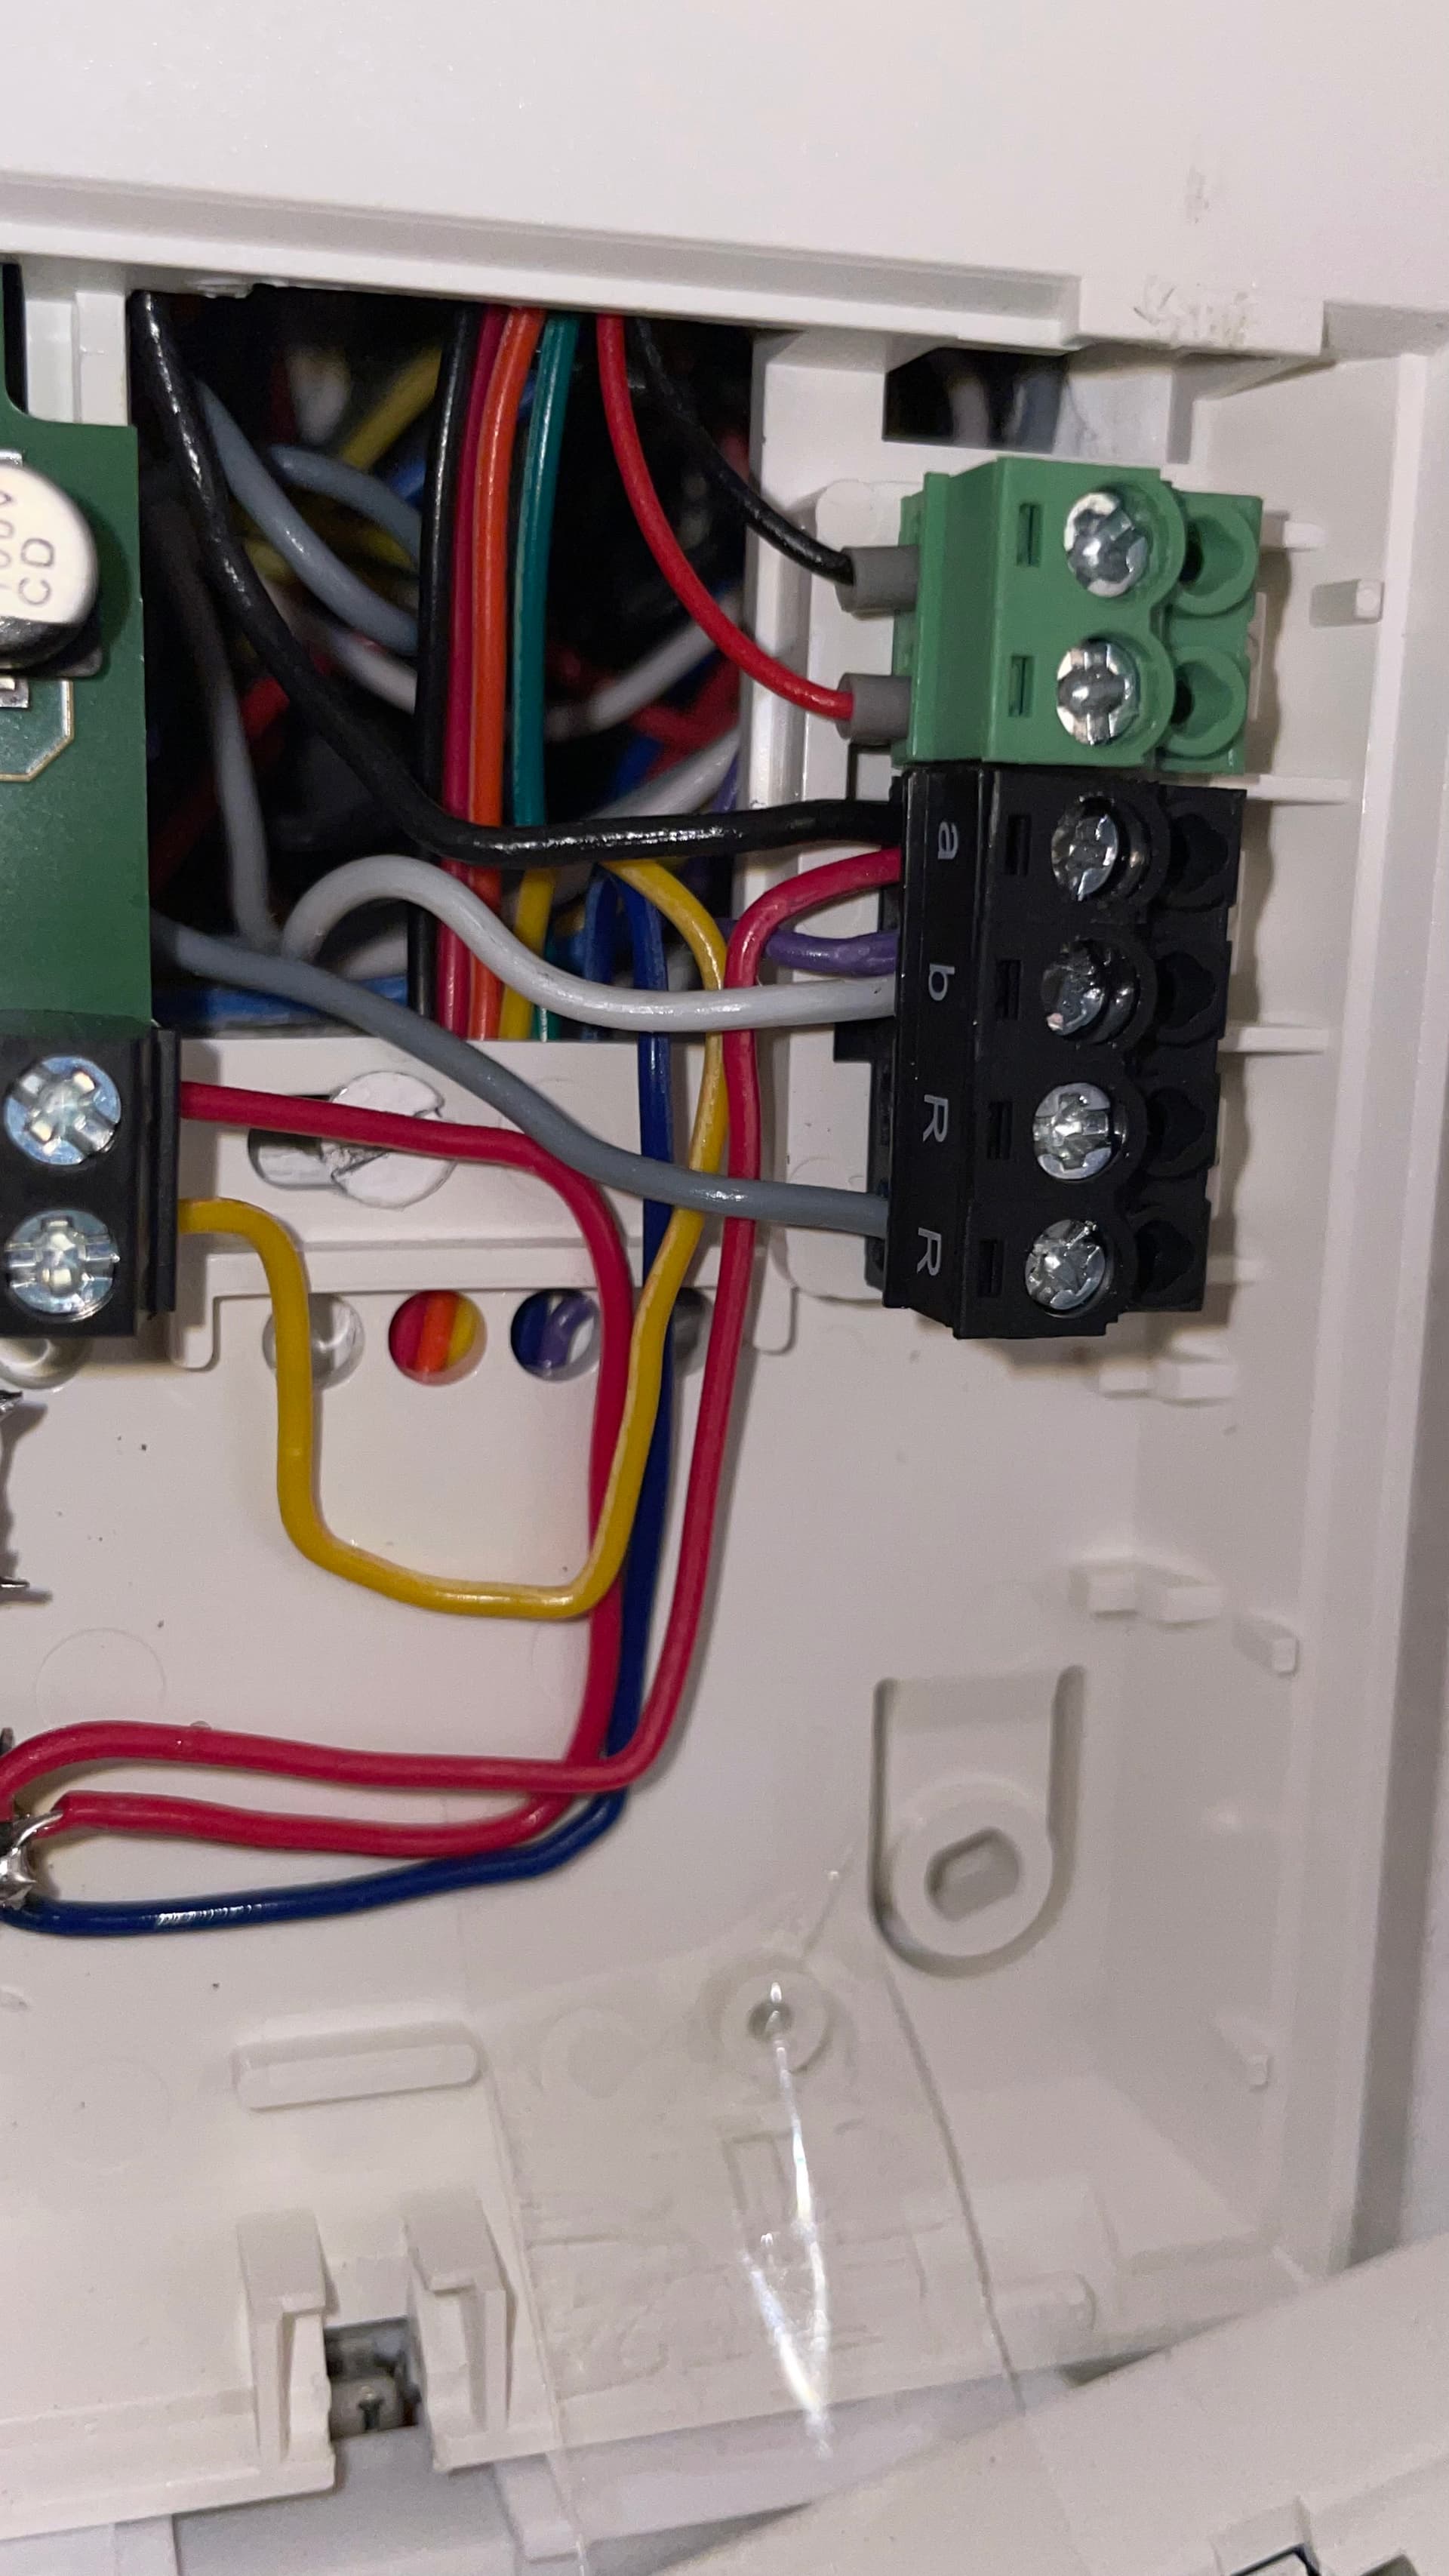
Everything else you can get from the screw clamps of your ELCOM
- BUS+ to K of the RSR 210
- Bus+ to Relai 1
- K to Yellow Nuki Wire (RING)
- Nuki purple to Bus-
- Nuki Blue ro Relai 2
- Relai Opner to Pad
- Relai Opener to GND
If you use my PCB its super simple i already bridged connections and labeled everything accordingly so you just need to follow the Colors and text.