Successful Integration of Tegui TG-374455 with Nuki Opener

Hello,
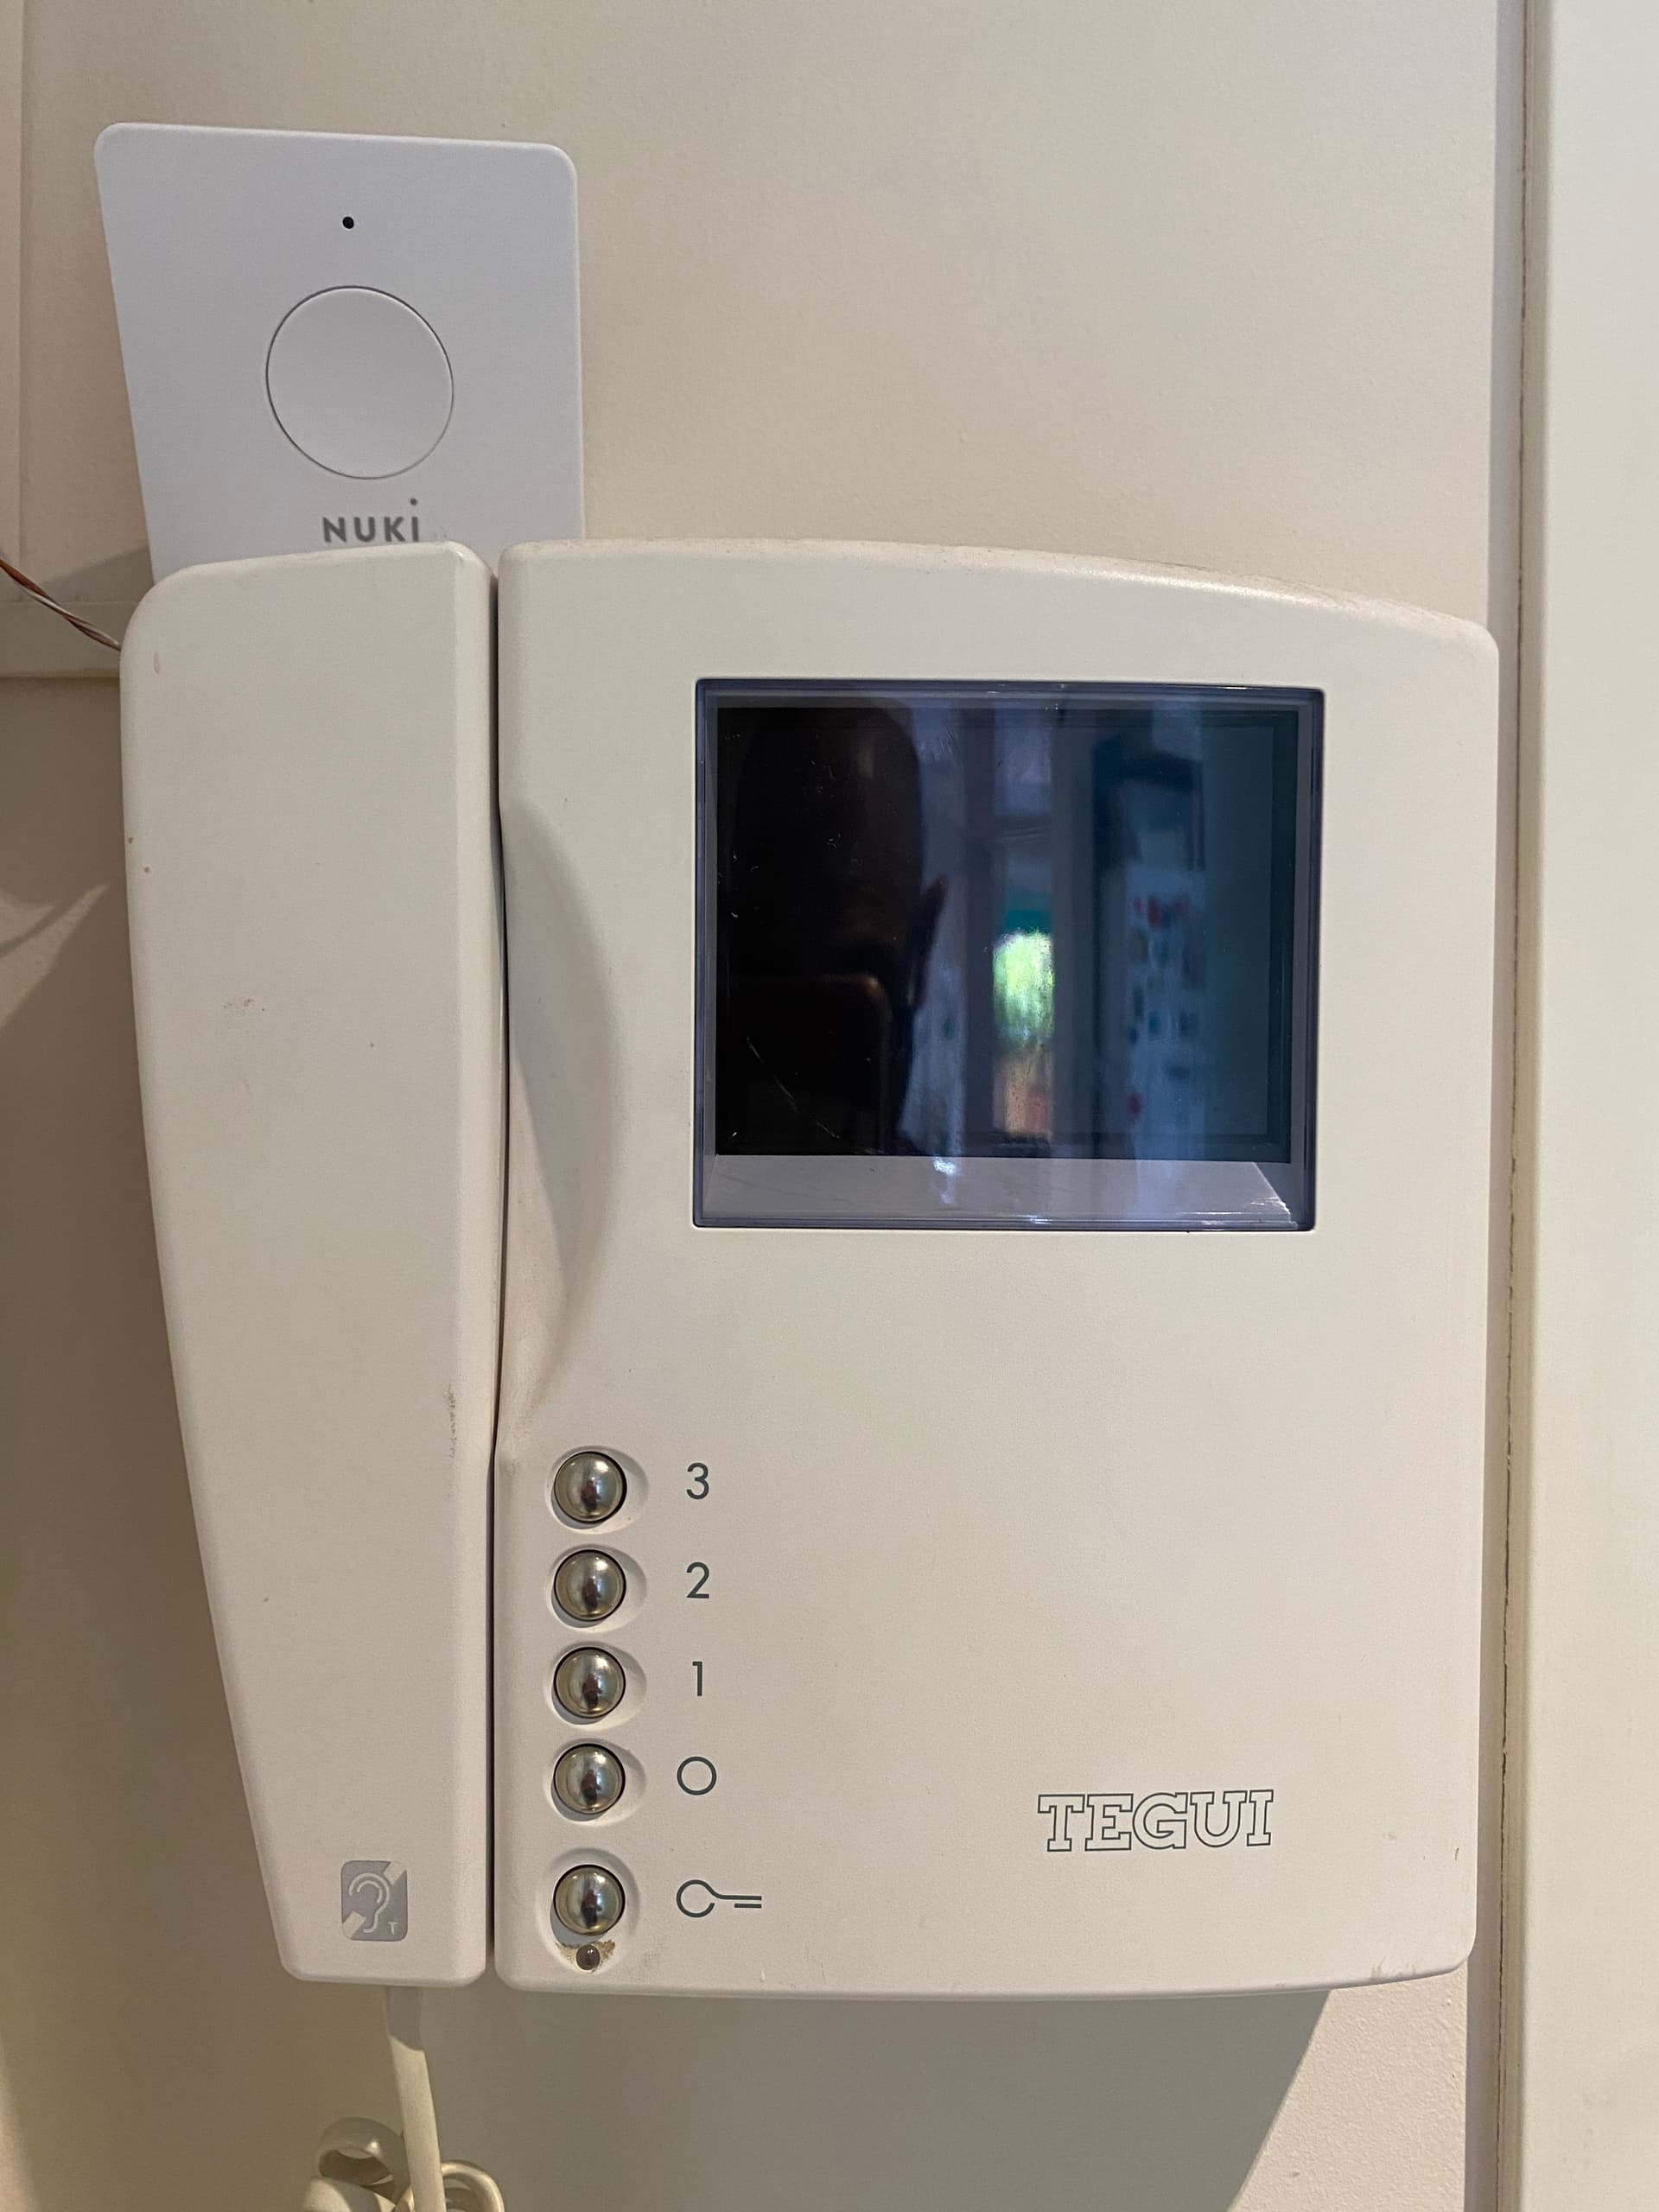
I wanted to share my recent success in integrating the Tegui TG-374455 bus intercom with the Nuki Opener. After extensive research and experimentation, I’ve managed to establish a functional connection between the two devices. I believe this information could be valuable to others facing similar challenges.


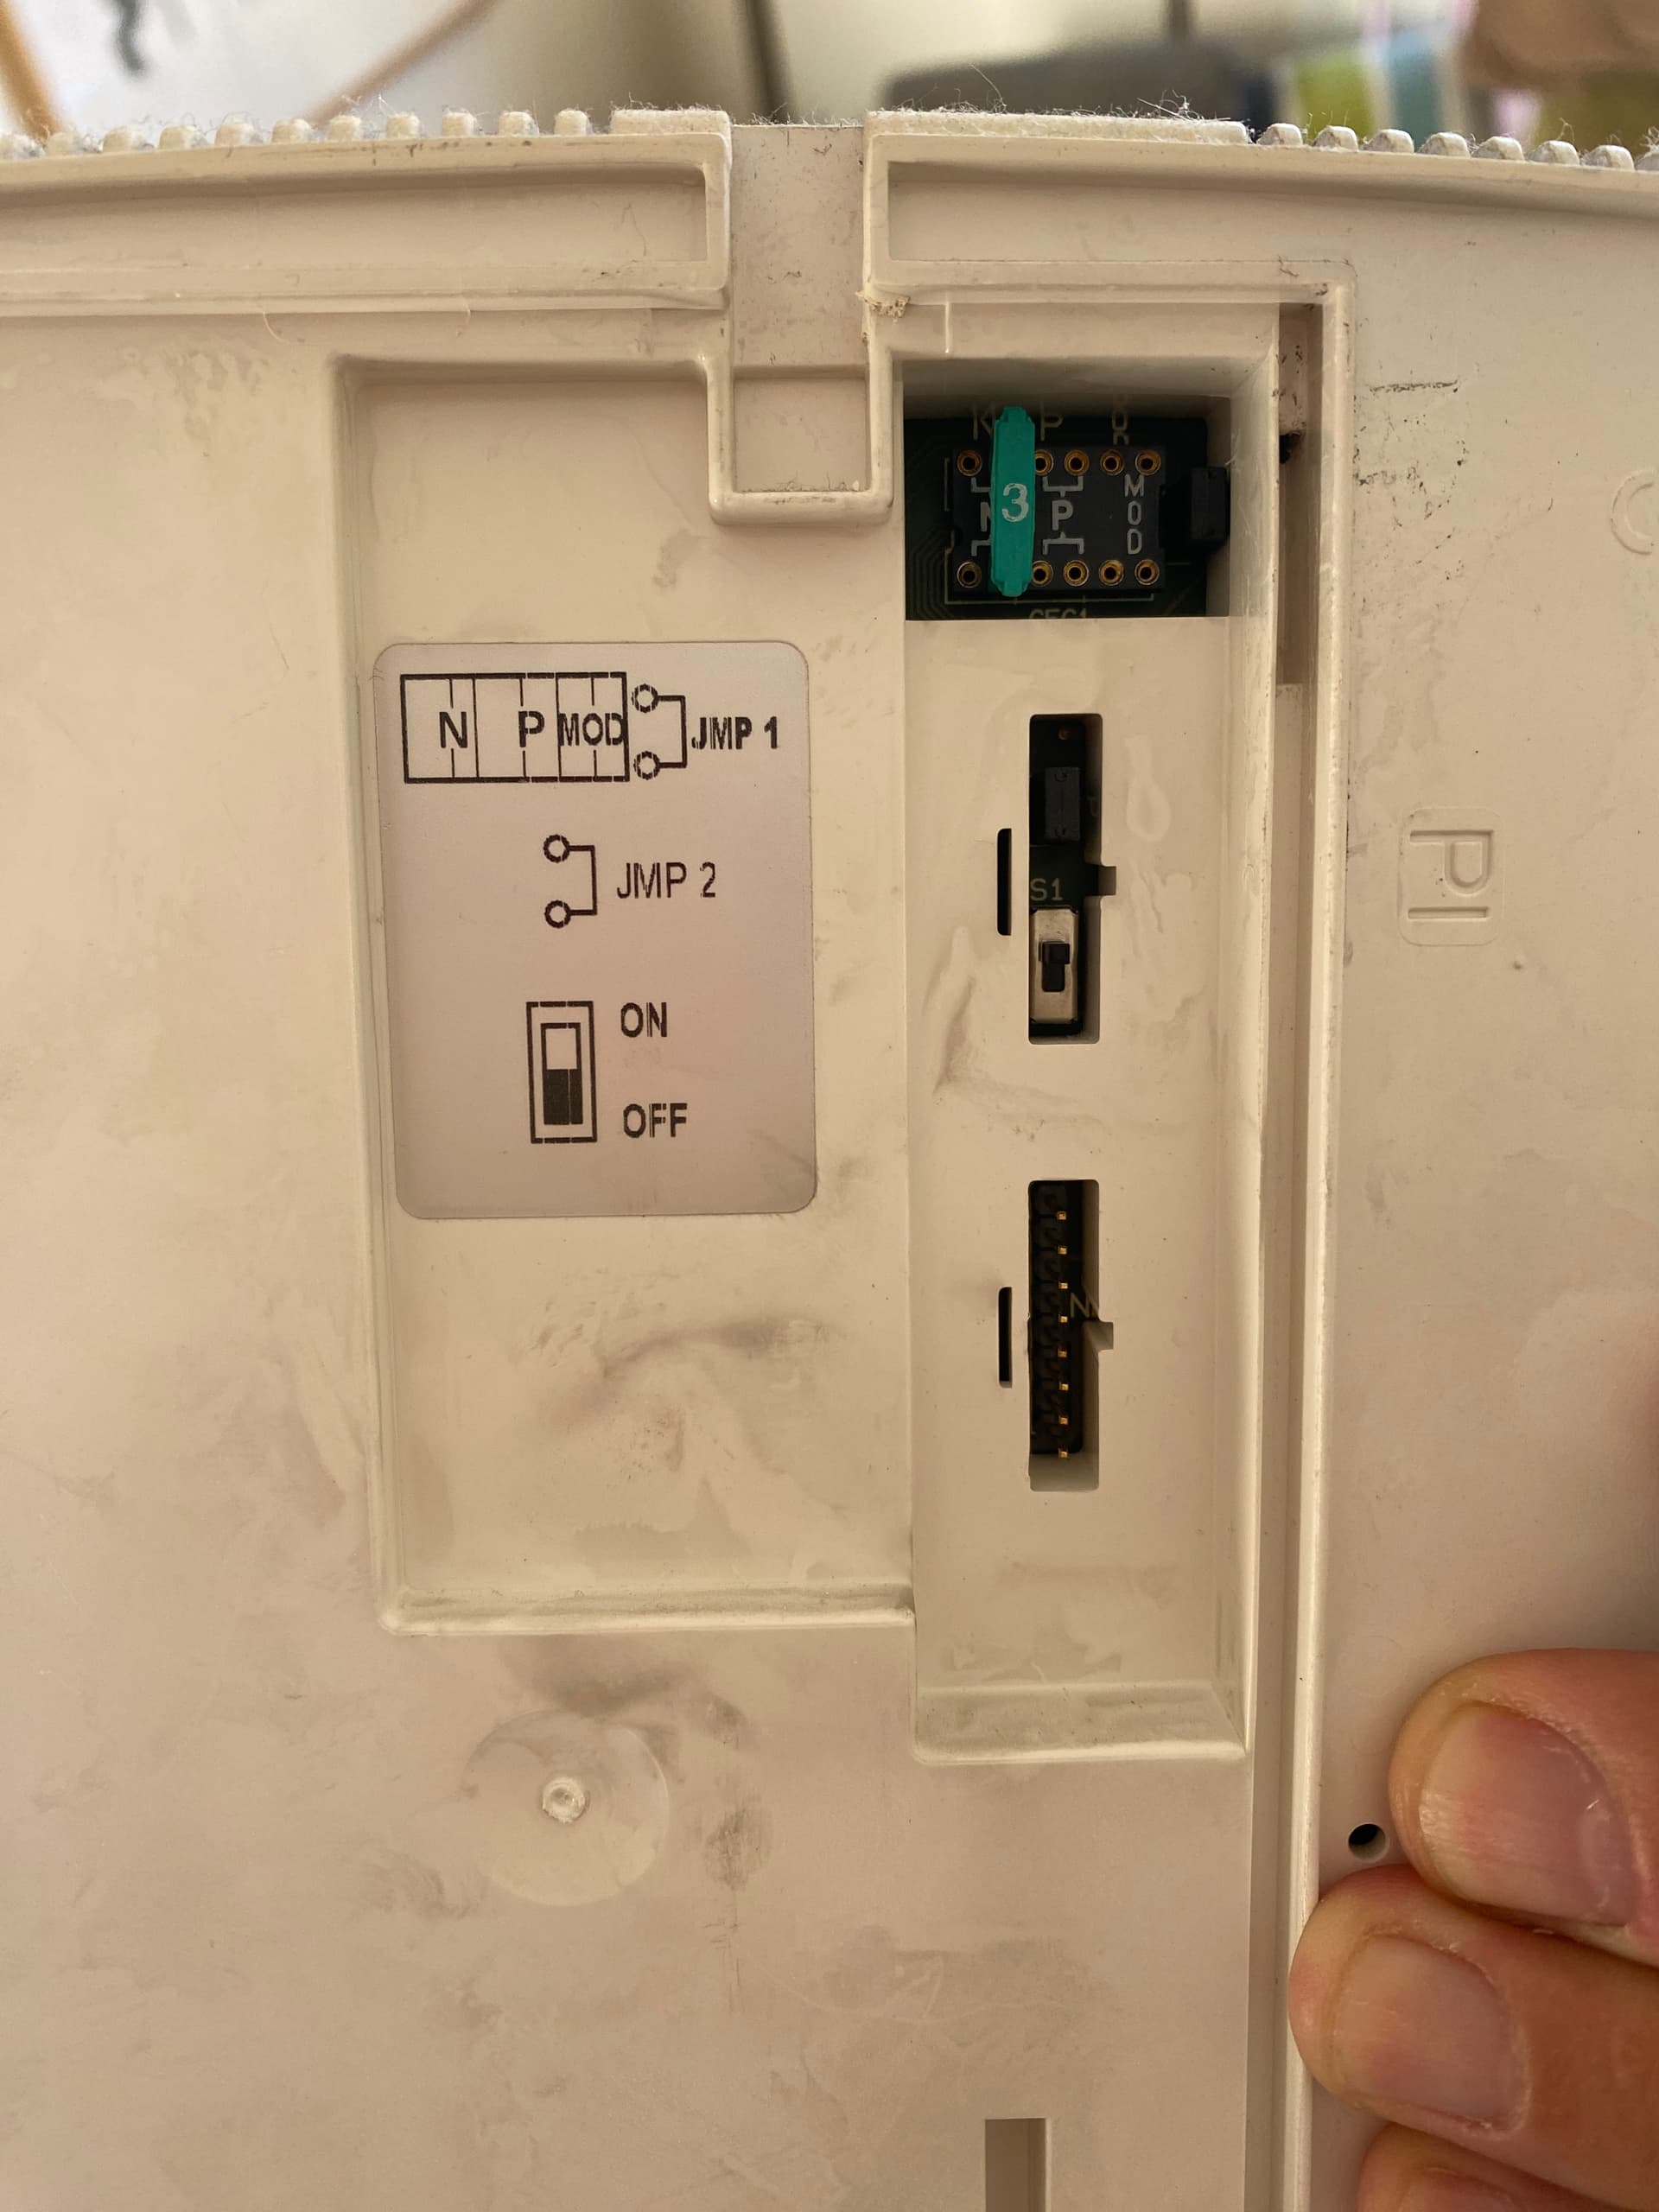
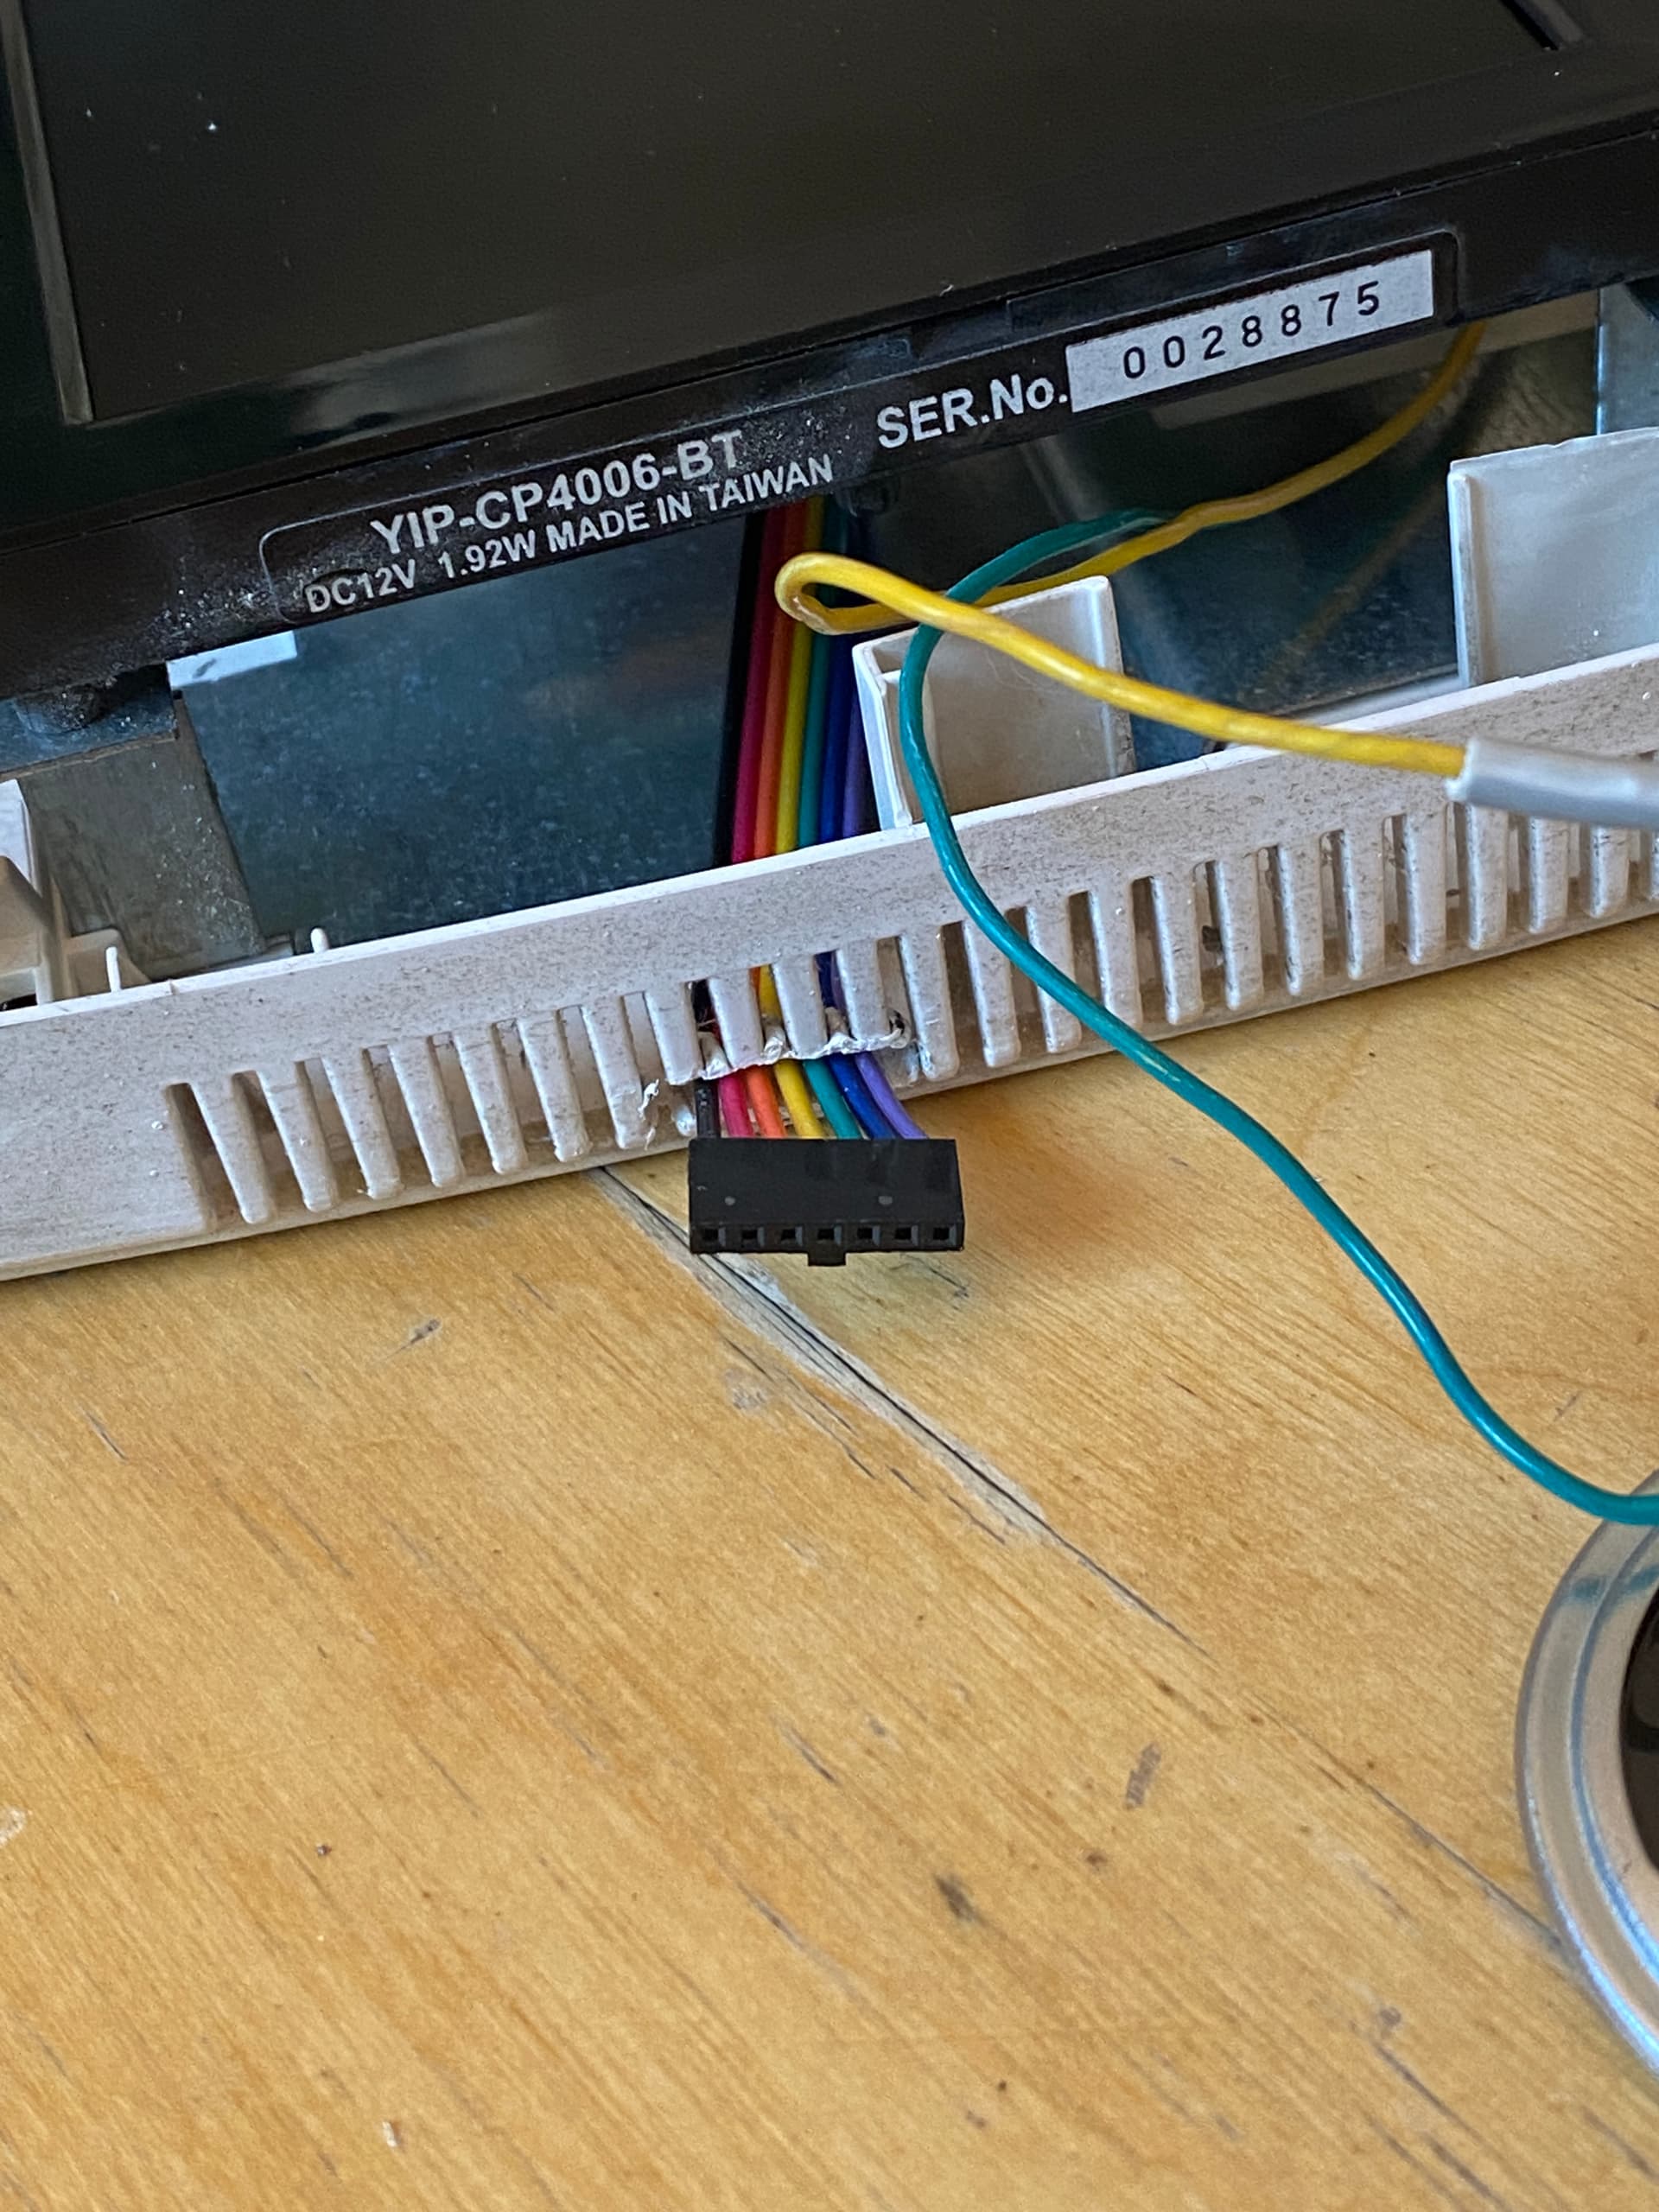
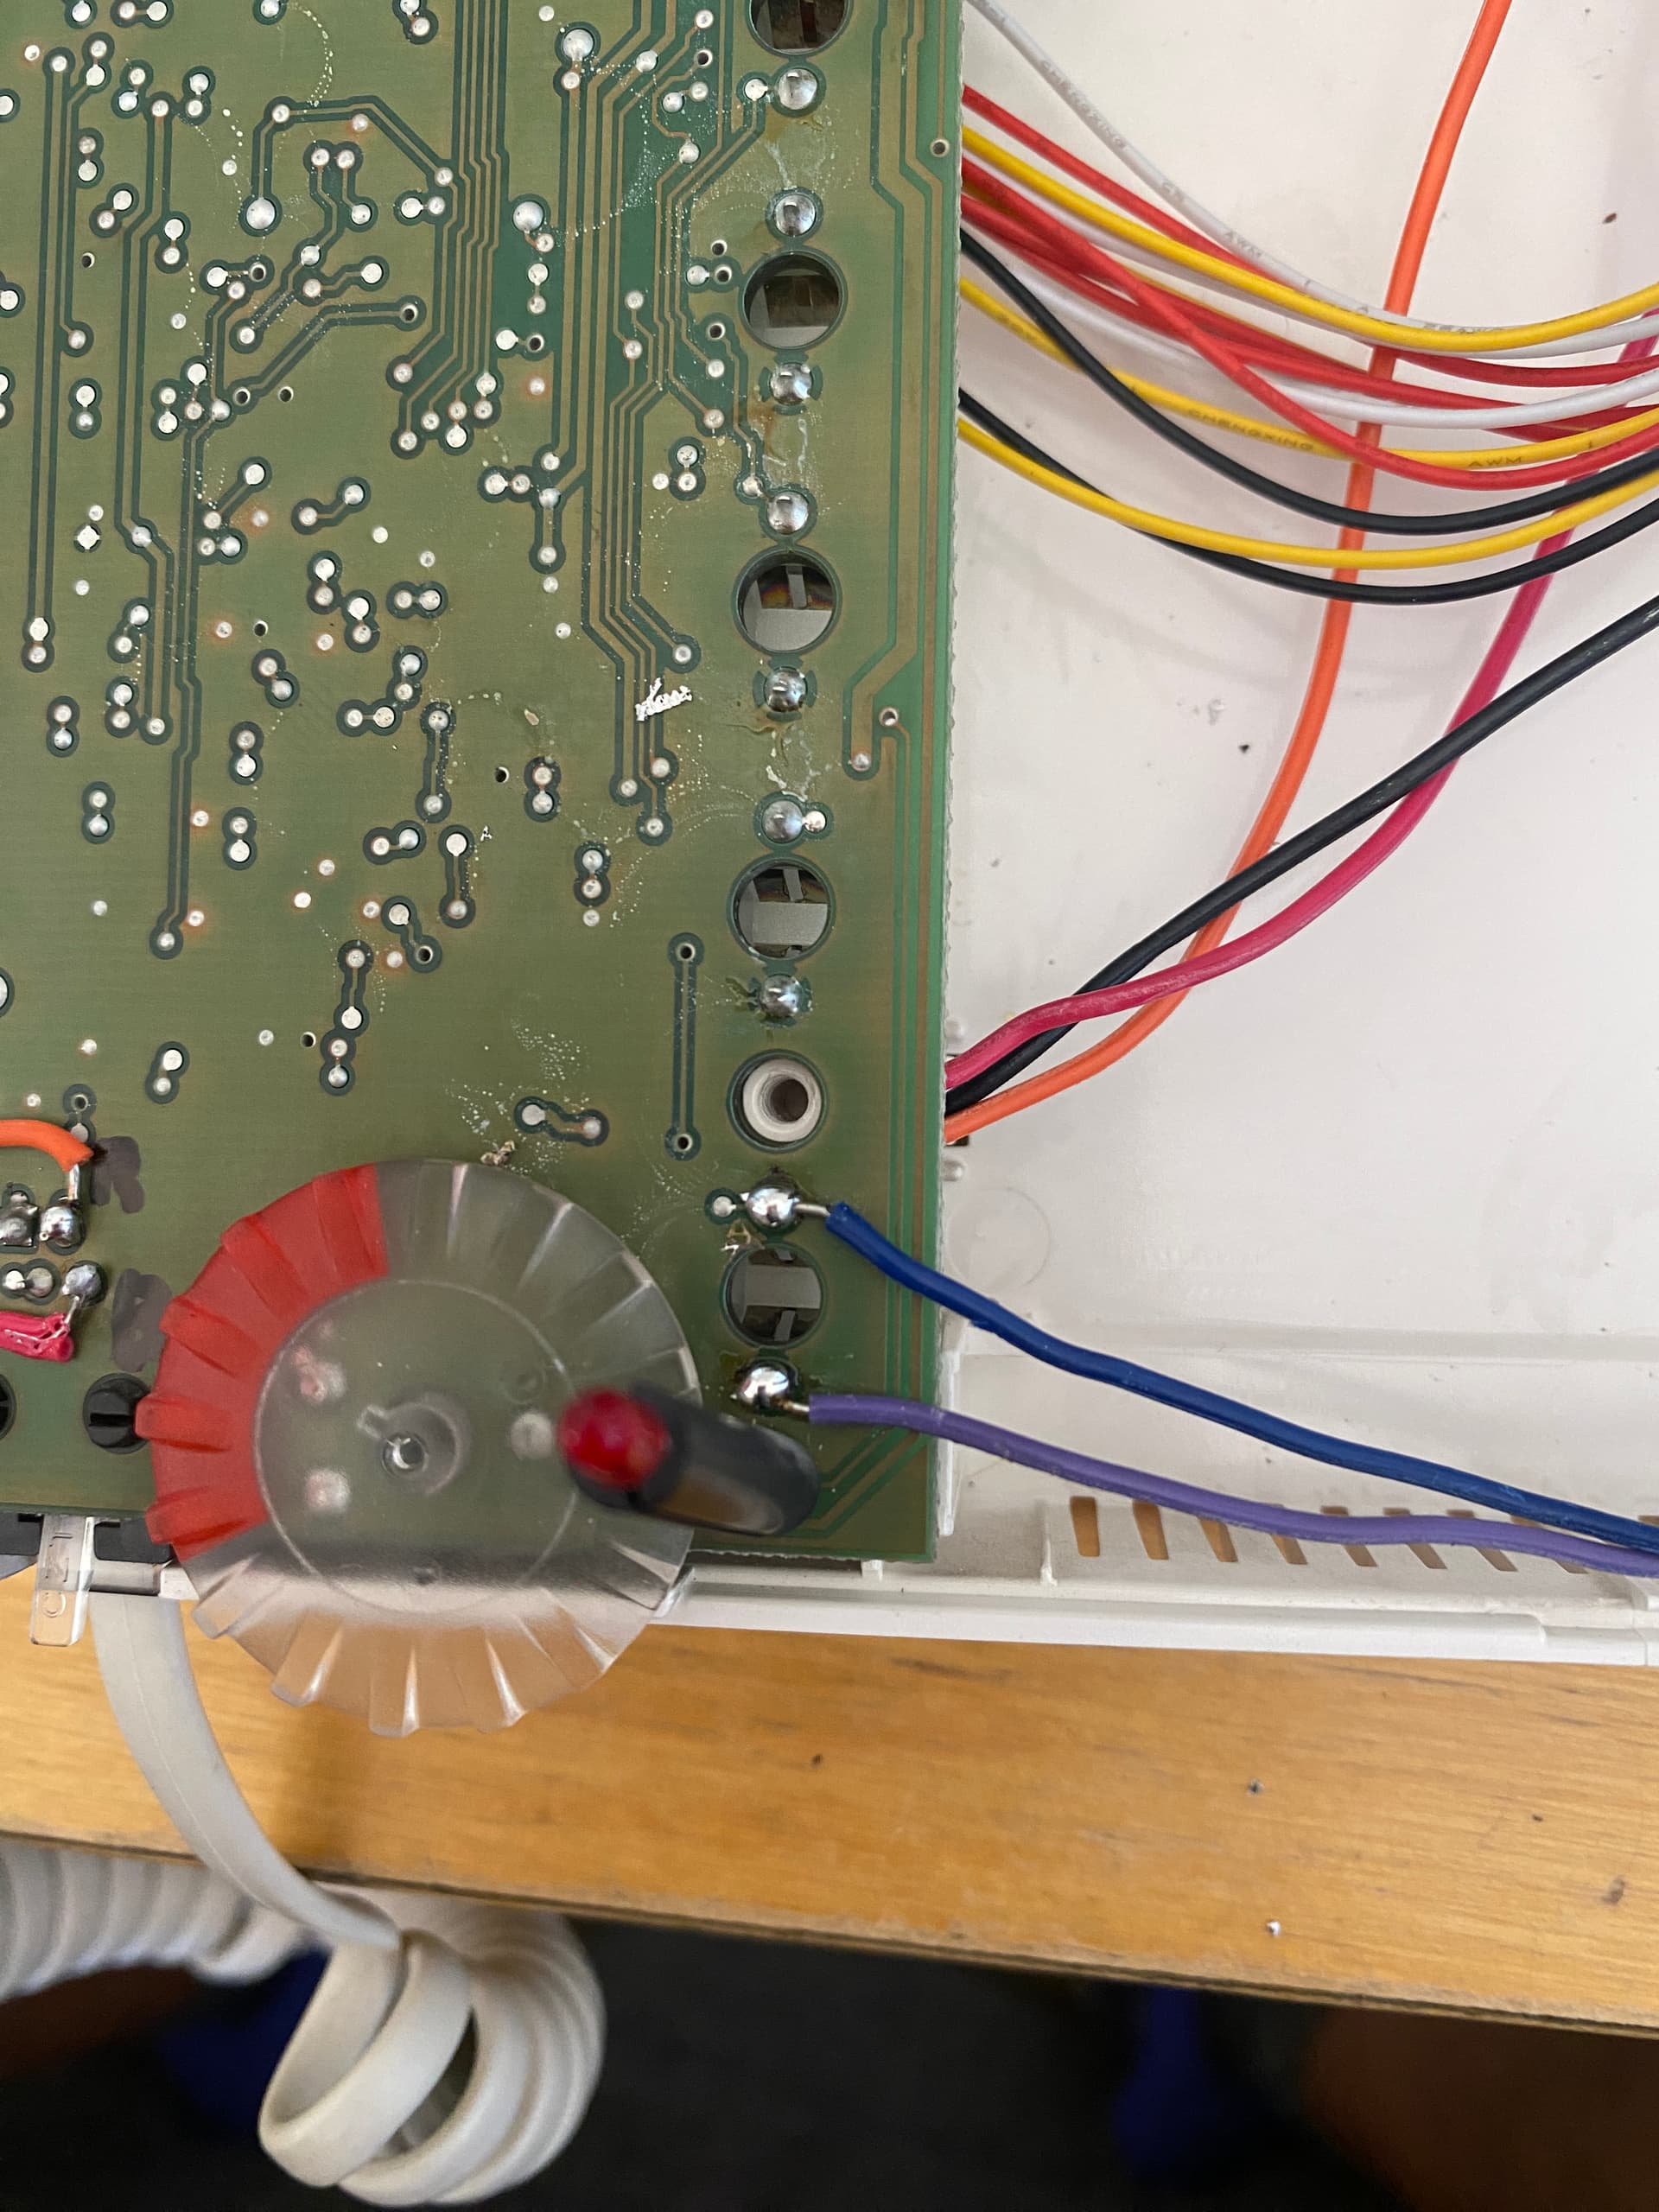
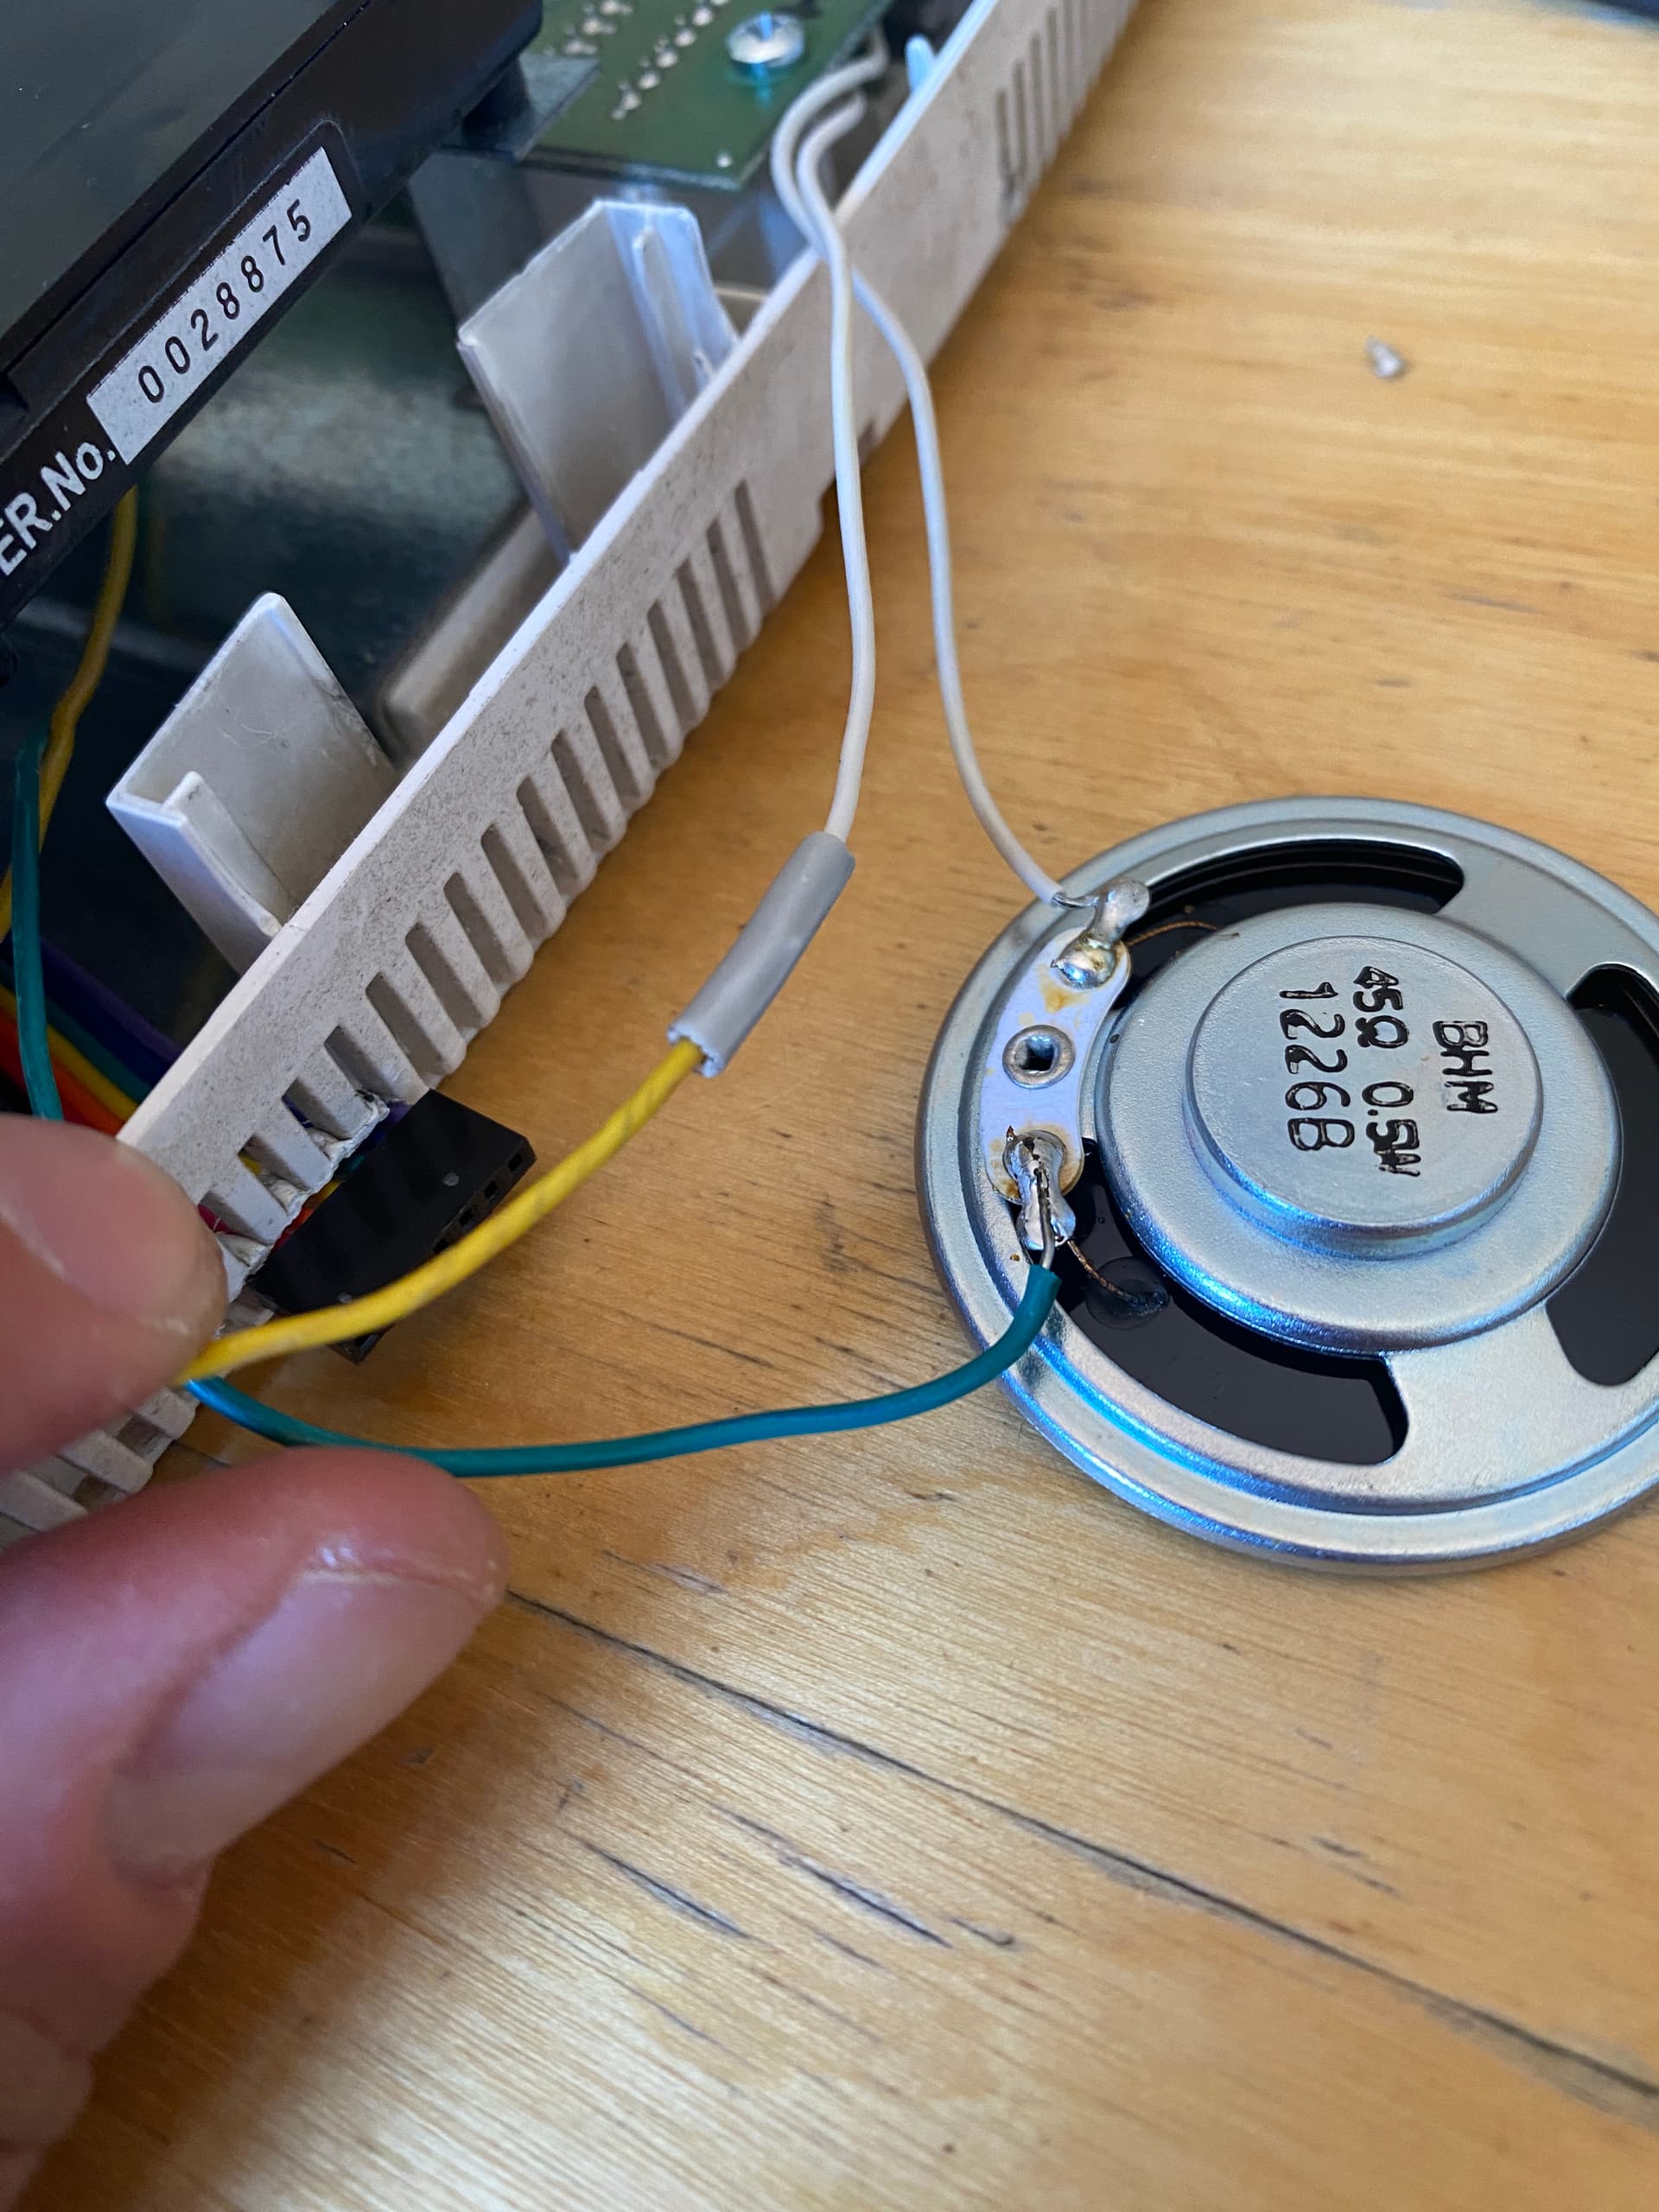
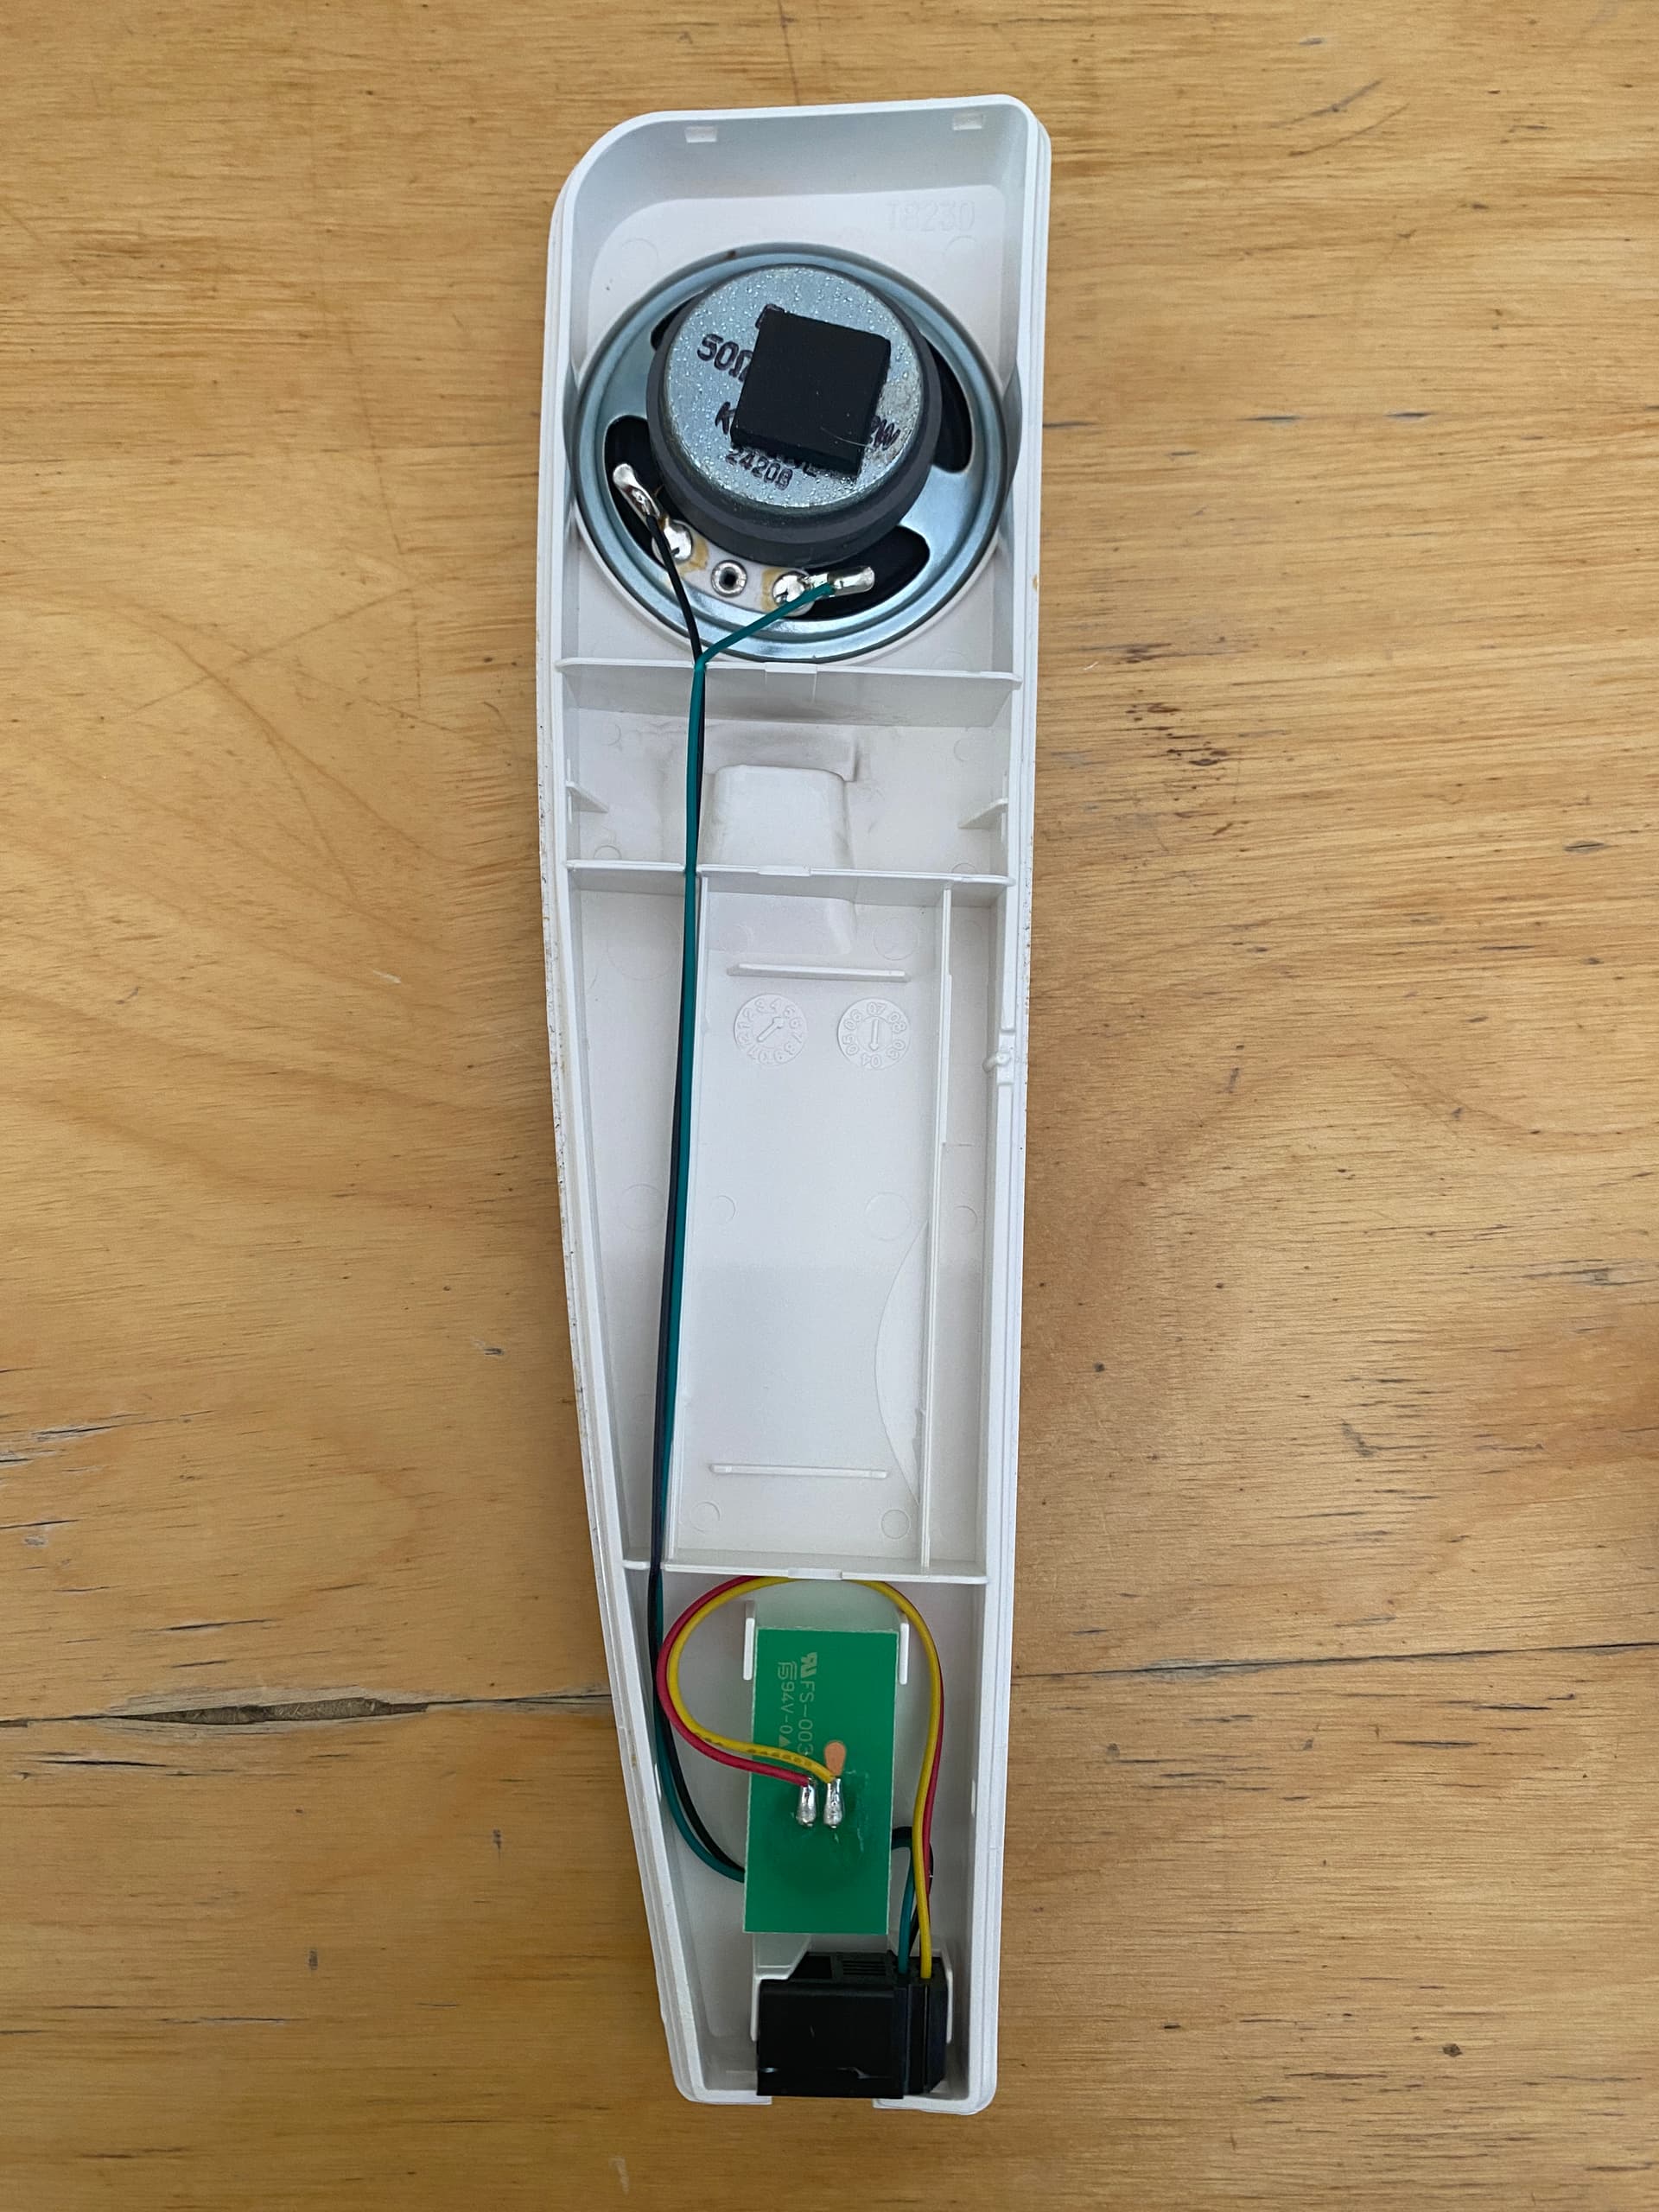
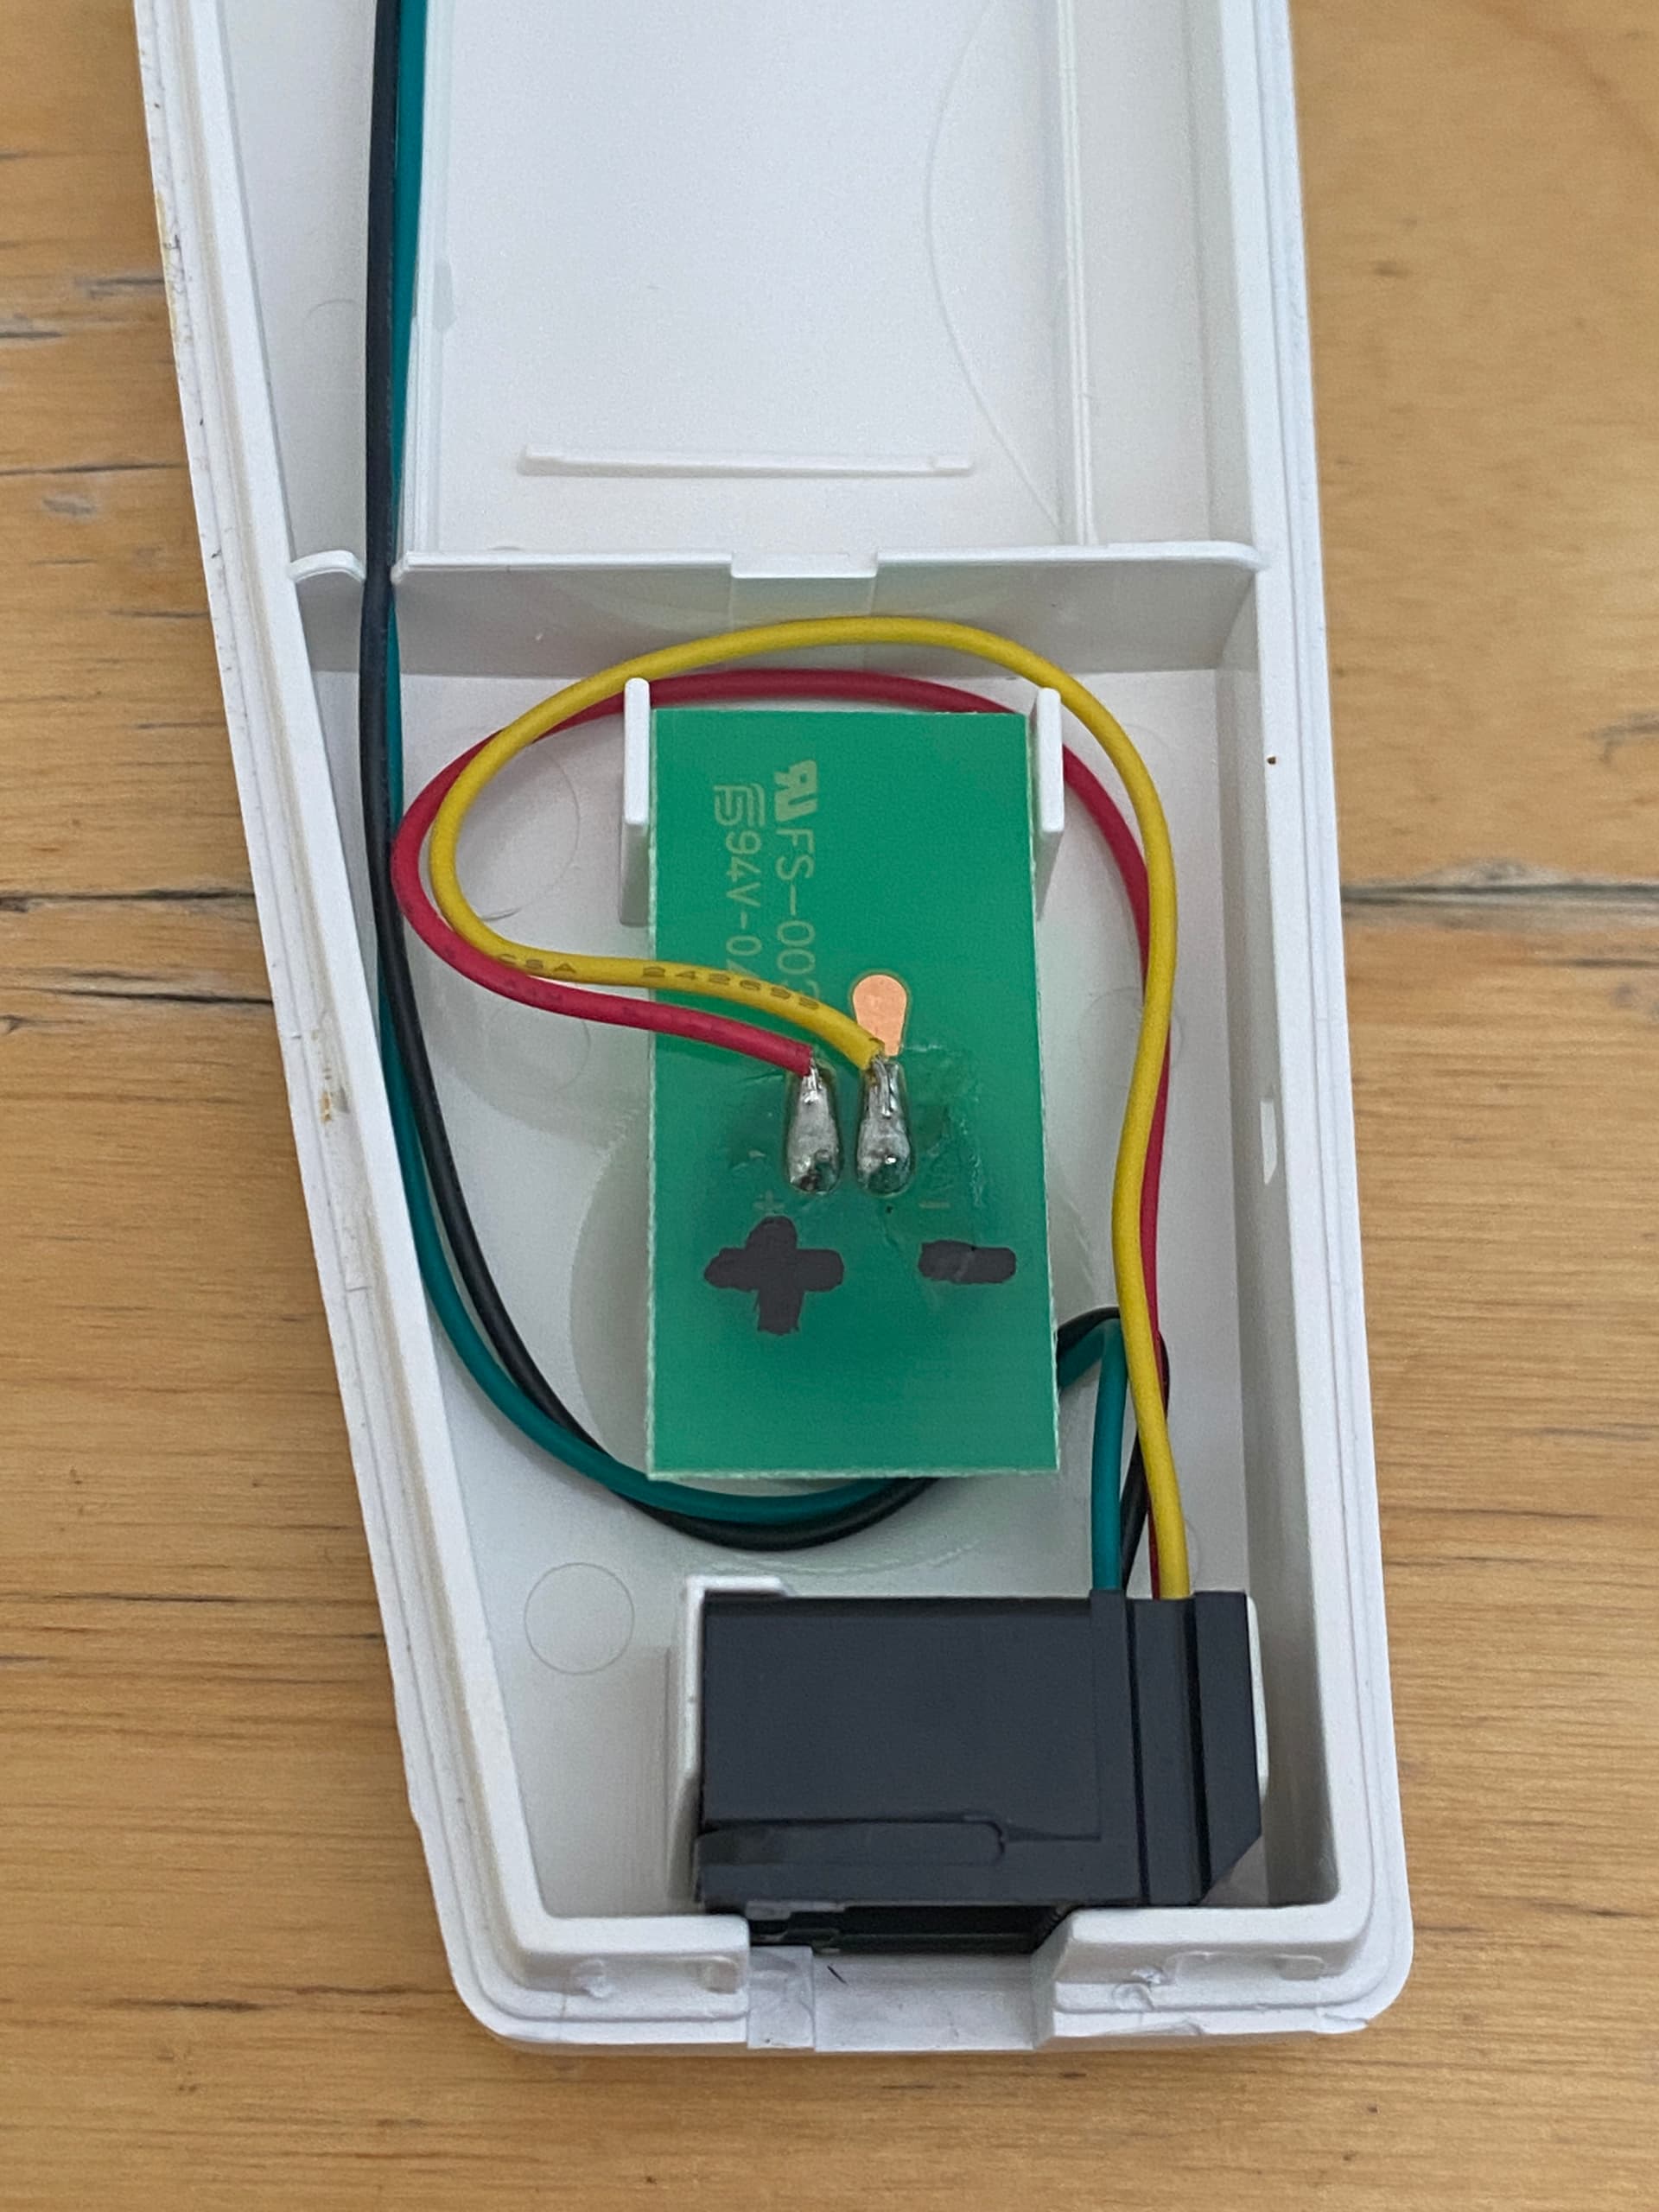
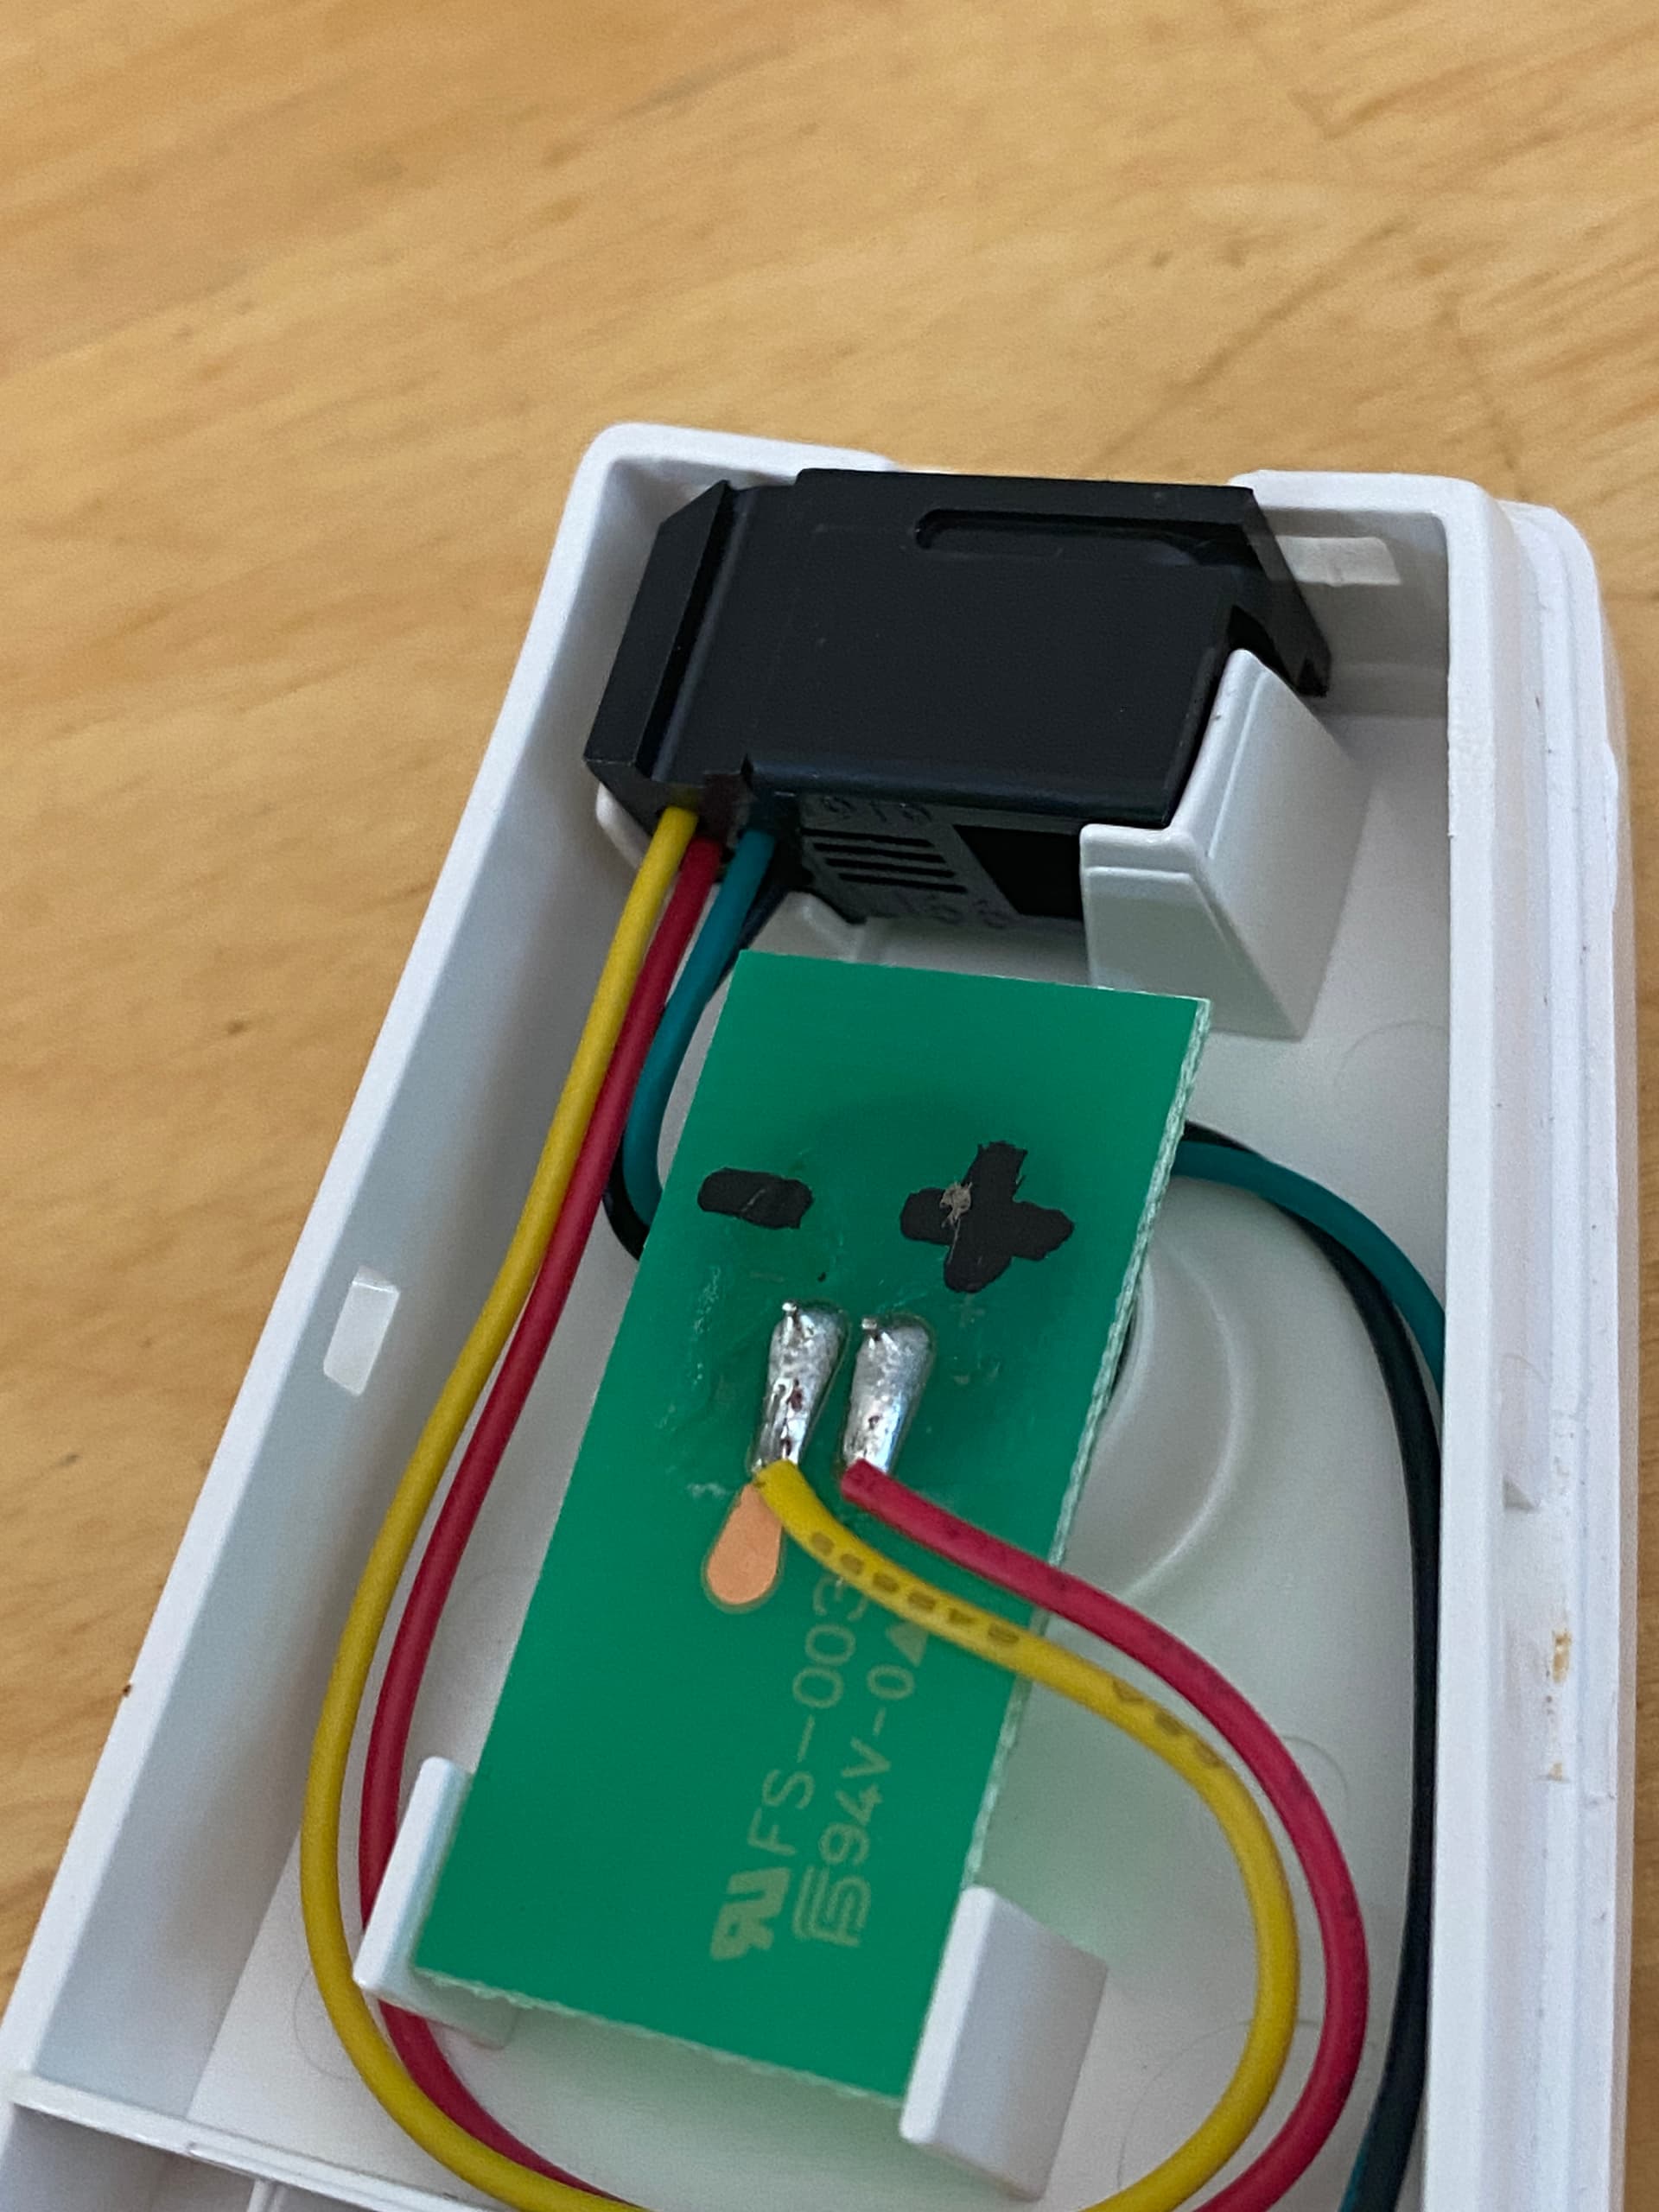
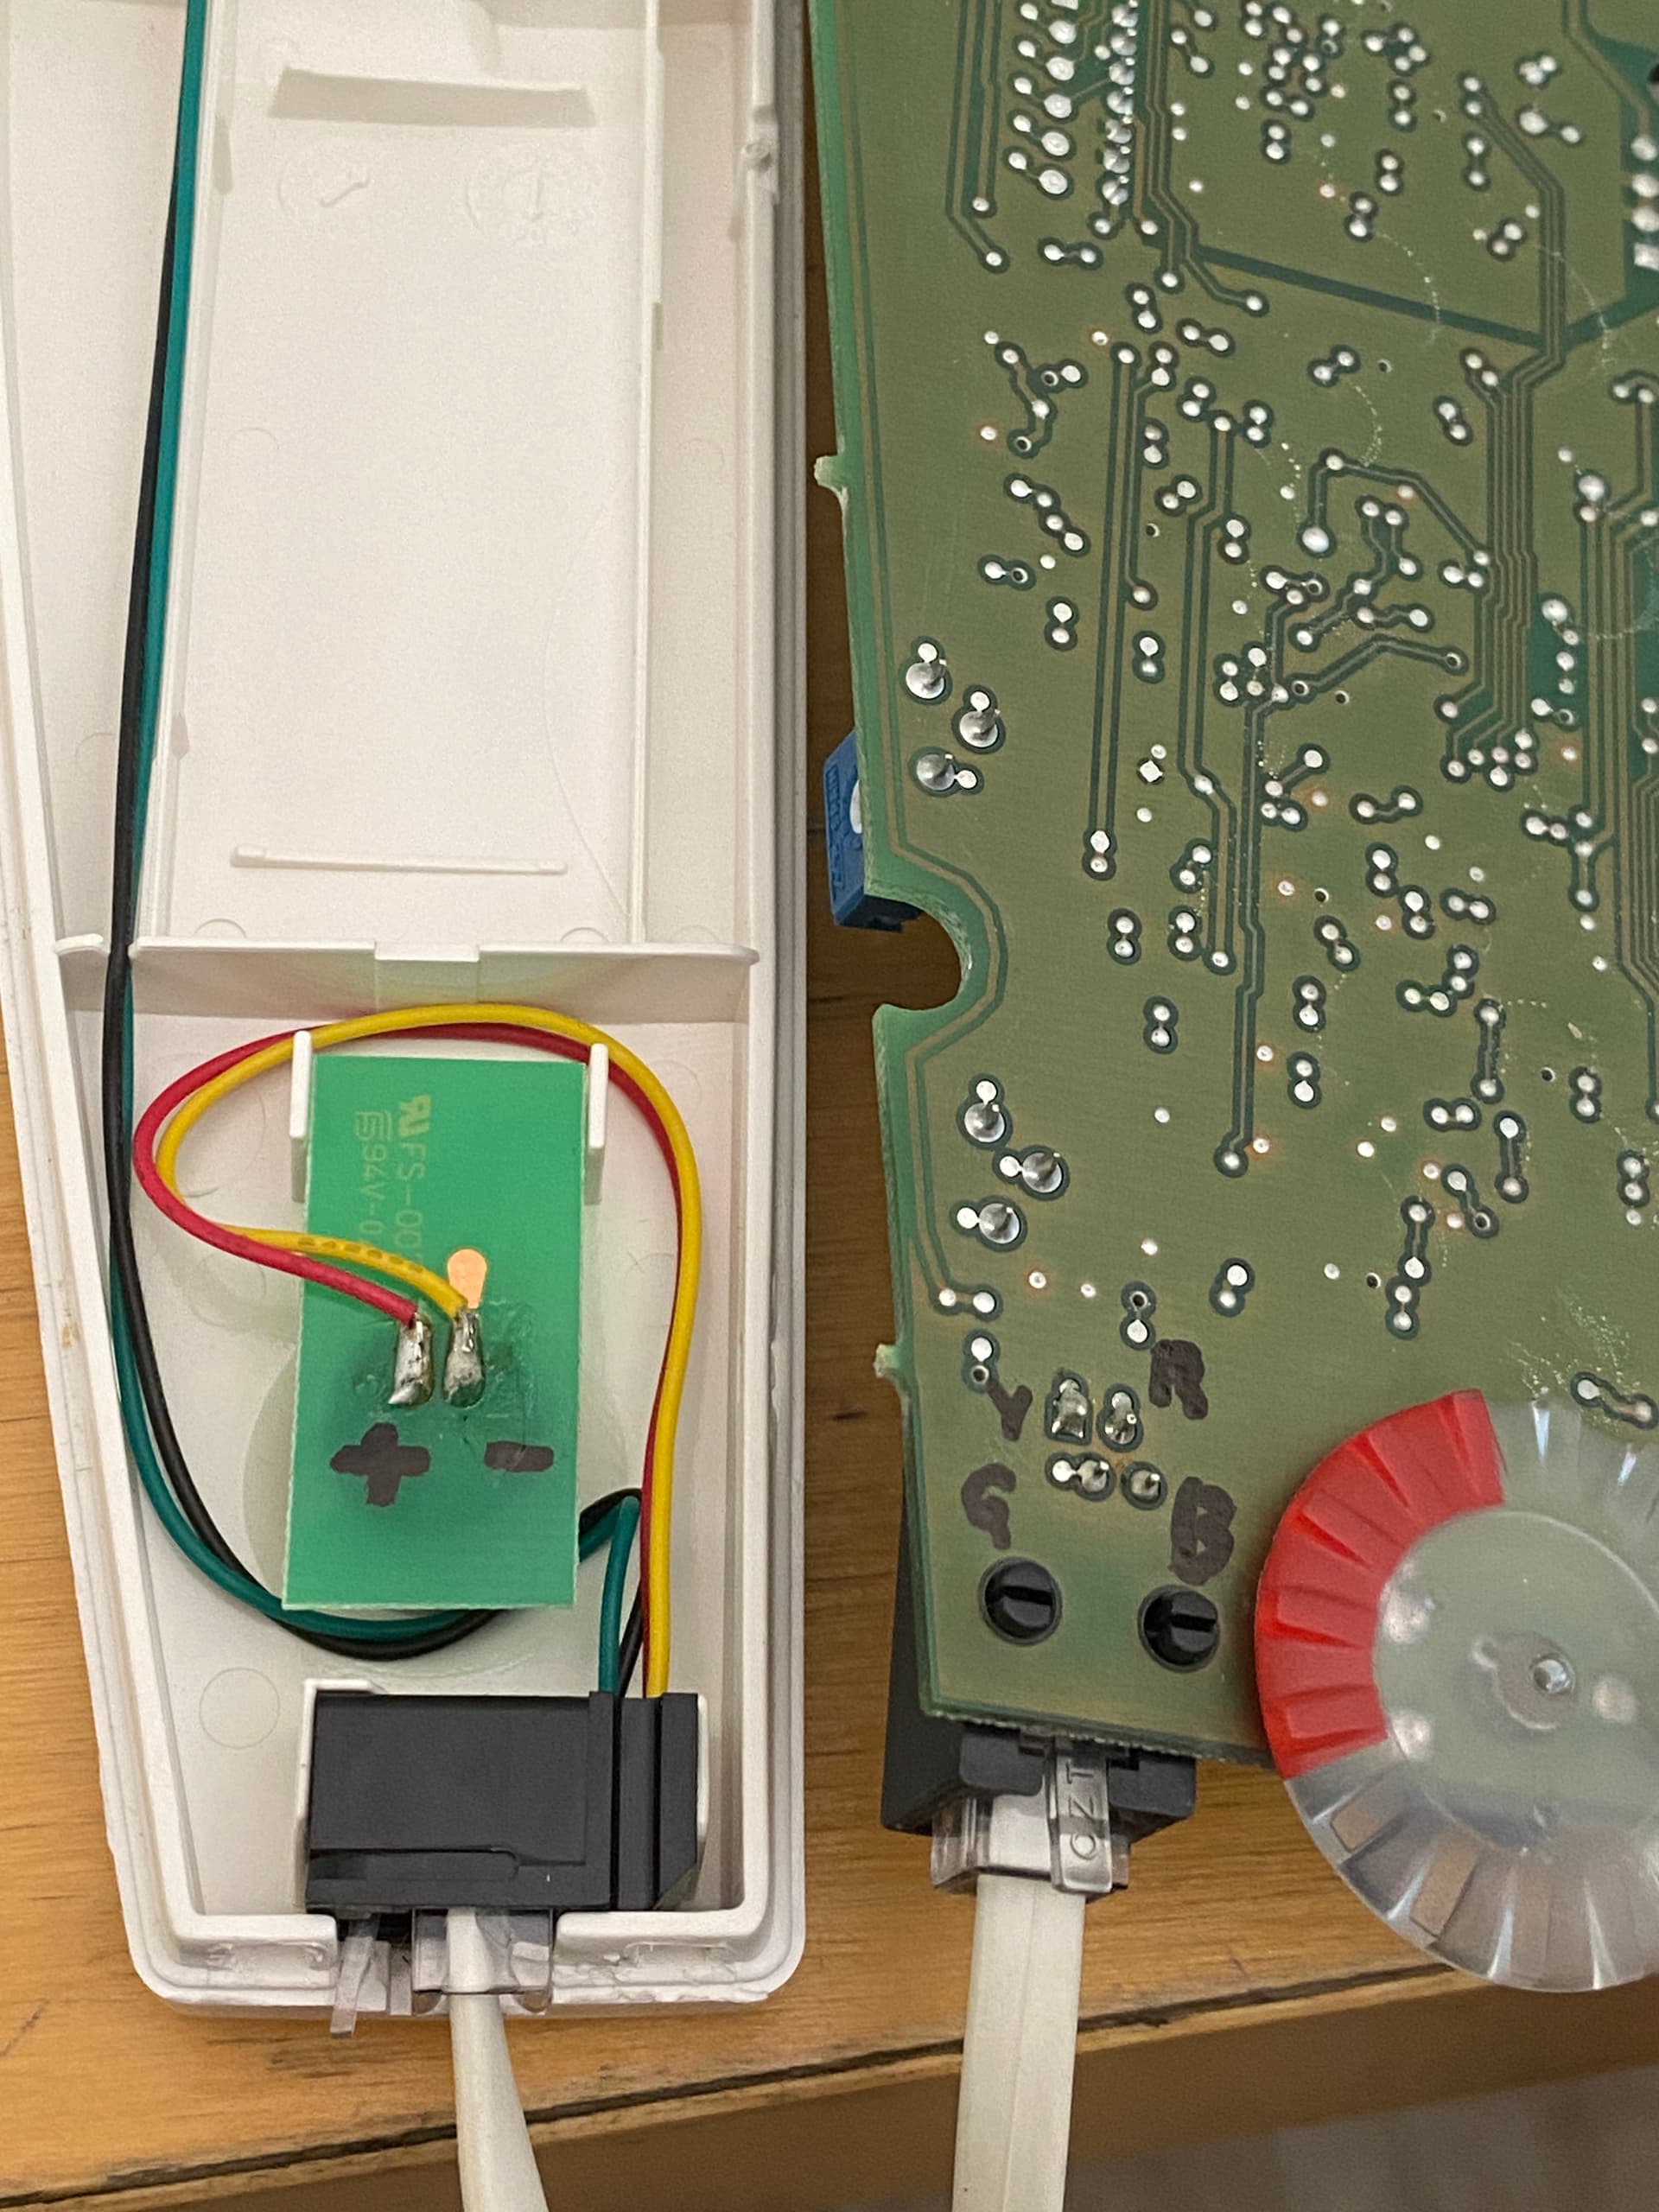
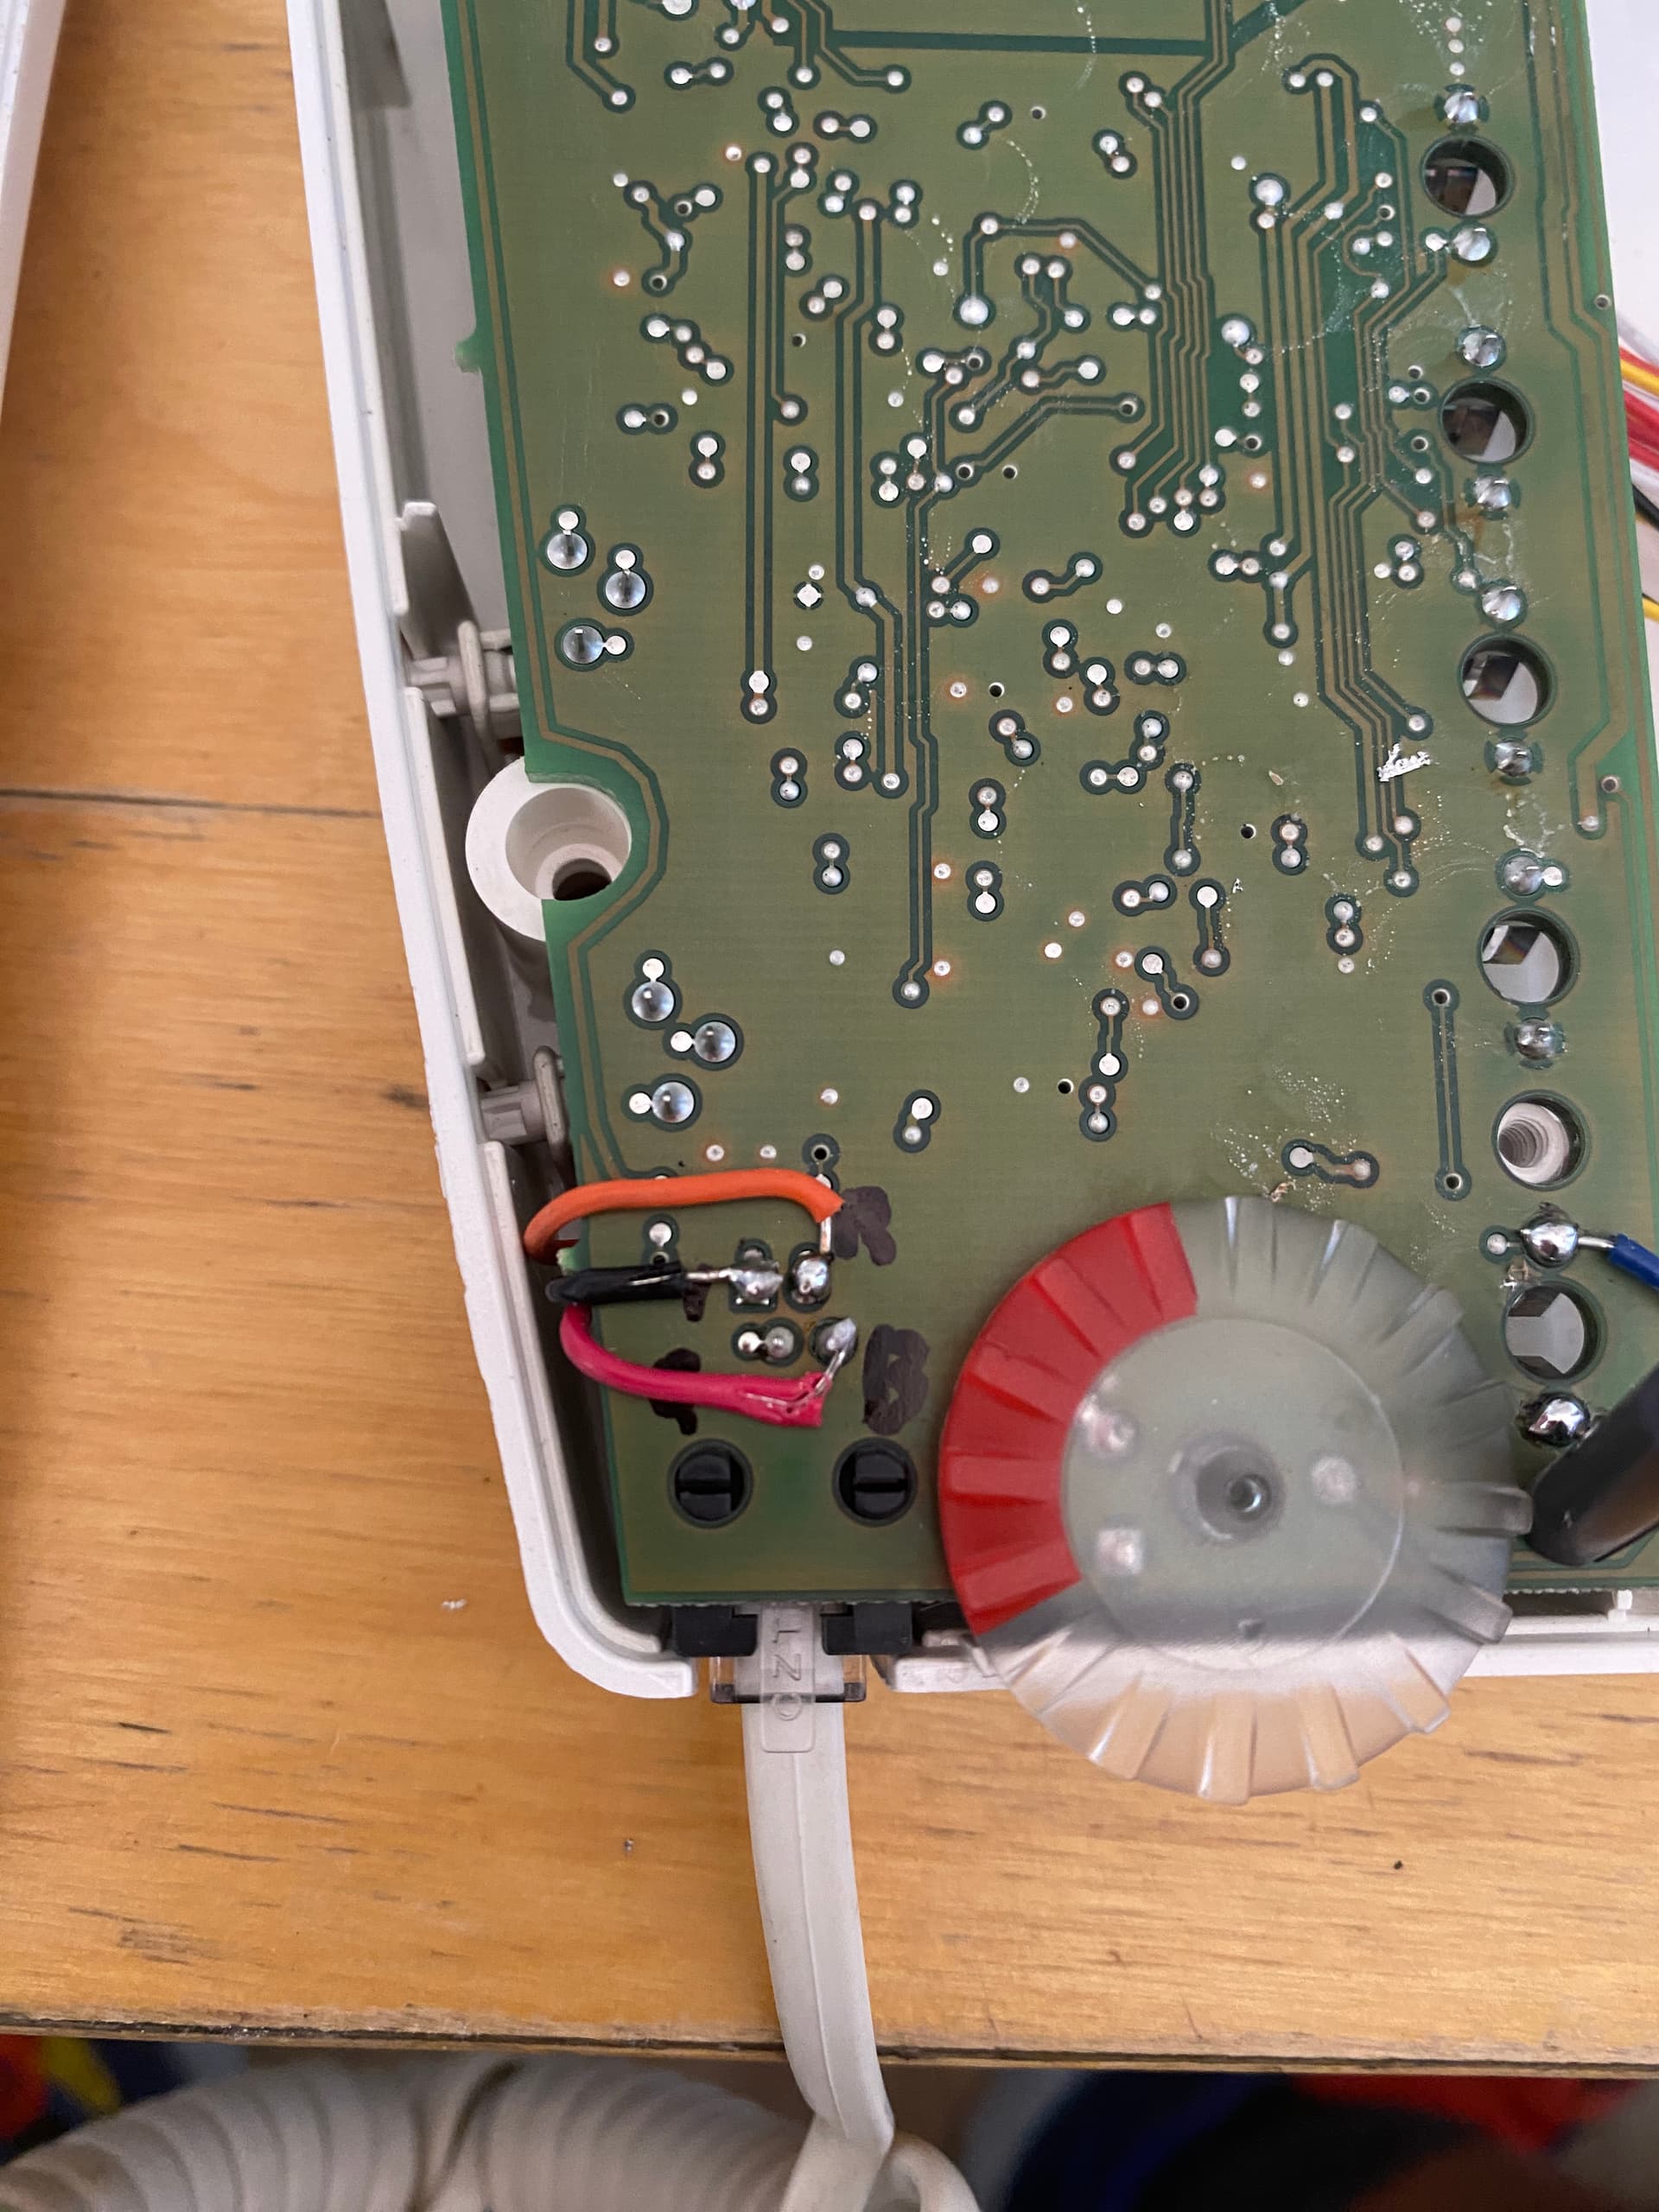
The Tegui TG-374455 bus intercom is a two-wire system, making it compatible with the Nuki Opener. For the wiring configuration, I referred to the Nuki documentation, specifically the “HOWTO Connect the Nuki Opener to an unknown intercom” guide, from which I derived the connection diagram provided in the image below.

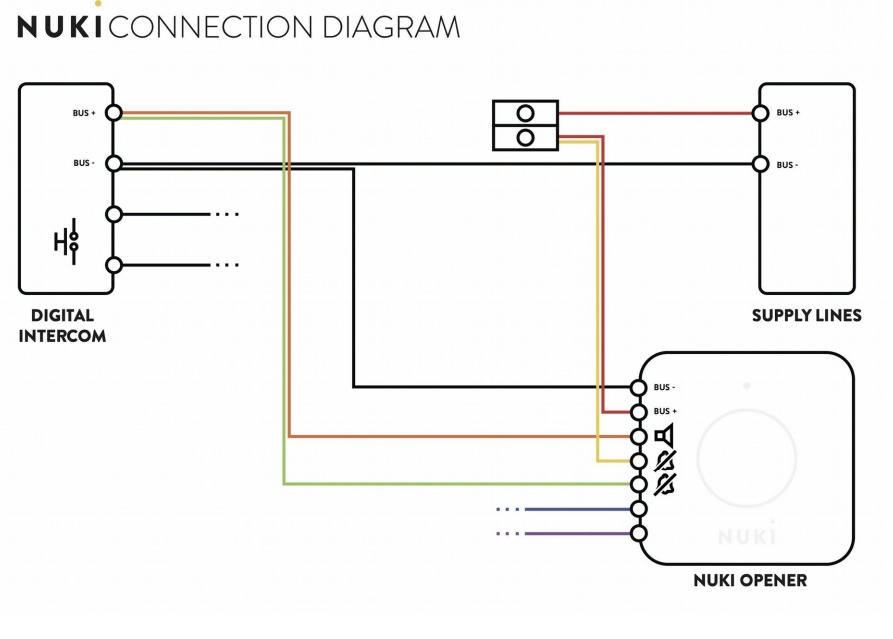
In line with Nuki’s instructions, many intercoms disregard the polarity of the connection, but he Nuki Opener requires correct polarity. The Tegui TG-374455 also behaves similarly and is indifferent to polarity. However, determining the correct BUS polarity is crucial. To achieve this, I used a multimeter to measure the voltage on the bus, toggling the probes until I discerned the positive and negative terminals. In my experience, and as a standard practice in Spain, the light blue wire signifies the positive polarity.

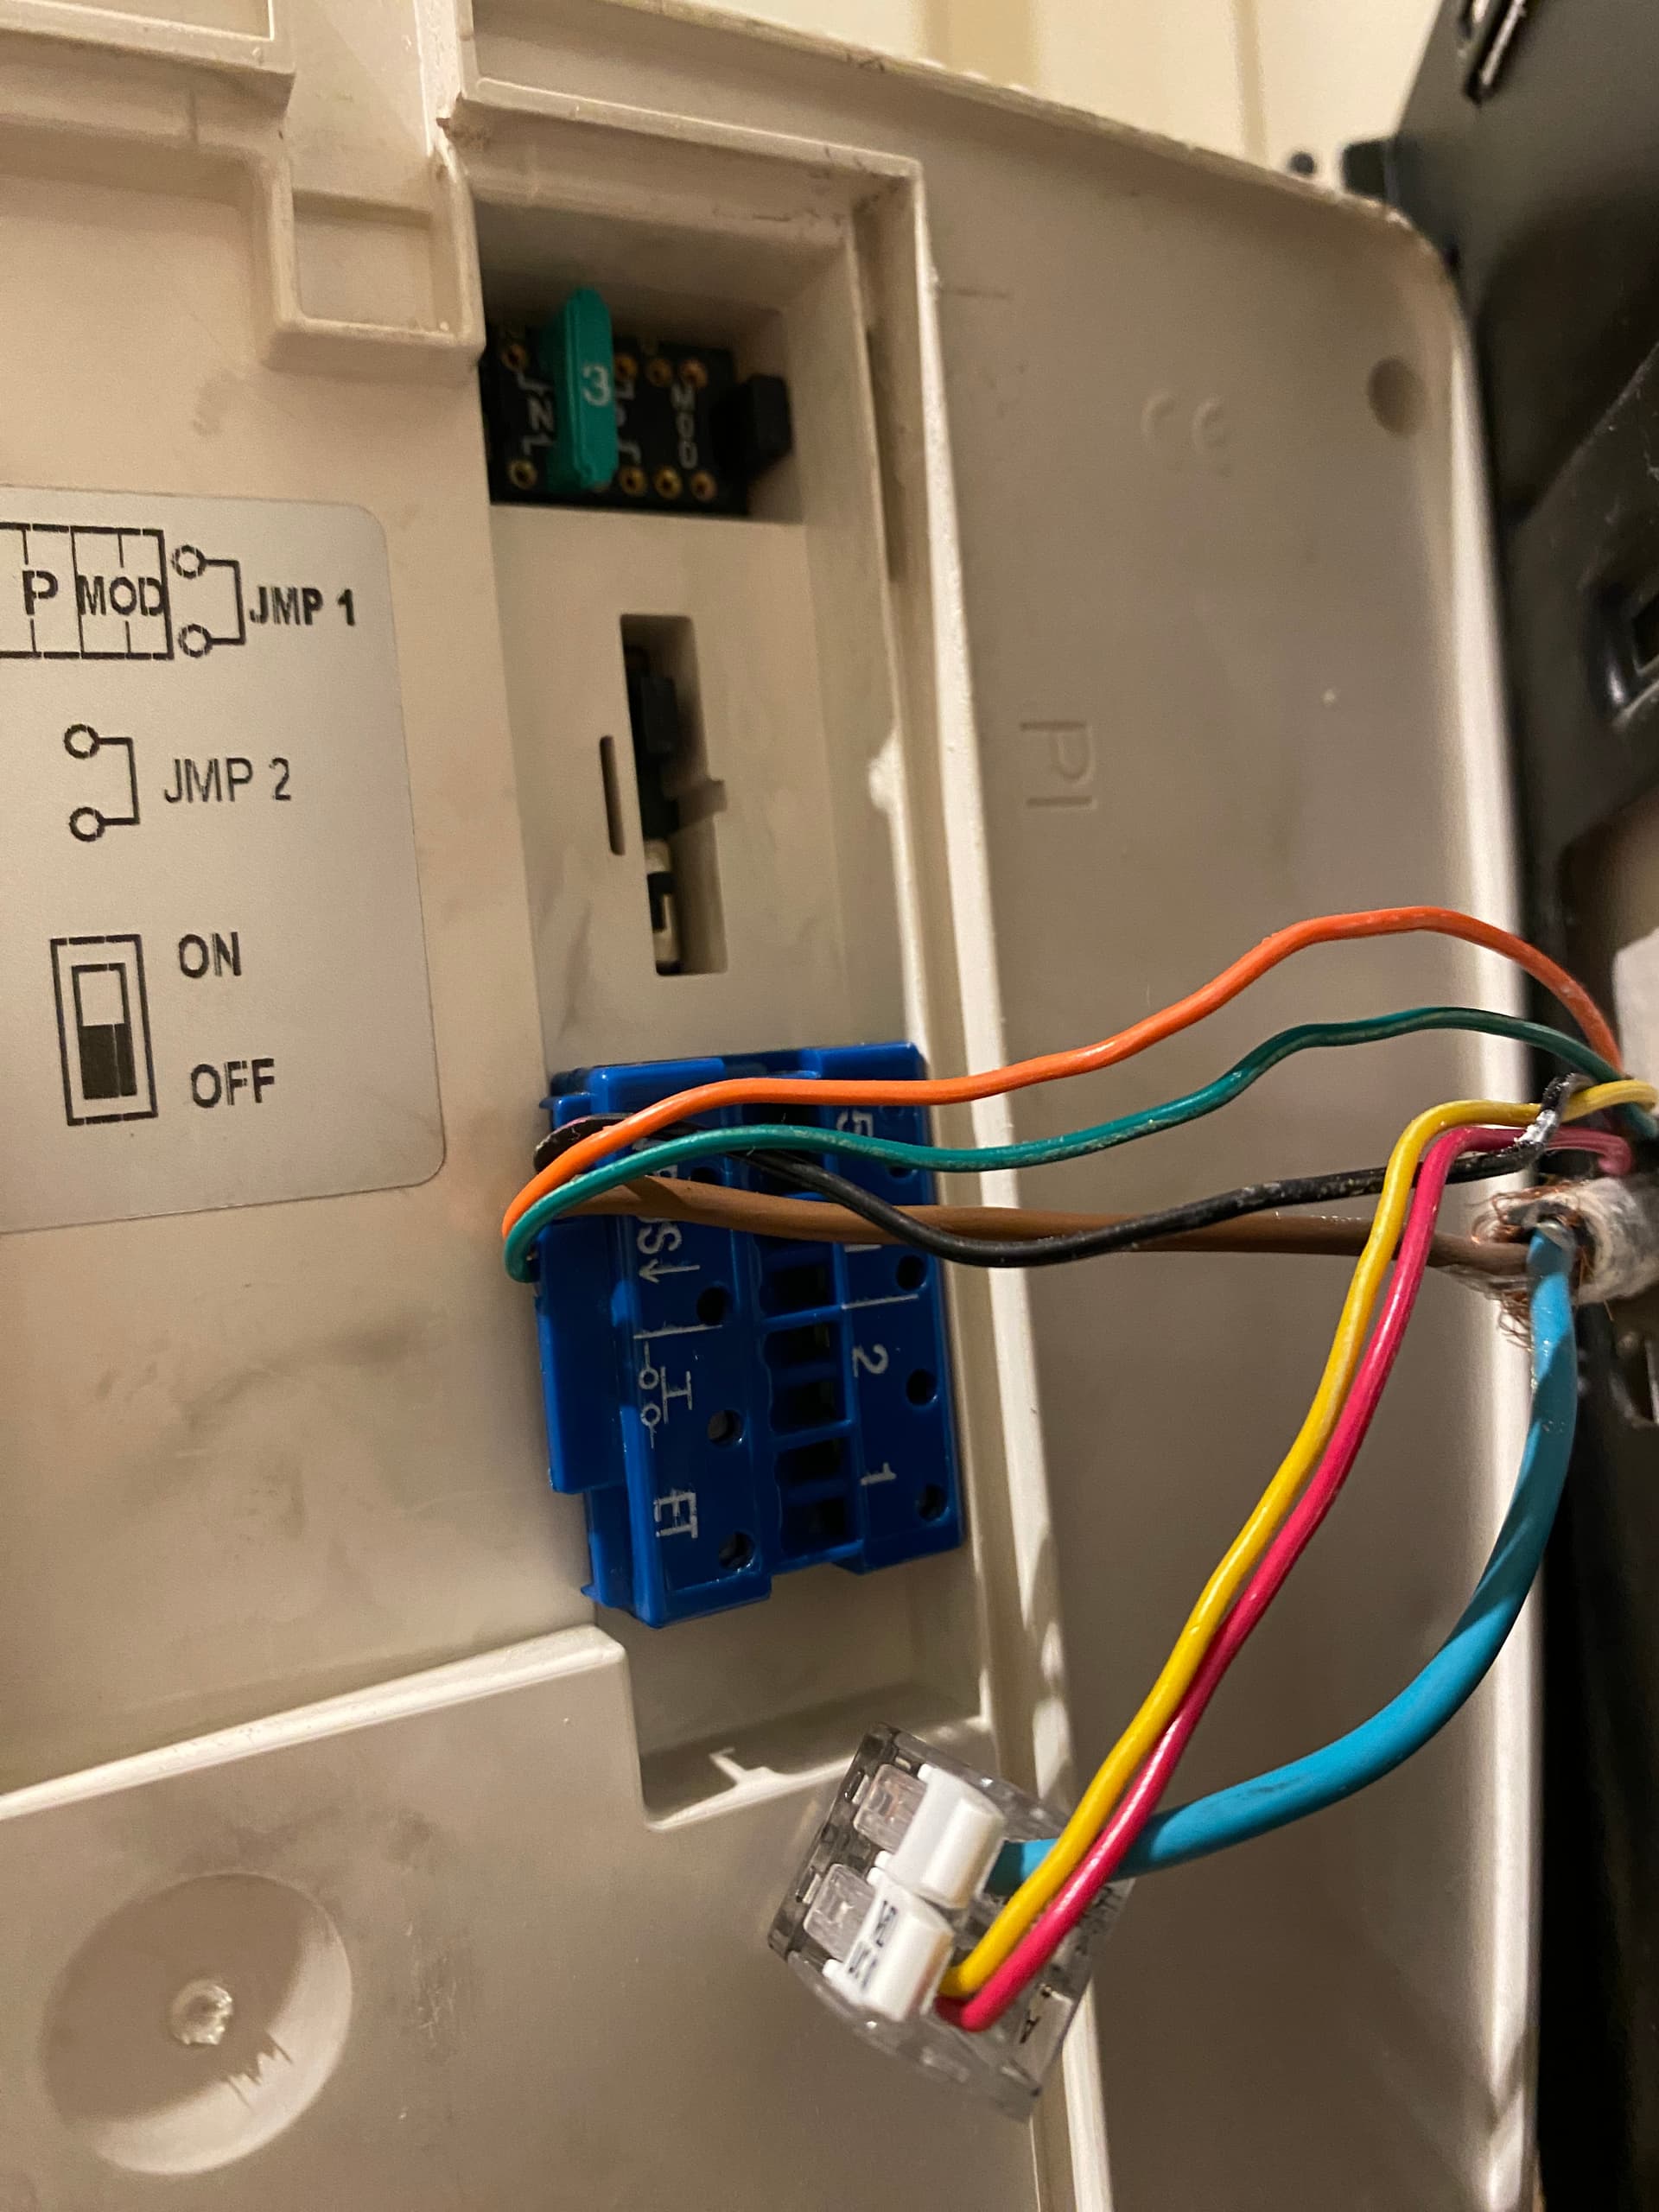
For a visual representation of my wiring setup, you can refer to the image I’ve provided


During the App setup process, I selected the following options:

  • Brand: Generic
  • Model: Bus(Koch)

It’s worth noting that I initially attempted the “Btcino Bus” configuration, but this led to instability issues. The system exhibited intermittent behavior—sometimes successfully triggering the door, while other times failing to do so.

I hope my experience and the information I’ve shared here prove to be helpful to fellow Nuki users facing the integration of the Tegui TG-374455 intercom with the Nuki Opener. If you have any questions or require further assistance, please don’t hesitate to ask.

Regards,
Pablo

1 Like

Hello agains,

I’ve got a crucial update on integrating the Tegui TG-374455 intercom with the Nuki Opener. My initial digital configuration wasn’t stable, so I’ve switched to a reliable analog setup.
I’ve reached out to Tegui for accurate info on their digital BUS, so we don´t have to select Generic expecting the Opener to guess the protocol. Will share their response soon.

Before we start I must warn you that this setup involves opening the intercom and soldering some wires to the board, meaning you have to have the tools and some basic technical skills.

Here’s a detailed breakdown:

  1. Open Intercom:
    Remove 4 screws at the back.

  2. Route Nuki Cable:
    Make top slot for Nuki ribbon cable. Connector’s notch faces wall for orientation.
    I made a small opening slot on the intercom casing´s top to run through Nuki´s ribbon cable. Take special care to make sure the connector´s notch is facing to the wall so when installed the Nuki opener is facing the right way.

  3. Solder Door Opening Contacts:
    Find bottom-right pins that trigger door. Solder violet (ground) and blue (open) wires to pins.
    Look for the two pins located on the bottom right of the board. These two pins open the door when short-circuited by the manual action of the intrercom’s front panel button (key symbol). Run the violet and blue wires flat to the surface of the board (so they don´t get in the way and prevent the mechanic action of the button from working correctly) and solder them to the board, the violet at the bottom (ground) and the blue on the other pin (open)

  4. Bell Connection:
    De-solder white wire from bell speaker. Connect to Nuki’s yellow wire (Bell). Solder Nuki’s green wire to speaker.

Note 1: in the picture the green wire looks blue-ish, but it´s in fact the green one.
Note 2: this serial connection allows you to use the “doorbell suppression” mode.

  1. Application setup:
    Then you have to setup the intercom on the app selecting “Analog”.

At this point you might wonder what you should do with the Black (Ground), Red
(loudspeaker), Orange (microphone) and why they are marked as optional.

Apparently, Nuki has plans to allow users to not only open the door using the app but also to speak through it. However, this feature has not been released yet (22-08-23 firmware 1.10.1), it will be released in later firmwares. This means that you can either stop here and have a fully functional set up or you can go ahead and connect them to the intercom so everything is ready when the new feature is released.

If so, here’s how I did it:

Optional Connections (Future Feature):
I opened the handset and I identified the 4 wires, positive and negative wires of both microphone and speaker.


Then I followed them to the intercom’s bard and solded the corresponding Nuki’s wires as seen in the picture below.

Notice that I could not test these connections because, as mentioned before, the talk through the app functionality has not been released yet.

I hope this configuration update is useful for you.

1 Like