Hi all,
I have been reading basically every post here on the challenges different users have with connecting Fermax Intercoms with the Nuki Openers. I am bascially ready to give up and move to a different provider and this is my last attempt to make it work. Already spent way too many hours on this.
Any help greatly appreciated.
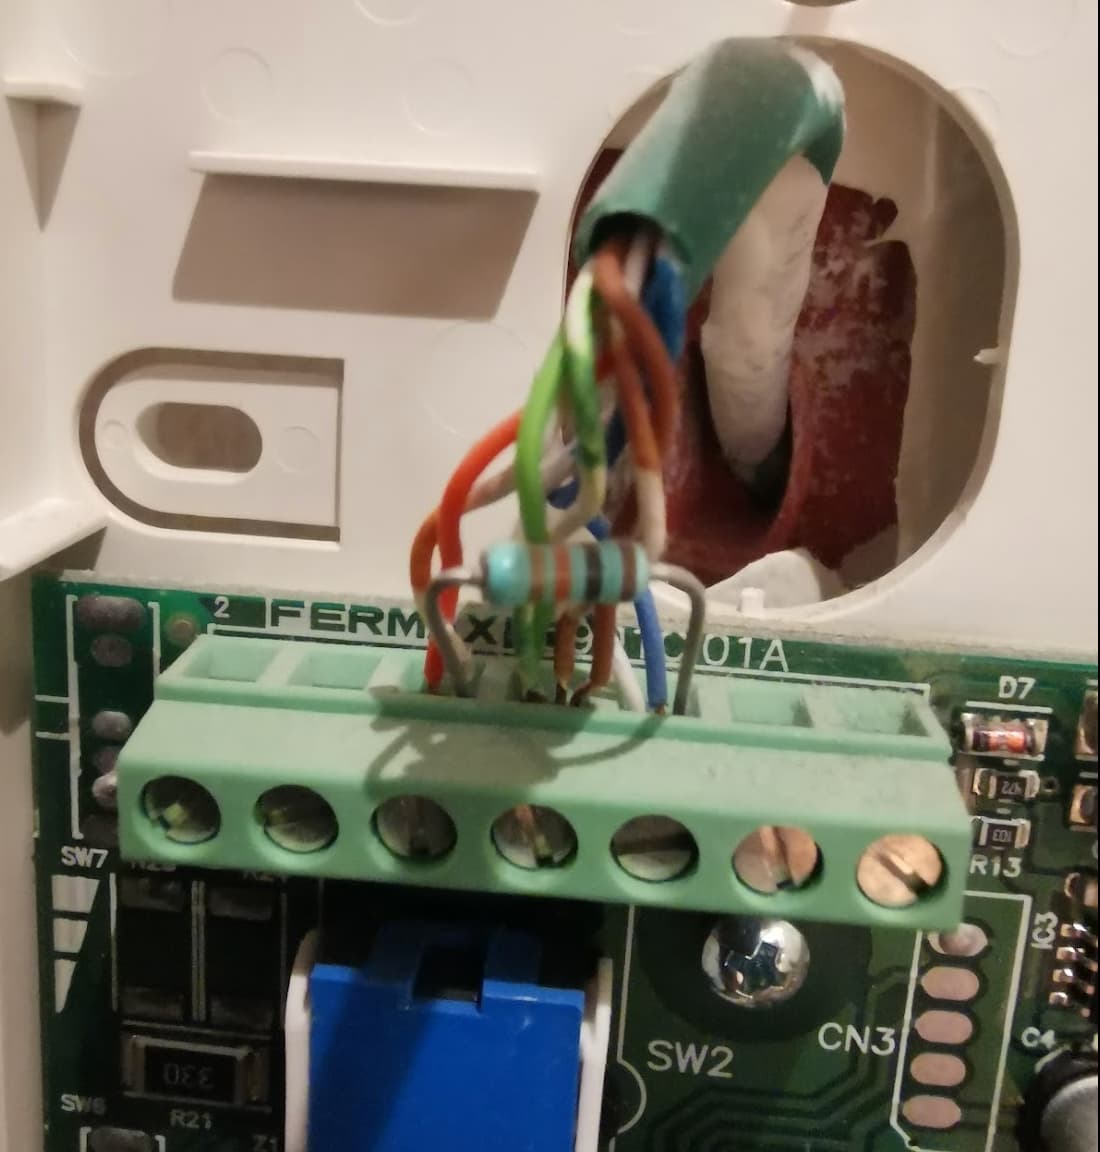
I have a Fermax intercom with a confusing set-up. There is a sticker that says 3390, but on the board it says: Fermax 15901CI01A, which refers to the BASIC VDS LOFT TELEPHONE CIRCUIT (perhaps it is VDS?). As you can see on the picture I have many cables from the wall. I guess it is an old telephone cable or a newer cat5. But unsure.
Further there is a resistor connected between “+” and “L”.
I have tried many different wiring constellations incl different ones suggested by the Nuki support. However, not a single one was able to open the door via the app, nor ring-to-open. Simply no success at all.
If any smart brain here can help, i’d be forever greatful.
Original set up (you can’t see here but below the description is F1, F2, +, -, L, A, T):
I went through the same process as you, and I stubbornly tried many different solutions — even ended up writing to the developers.
Thanks to the Nuki team, I finally managed to get my Opener to work.
To keep it simple, the Fermax VDS system works like a closed circuit, where all the intercom units in the building are connected in parallel. As soon as one of the devices receives its identifier, it “occupies” the line and starts ringing.
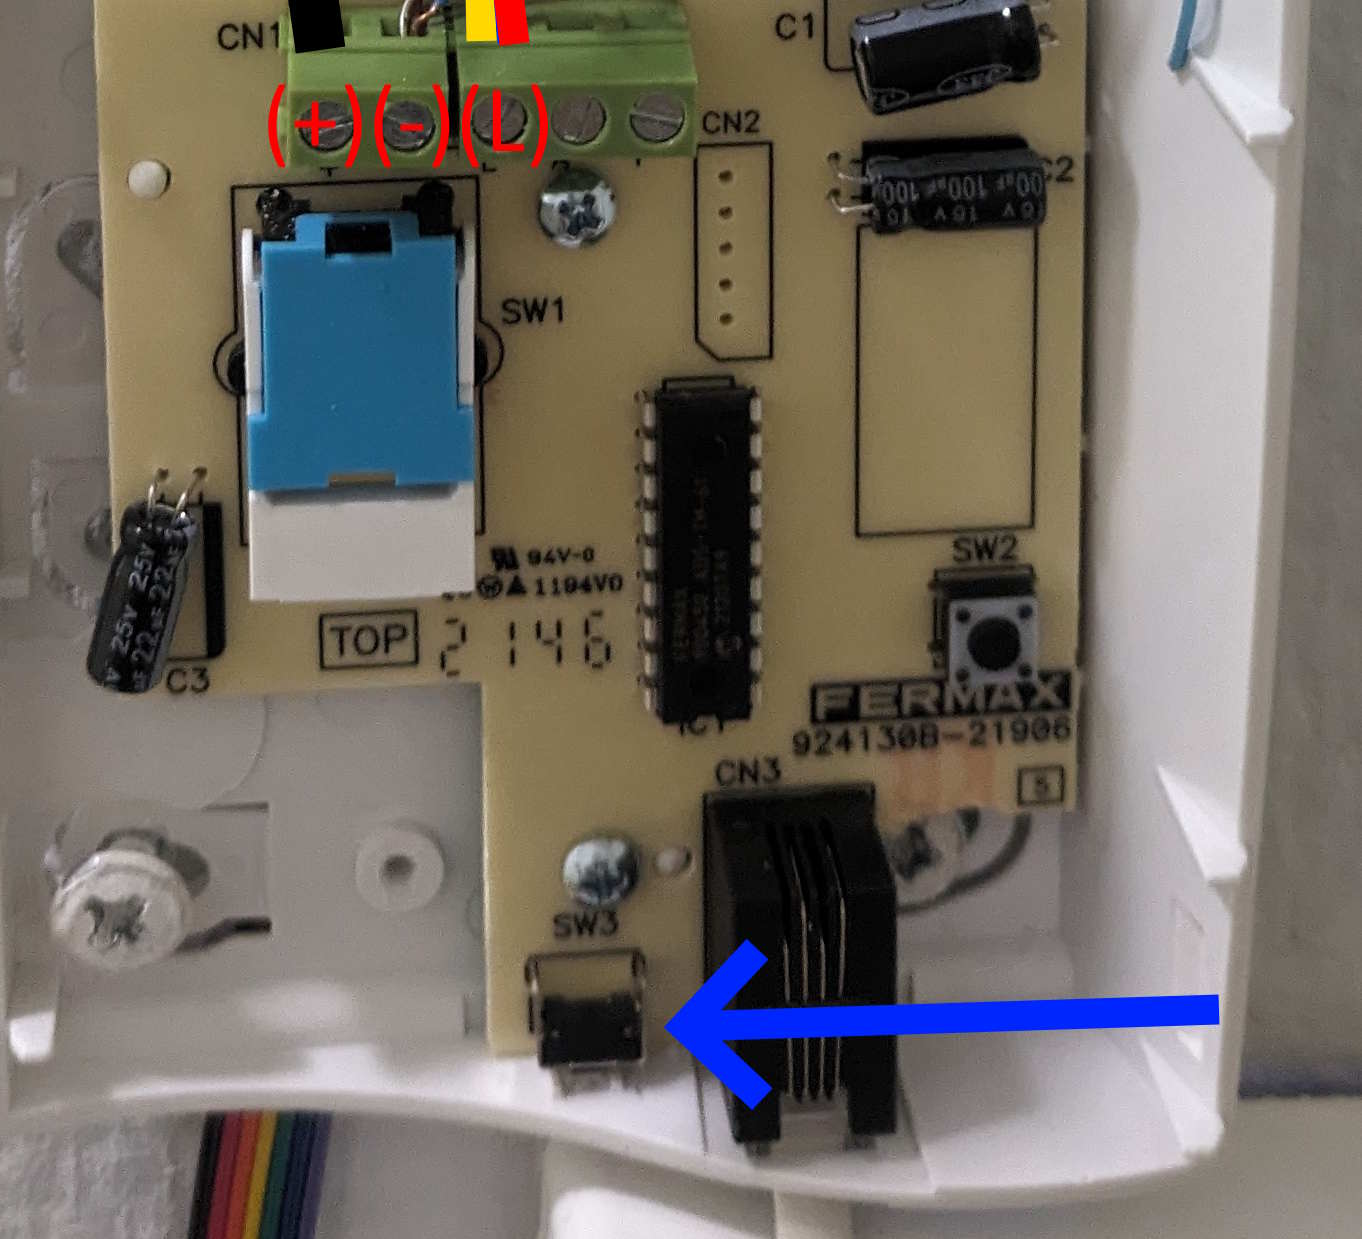
Regarding the wiring, start with the basic setup:
the black wire goes to +
the red and yellow wires go to L
The other setup with the green wire is (I believe) for replacing the doorbell signal.
You can connect everything in parallel with your existing intercom.
Before starting the configuration, make sure your Bridge doesn’t have another Opener already registered. Otherwise, it will keep trying to connect to the previous one.
Also, make sure to update the Nuki app, the Bridge, and the Opener as soon as possible.
During the installation process via the app, you’ll probably get several Bluetooth disconnection error messages — don’t worry about them, it’s a common bug.
When the app asks you to trigger your intercom, simply press the programming button on your intercom (this will save you from going back and forth to the street panel). This action will create the connection between your unit and the external panel — you should hear sounds from outside, for example.
Next, you’ll reach the step where the app asks you to trigger the door opening. It often takes several tries for the signal to be detected. Just repeat the action until it works — it does eventually.
Once the signal is detected, continue with the rest of the setup. Expect to go through some trial and error, it often bugs a bit.
Just so you know:
Continuous mode works well
Scheduled time slots programming also works
But opening via the app can still be unreliable
Regarding the resistor between + and L, I believe you’re probably at the end of the building’s line. That resistor is used to close the circuit, so do not remove it.
Good luck!
And if needed, you can always try writing to the developers directly
I have an apartment where recently a Fermax system was installed.
At my apartment I have a Fermax Veo Duox Plus 3444 handset (see link to below). It’s digital and uses only 2 wires to connect both video or audio terminals.
Since it’s digital, I can’t connect my Nuki Opener directly to it. However, after reading some Fermax documentation, I found that there’s an optional device - DUOX PLUS RELAY 3257 (link below) - that can be connected to the Fermax bus and it allows connect it to, e.g., an external button to activate the building door lock connected to the Fermax system - it’s where I think the Nuki Opener enters the scene.
AFIK, it could be used with the Nuki Opener, and, as a matter of fact, with any Wi-Fi/Zigbee switch, like the Sonoff.
Here in Portugal, the DUOX PLUS RELAY 3257 costs less than 50€ (not cheap at all).