Hi Andre, hast du eine Lösung? VG Paul
Leider nicht…hab den Opener wieder zurück gesendet.
Since the RSR-200 is also compatible with the BFT-200, my instructions here should be compatible I think? No soldering required: Elcom bht-200 - #12 by 0ngx
Can someone help me? I don‘t know how to connect the Nuki opener to the elcom bvm-100.
Hey all,
I have followed the instructions for my BFT-200 and got it working (with the RSR-200 Relay).
The only thing I have noticed is, that my Opener firmware is stuck to 1.11.0. Has anyone noticed a similar thing? How can I fix it, because I don’t know any way to manually install a firmware for the opener (according to the app there is no firmware update available).
Thanks!
Roxasu
Hello. I’m thinking about equipping my bhf-200 with the opener. However, since I find the device itself ugly, I’m wondering whether I could easily switch to a bft-210 on the system side?
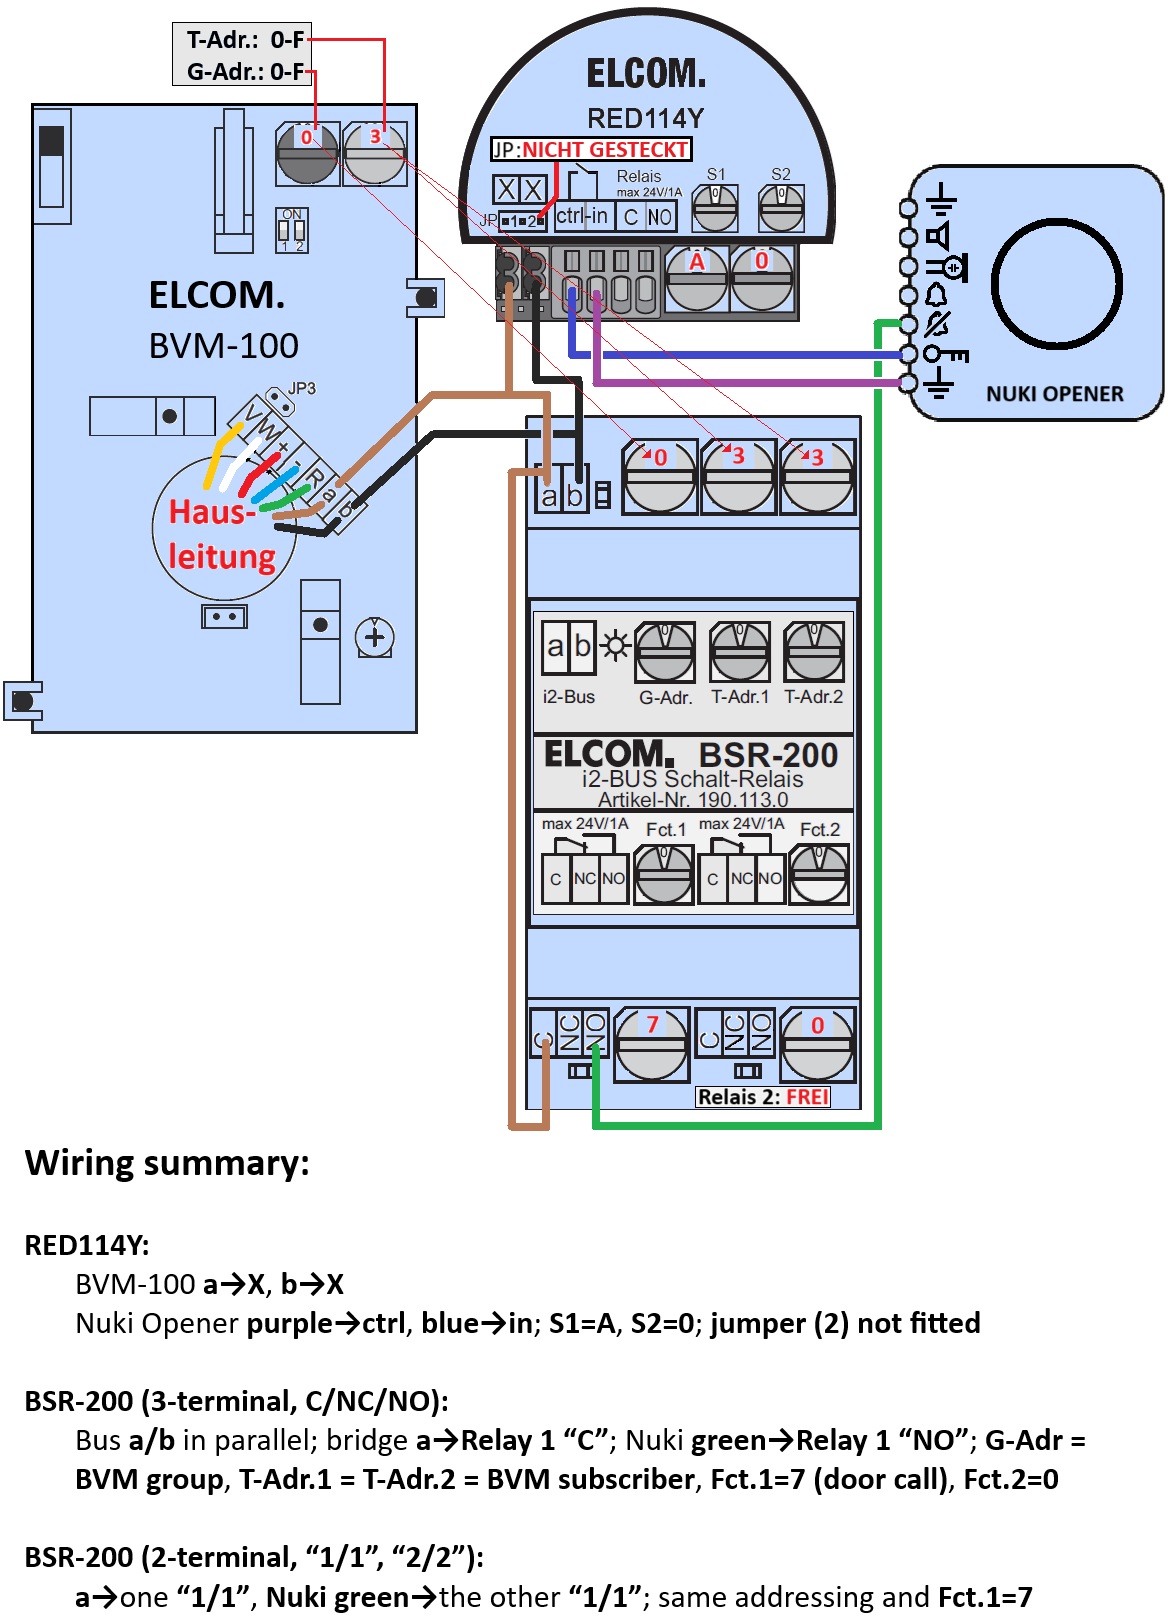
Thanks @jean gizmo, your #72 post made this possible. I was new to many terms, so I reworked your instructions (with help of AI) into a compact guide and implemented it on an ELCOM BVM-100 with BSR-200 + RED114Y. Everything works reliably (Ring to Open + direct open); bell suppression on i2 isn’t feasible in this setup.
Wiring summary (matches your approach):
- RED114Y: BVM-100 a→X, b→X; Nuki Opener purple→ctrl, blue→in; S1=A, S2=0; jumper (2) not fitted.
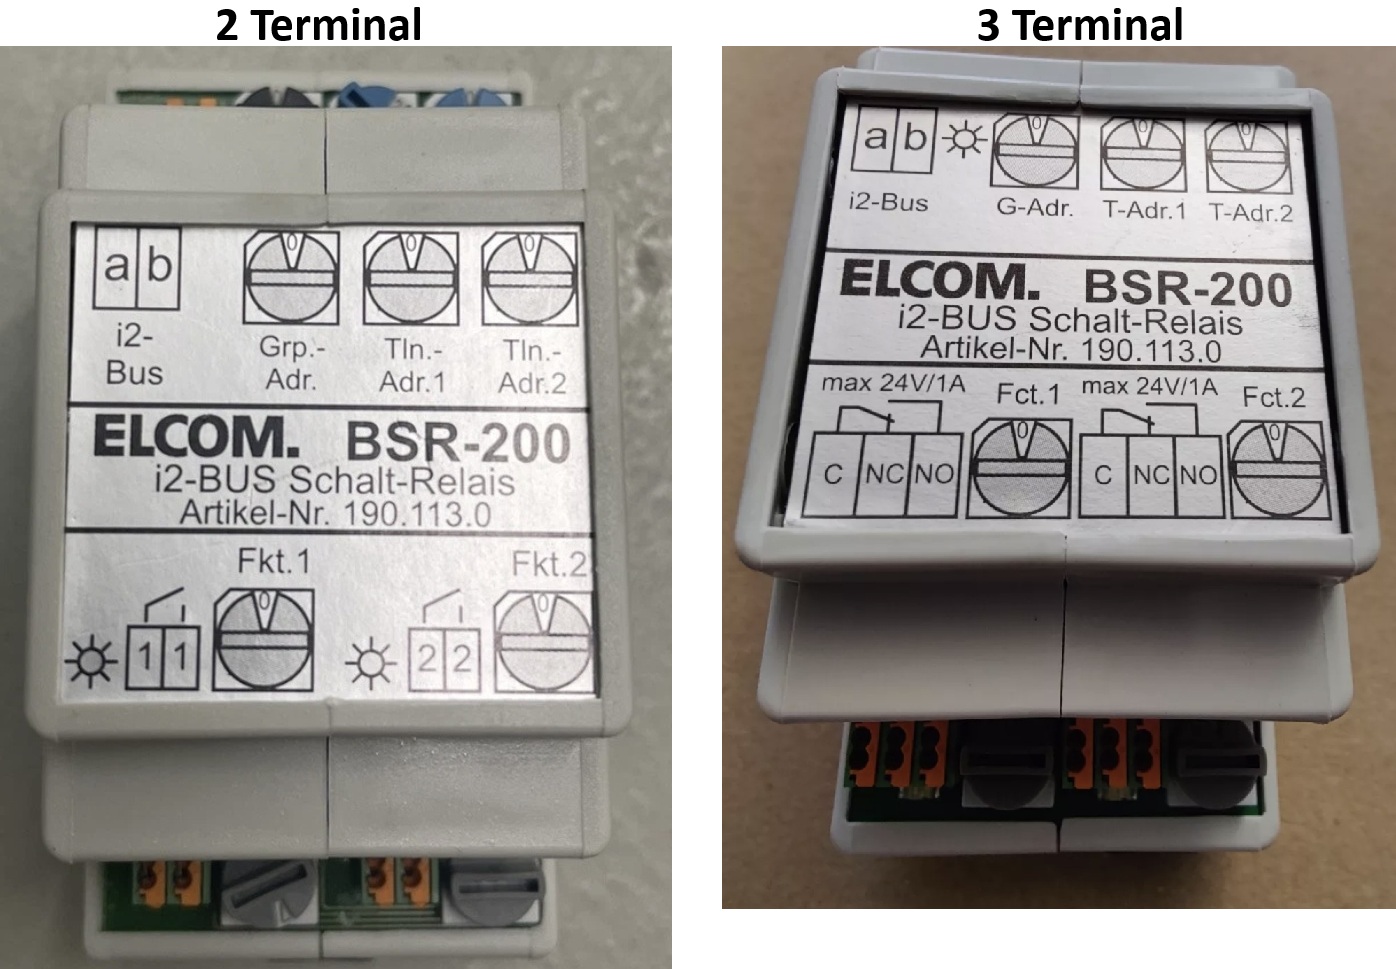
- BSR-200 (3-terminal, C/NC/NO): Bus a/b in parallel; short bridge a→Relay 1 “C”; Nuki green→Relay 1 “NO”; G-Adr = BVM group, T-Adr.1 = T-Adr.2 = BVM subscriber, Fct.1=7 (door call), Fct.2=0.
- BSR-200 (2-terminal, “1/1”, “2/2”): a→one “1/1”, Nuki green→the other “1/1”; same addressing and Fct.1=7.
Applies to both BSR-200 variants (2-terminal and 3-terminal).
Install notes (my setup):
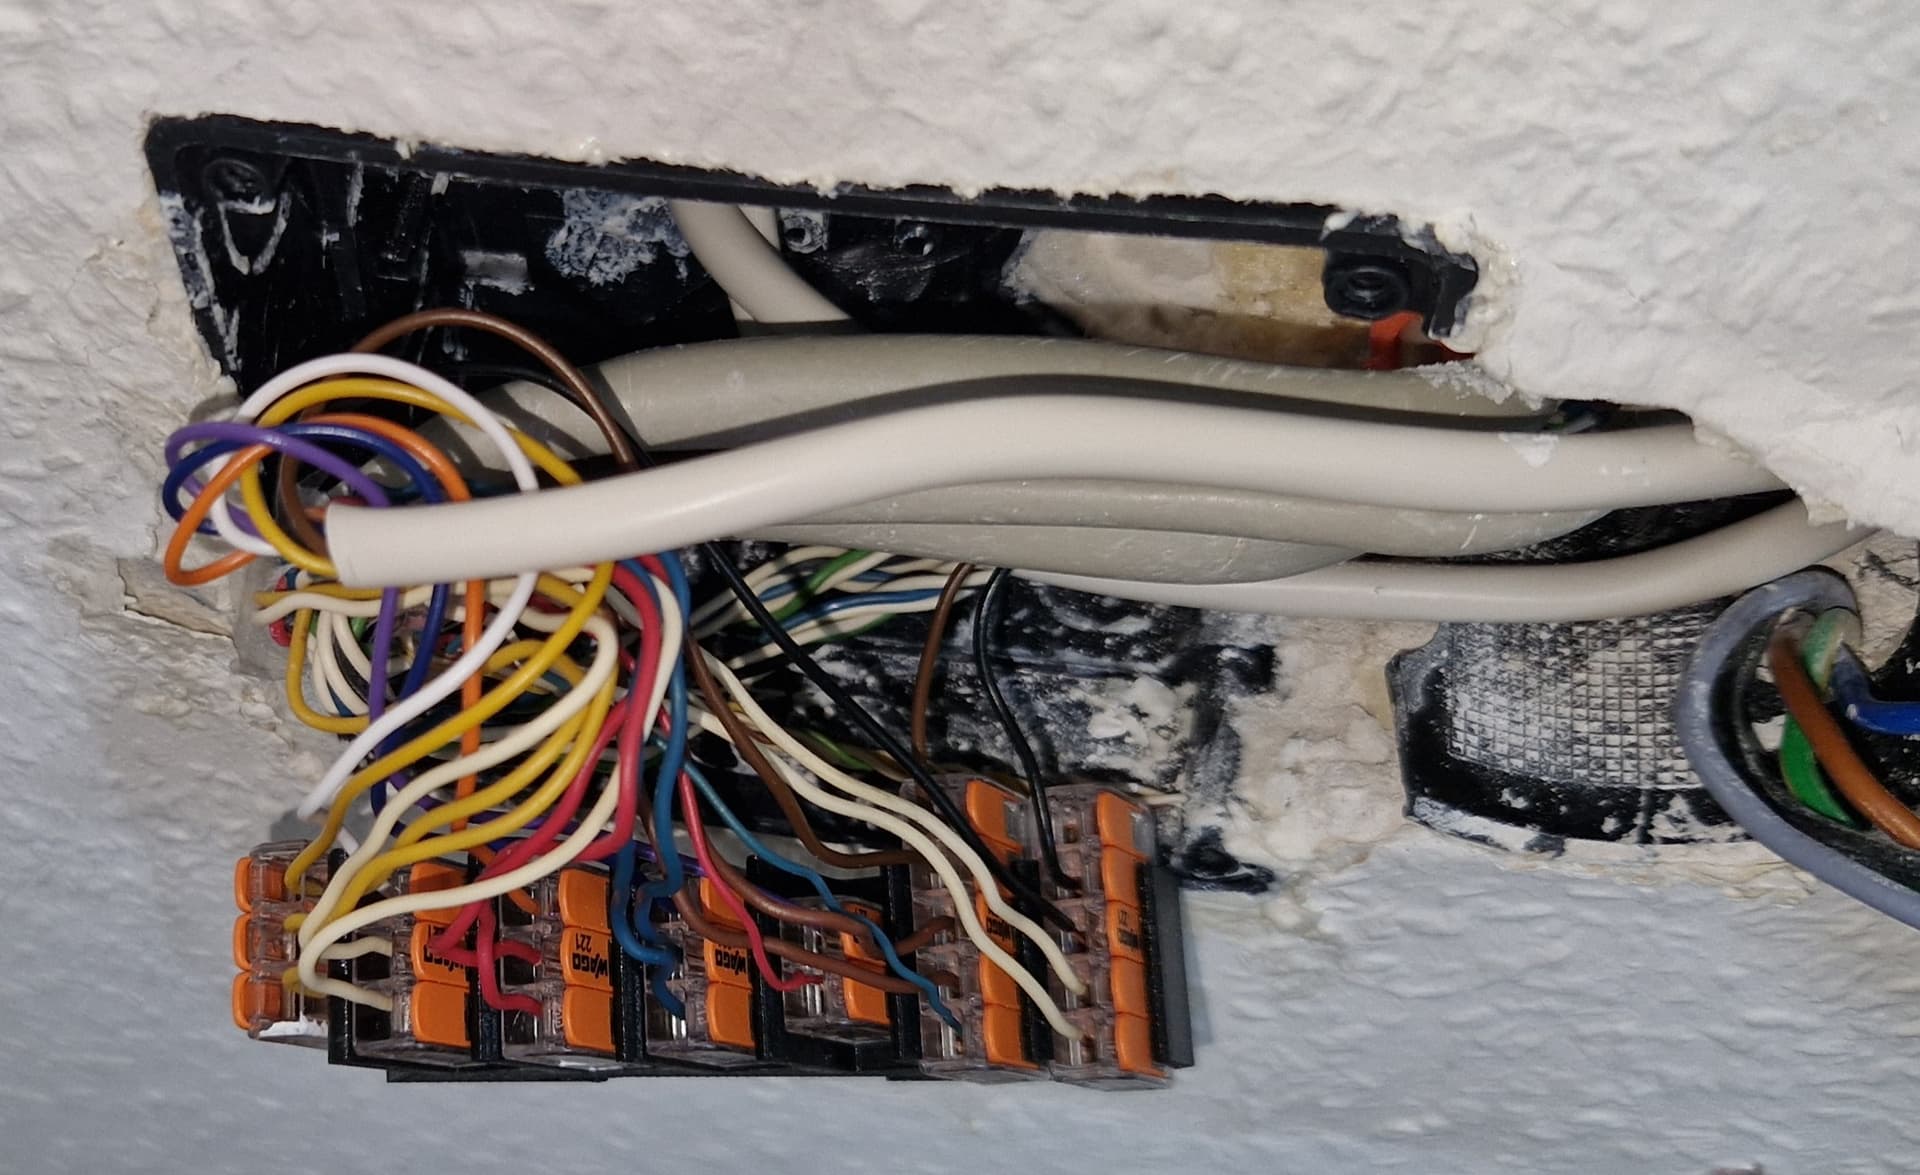
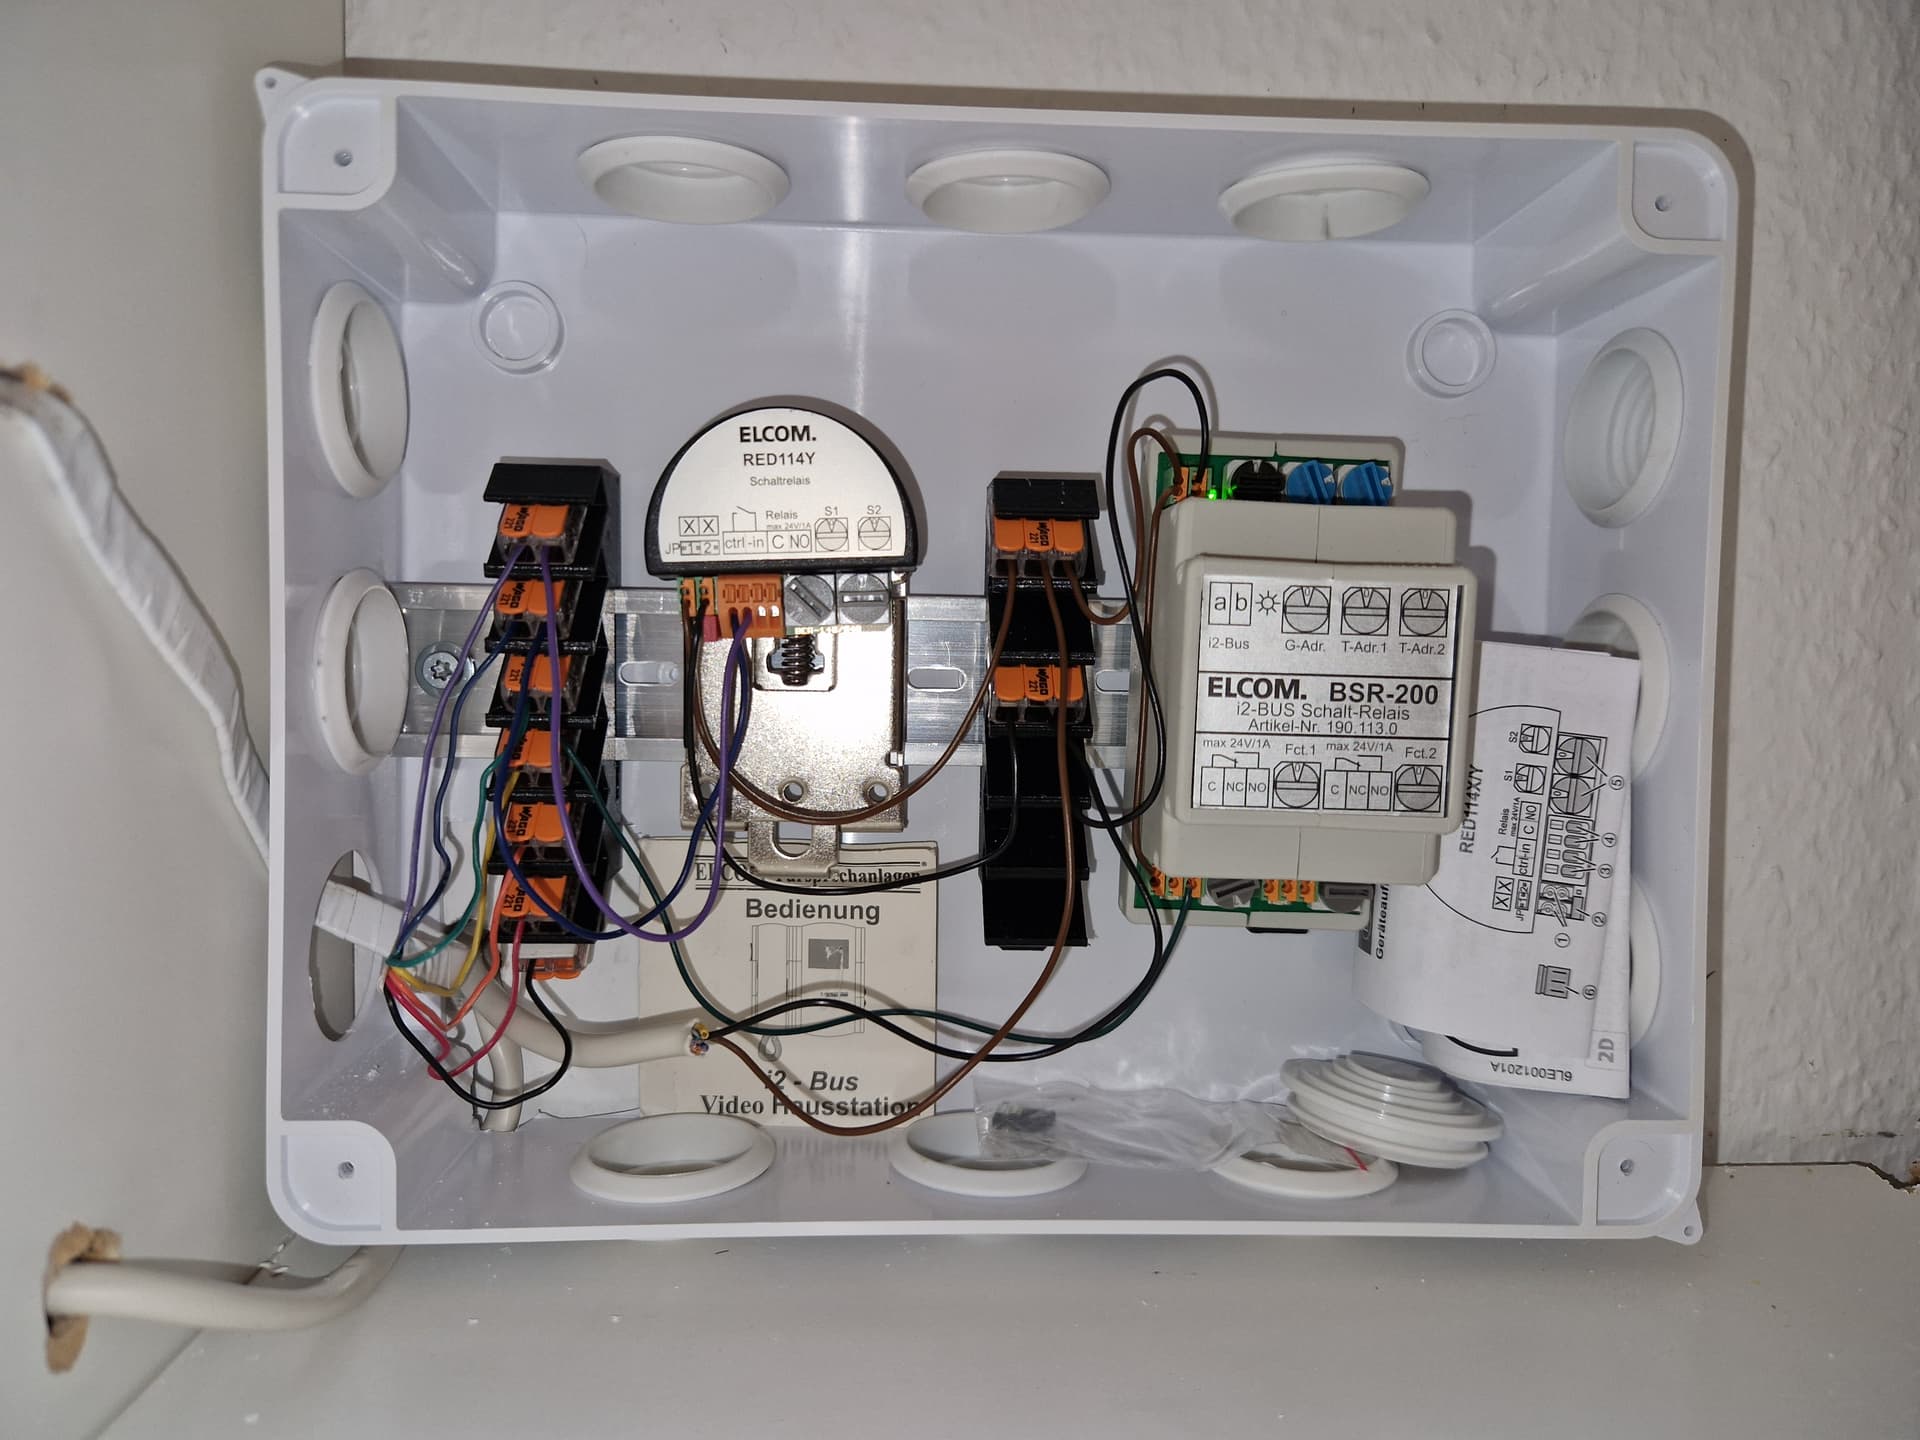
I branched the intercom a/b lines directly at the house entry using Wago connectors, and routed the Nuki Opener wires into a Wago as well. The BSR-200, RED114Y, and the Wago blocks are mounted on a DIN rail inside a large junction box. Works cleanly and is service-friendly.
1 Like
This is probably too late for you.
I had a similar issue and it turned out that the voltage between a and b was inversed on my configuration.
That breaks the ring detection, because the nuki expects a “High” signal on the yellow line (which doesnt come if a is the negative pole and connected to the lower K socket).
As it turns out, you can easily swap the two lines coming from the central station and that fixes the ring detection.
Hope this helps anyone else having the same issue.
Additional findings that may help others:
- Door opening (RED114Y): Wiring polarity doesn’t matter — a/b and Nuki’s blue/purple wires can be swapped freely. For a proper ground reference, use the “ctrl” pin rather than the “in” pin (measured 3.8V difference between “in” and true ground; “ctrl” is exact ground). The RED114Y appears to auto-detect polarity internally.
- Ring detection (RSR-200): Connect the lower K socket to the positive potential of the bus (whichever of a or b is “+”). If ring detection fails, your a/b polarity may be inverted compared to standard setups — either bridge from b to K instead of a to K, or swap a and b at the incoming side.
- Two “a” sockets: One is wired through the door button and returns as R, enabling analogue door button detection at the handset. The other comes from the central station.
- Ring suppression (BHT-200): Disconnect the base station loudspeaker — only the Nuki will then ring, fully configurable. Handset speech is unaffected.
- Nuki power supply: An LM2596S DC-DC step-down regulator connected to a and b works well. A series resistor may be needed to reduce noise sufficiently (verify with a signal analyser).
TL;DR:
- Ensure a = “+” and b = “−”; if inverted, swap the lines coming from the central station.
- RED114Y polarity-tolerant — just set switches to A and 0.
- RSR-200 required for ring detection.
- Ring suppression: unplug the BHT-200 base speaker.