I got my two Nuki successfully integrated into Home Assistant. The next step should be to integrate the door sensor as well. But here I’m struggling a bit. I found on the web some documentary how to configure but so far it’s not leading to success.
but the door state is always the same. Can you plz let me know how you configured your file in order to get it running ? That would be highly appreciated
First I need to tell you that I just changed the way I am connecting to the lock. I used to use the local API, like you are trying to do right now and now I am using the WebAPI. As it name implies, the first one stays in your local network while the second one reaches your account, at Nuki, and get door state.
If you want to use WebAPI too, you’ll have to get a bearer from Nuki API portal and then configure HA appropriately. More on that here.
If you want to keep using local API, here is a couple of things:
In latest of HA version, it is no longer required to declare Nuki in configuration.yaml, you can just use the “Integrations” menu. Link
In order to use local API, you need to get a token which I guess you are since you have token=xxxxxx in your code (I assume it is not just x’s)
In my setup, the code above works fine but I was getting some network errors and that’s why I move to WebAPI instead
What happens when you open http ://192.168.2.114:8080/list?token=xxxxxx in a browser? Does it tell you what the state is?
In my case, it will show this:
[{“deviceType”: 0, “nukiId”: xxxxxxxxx, “name”: “Porte”, “firmwareVersion”: “2.10.8”, “lastKnownState”: {“mode”: 2, “state”: 1, “stateName”: “locked”, “batteryCritical”: false, “batteryCharging”: false, “batteryChargeState”: 36, “doorsensorState”: 2, “doorsensorStateName”: “door closed”, “timestamp”: “2021-03-29T07:43:08+00:00”}}]
The bold part is what we are extracting in binary_sensor sensor.
What I observed today when I did some queries from different devices that I got also some 503 errors. Potentially I try also to switch to the WebAPI as the door sensor script (binary sensor) is still not working ;-(
The API Token is already created what is not fully clear to where / and in which format to place the API request ? I assume that the resource is then https://api.nuki.io, right ?
That’s right, you need to use this swagger interface to create a new token for WebAPI.
WebAPI documentation is here.
Explanation on how to create the token is here.
Once to have this token/bearer ready, return to first link of my first response to your message to get HA config.
thx a lot for that perfect guide - It’s really highly appreciated !!!
The token is there and the preparations are done and it worked really well. The only thing which is giving me finally some headache and prevents me to move forward is where and how to place these lines in the configuration .yaml
But I fear that somewhere there is still a bug as in my log file the following lines are appearing
Invalid config for [sensor.template]: value must be one of [‘battery’, ‘current’, ‘energy’, ‘humidity’, ‘illuminance’, ‘power’, ‘power_factor’, ‘pressure’, ‘signal_strength’, ‘temperature’, ‘timestamp’, ‘voltage’] for dictionary value @ data[‘sensors’][‘sensor_nuki_door’][‘device_class’]. Got ‘door’. (See ?, line ?).
It has to be a binary_sensor, if you think about the possible states of this sensor, it can be “open” or “closed”, so it is binary. The list of terms (‘battery’, ‘current’ etc) is for a sensor, ‘door’ is one of the terms for binary_sensor. In this link, you will see ‘door’ listed.
Here is my config, easier than explanation.
sensor:
# Creation of Nuki object using Nuki WebAPI
- platform: rest
name: Nuki
resource: https://api.nuki.io/smartlock/xxxxxxxxx
headers:
Authorization: Bearer xxxxxxxxxxxxxxxxxxxxxxxxbearerxxxxxxxxxxxxxxxxxxxxxxxxxxxx
scan_interval: 30
json_attributes:
- state
value_template: 'OK' #Circumvent 255 character limit
binary_sensor:
- platform: template
sensors:
sensor_nuki_door:
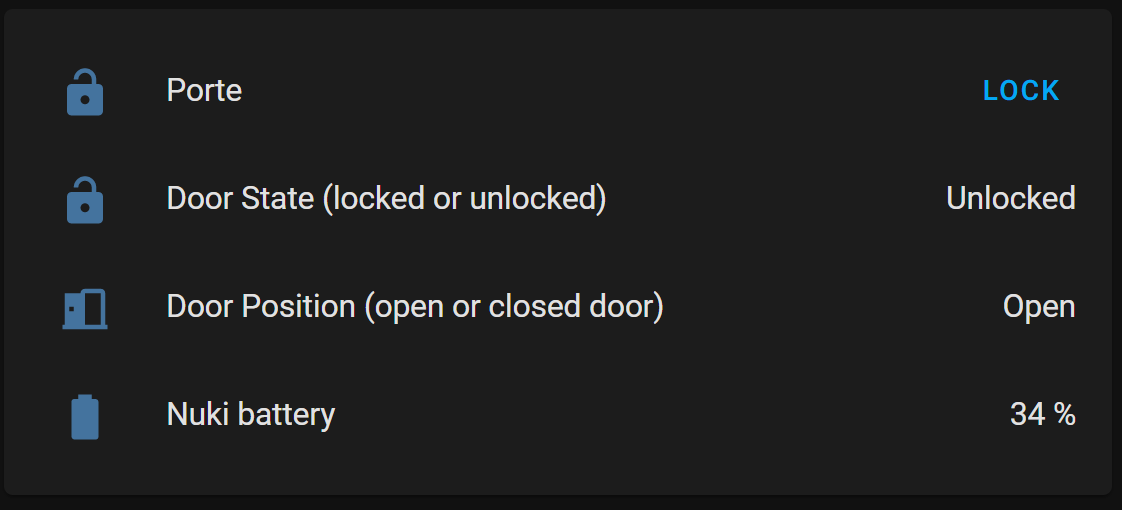
friendly_name: 'Door Position (open or closed door)'
unique_id: nuki_door_position
device_class: door
value_template: >
{{ state_attr("sensor.nuki", "state")["doorState"] == 3 }}
- platform: template
sensors:
sensor_nuki_door:
friendly_name: 'Door State (locked or unlocked)'
unique_id: nuki_door_door_state
device_class: lock
value_template: >
{{ state_attr("sensor.nuki", "state")["state"] == 3 }}
Note that are TWO binary sensor, one to tell if door is ‘locked’ (vs ‘unlocked’) and on to tell if ‘open’ (vs ‘closed’).
Dear Eole, thx for helping me out … you really made my day
For sure the binary sensor sounds logical. I just tried it and it works very well ! I have to admit I stepped not too deep into Home Assistant yet as I’m just started with that system but I’m really amazed by all the opportunities the systems allows.
As I initially said I got the two Nuki’s and for sure the challenge is on to implement them together. The Bearer token is as far as I understood the same only the smart lock ID for sure is different.
What is not yet fully clear to me is how the sensors and the binary sensors are linked to each other. I tried to rename them individually means
but as you might guess this was not leading to success
I also tried to use the script regarding the batteries under the above “sensor” section but I receive an error message. Where did you place it to get it work ? I saw in the screenshot you provided that you were using this as well
Hi Juergen,
You may want to use </> icon after you pasted code so it will nicely fit your post and, more importantly, will keep indentation correct. Indentation is very important when coding yaml.
I have only one lock but I guess what you did is correct when you have 2; one bearer and 2 different IDs.
As to understanding how this work, here is what you can do:
o Go to “Developers Tools” | “Template”
o Paste this at the top and see what’s appearing on the right:
So you see that the first one is the WebAPI object in json format, which you then “query” with the templating thing to extract “doorstate”, “batteryCharge” etc. As you see, there is no need to use any script to get the battery level.
By the way, for the battery level, just add this to your “sensor:” section:
thx for coming back on my matter! I just tried the few lines which you dropped me in the developer area and it’s working great. I just implemented also the battery sensor and it’s working fine. I tried it already yesterday but it seems I messed up the dash character “-” and it was not fully working. It always showed the 0% …
Now everything is working fine and I’m really happy to the see the system running. During the bank holiday I try to incorporate also the 2nd lock and I will keep you posted how this is working But again thx a lot for the kind support from your side !!!
That’s great Juergen, happy that this is working for you. The dashes, the indentation are indeed really important and sometimes HA may fail to tell you that this is where the issue is. The same goes for ’ and " when they are used together on one single line. Another important point is reloading or restarting HA. While restarting is always the best you can also save some time and just reload some parts (automations, scripts etc). When you are pulling your hair from you head because it should be working, remember to check the points mentioned above. It happened to me so I know how frustrating this can be .
you’re fully right If you’re doing your first steps things can really be challenging. These traps that you described can really drive you nuts especially if you’re not aware of it … hahaha. As soon as I got a bit time I will try to implement as already discussed my second Nuki and also with Hue I will try to get the battery state. The first trials did not work as expected but I guess time will bring also the solution. Today we had plenty of sunshine and for sure that got priority Let’s enjoy the weekend and thank you very much for the precious hints !
With this configuration I have a problem with battery. The use of rest api drain battery very quickly.
Before my battery (eneloop pro) was drained in 3/4 months, now in less than a month.
There is a method for not poll status but receive info about door status (open, closed) from bridge?

 .
.